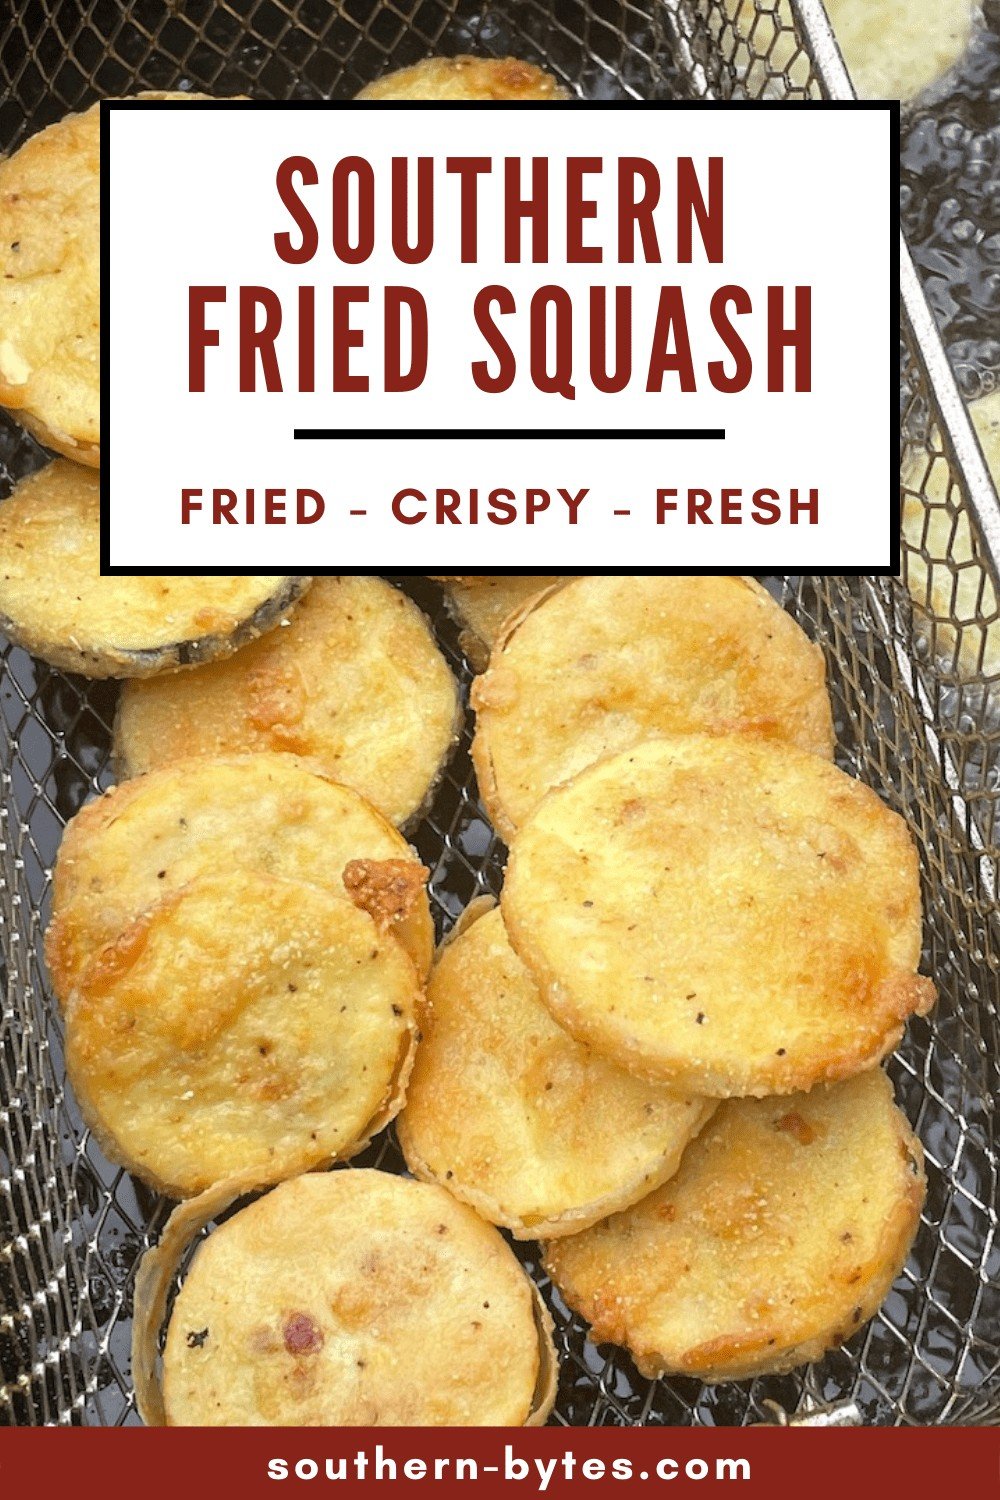
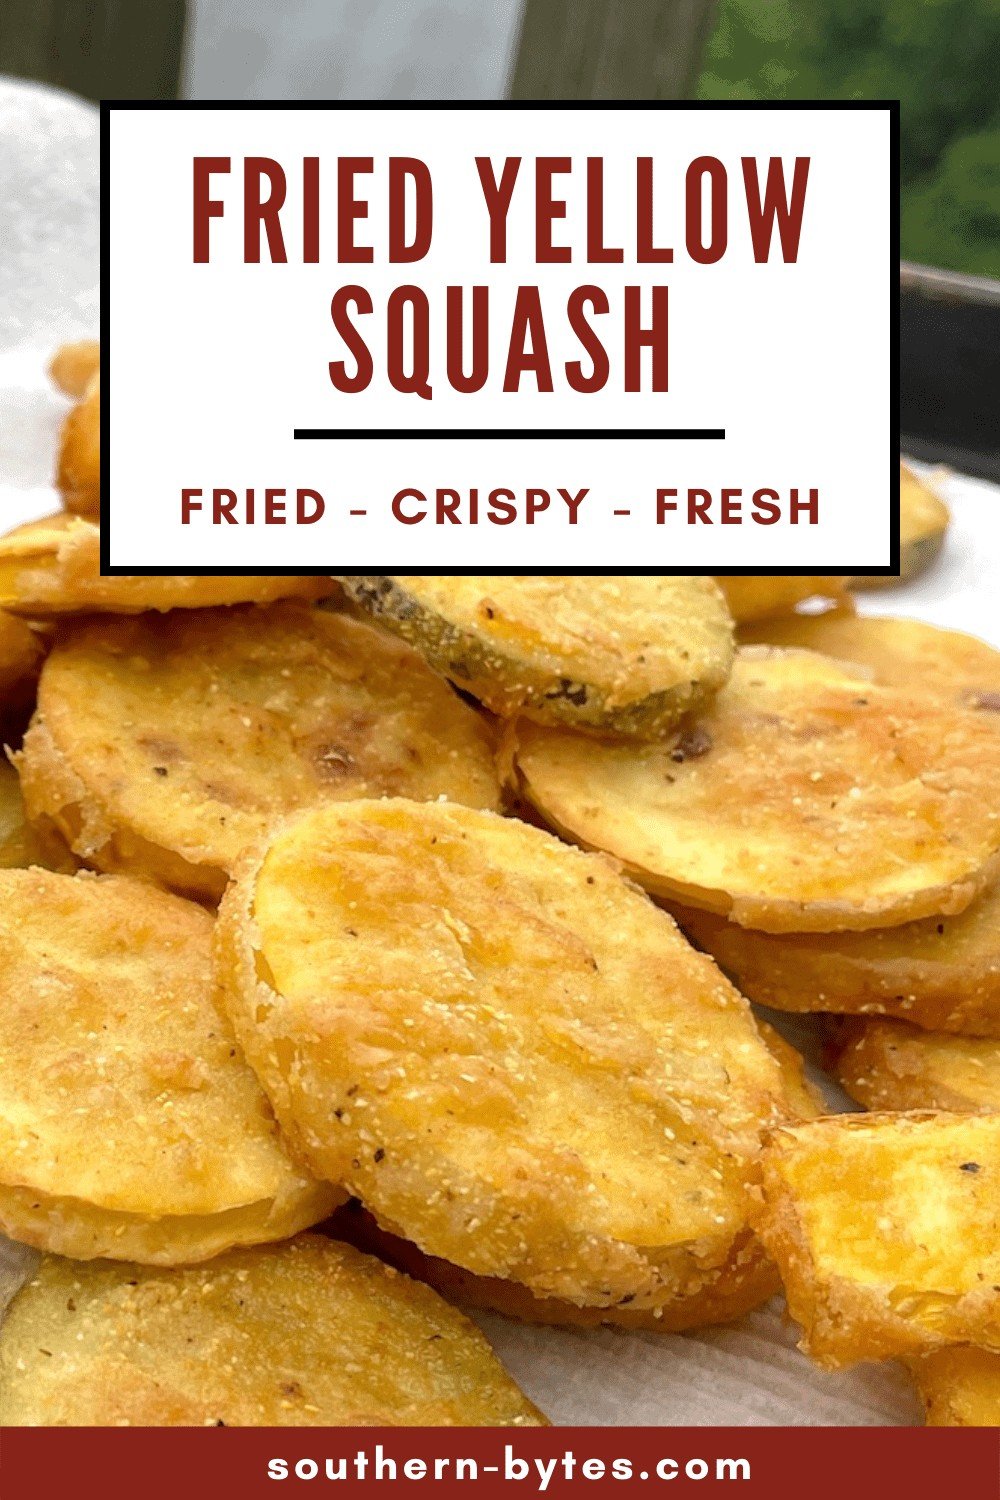
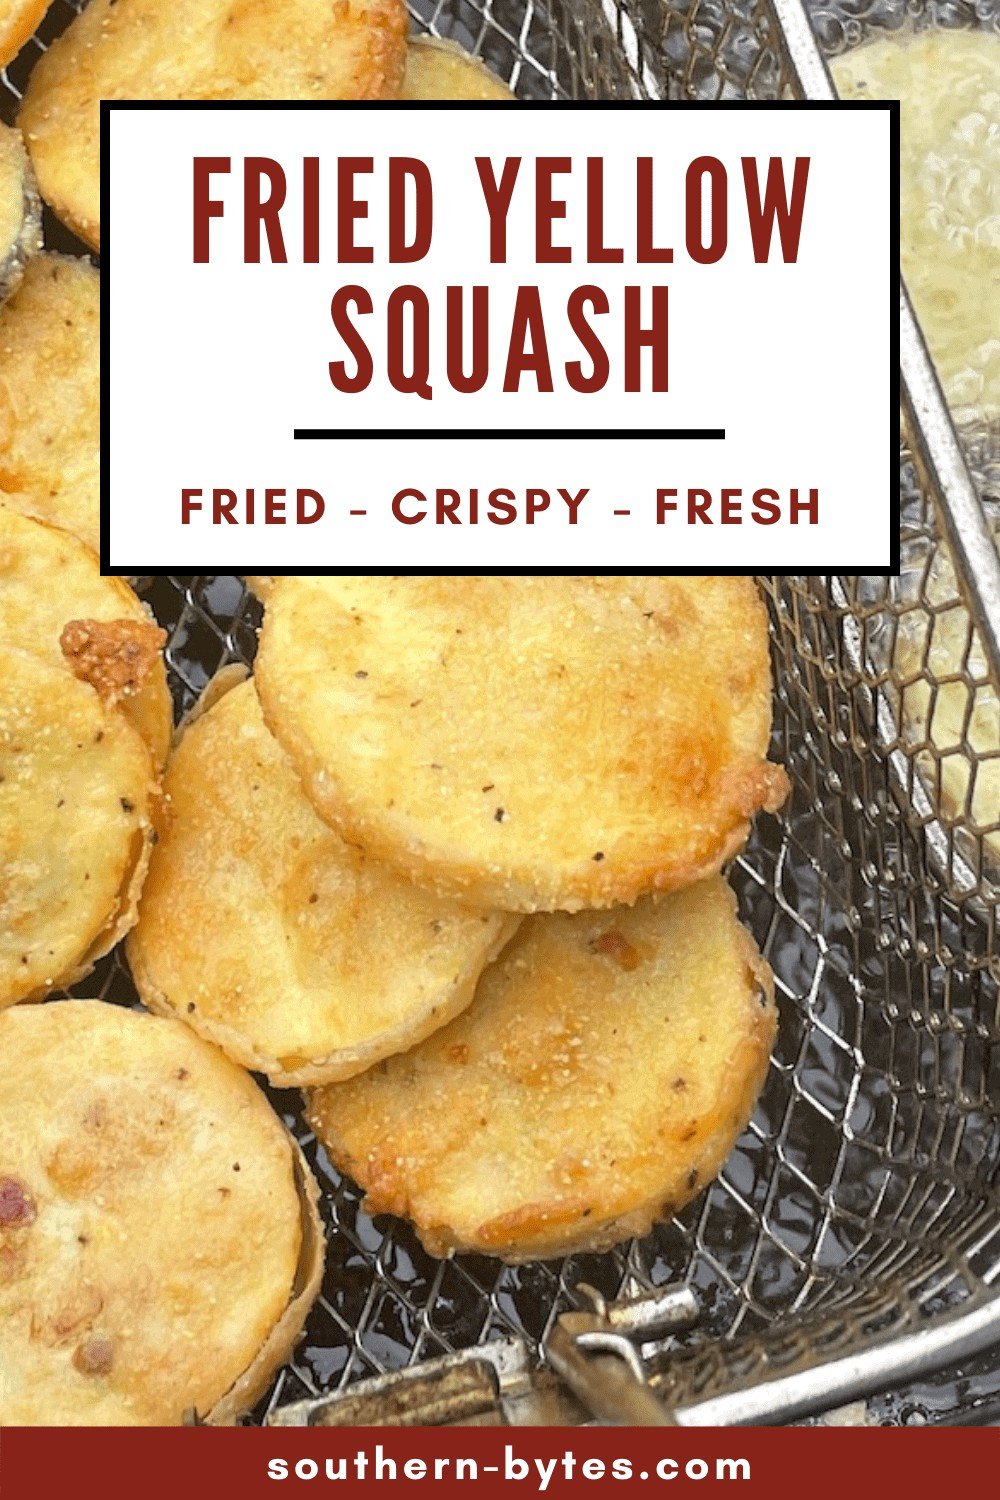
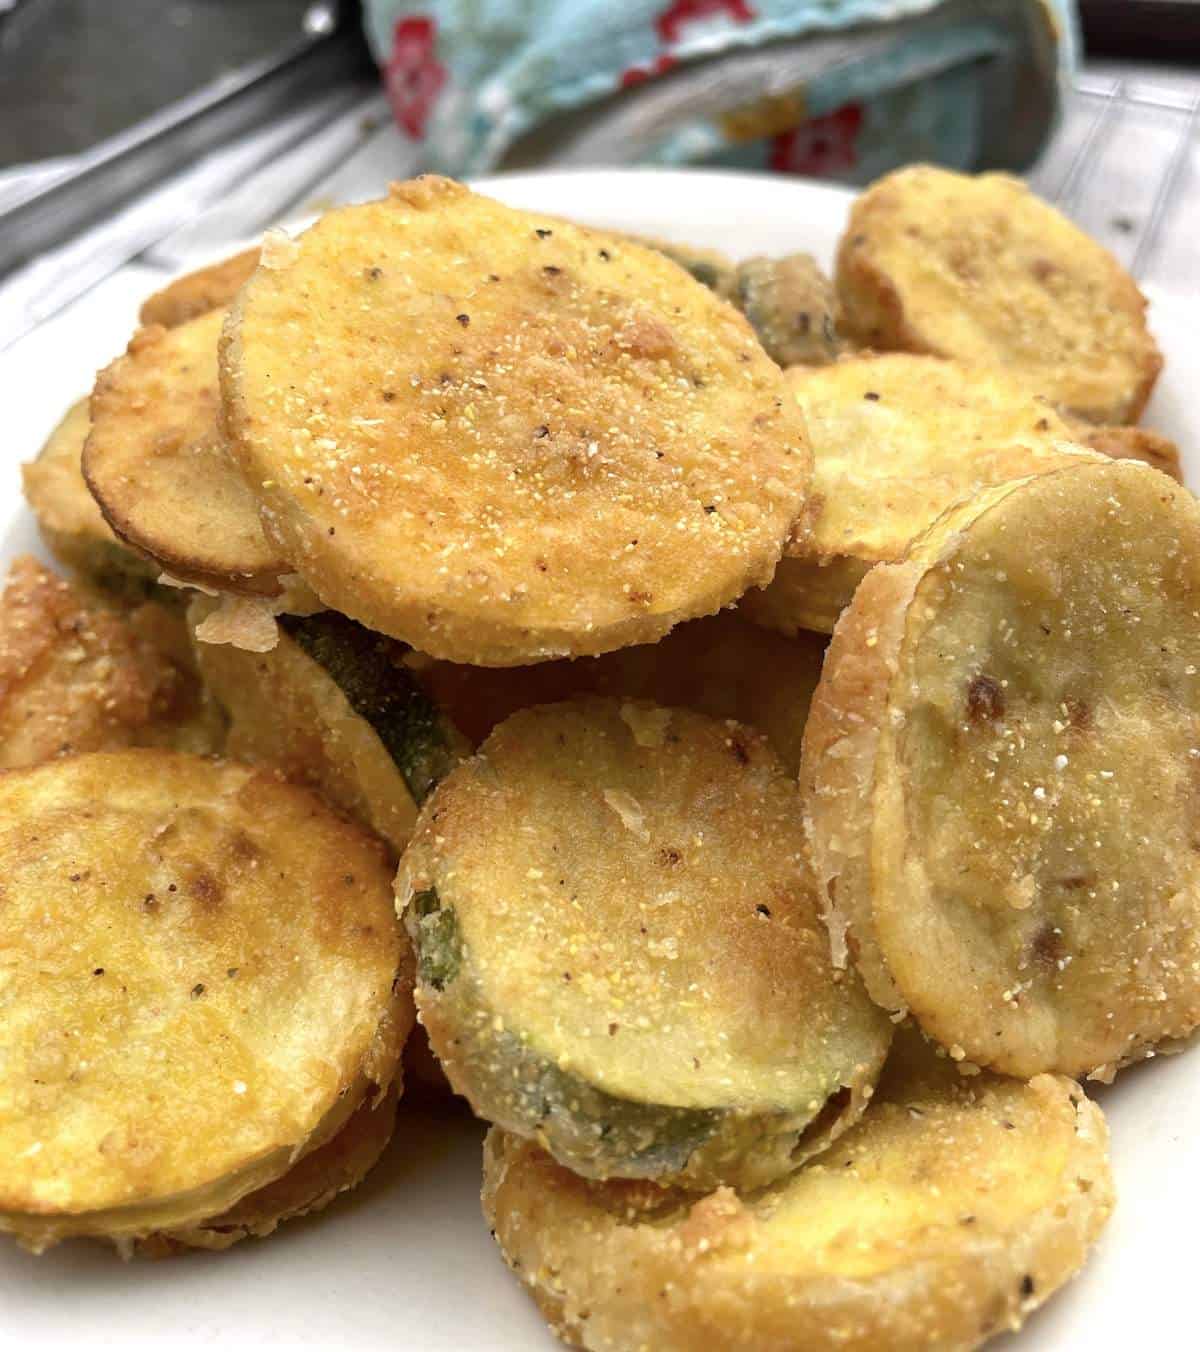
Southern Fried Squash is a summer delicacy. Fresh yellow squash and zucchini are dredged in buttermilk, breaded with flour and cornmeal, and fried until they are golden brown and crispy. It is such a delicious way to cook summer squash and is the perfect summer side dish.
During the summer months, we have squash coming out of the garden in quantities that are kind of alarming. We really appreciate it, but it can be really overwhelming.
One of our favorite ways to use our squash is to fry up breaded squash slices in hot oil – just like fried green tomatoes. Dipped in a delicious homemade boom boom sauce or Raising Cane’s Sauce – fried squash is one of our favorite things!
Fried Squash is the perfect side dish to serve during the summer when fresh summer squash is everywhere. We also love to make sautéed squash! Summer vegetables are one of my favorite things – tomatoes, okra, squash, & peppers. (Fried okra has been a staple for us!)
We have more fresh squash than we can count, so this classic southern dish is one that we make pretty regularly. (I planted several yellow crookneck squash plants & a few plain yellow summer squash plants, thinking they couldn’t all grow. Every plant grew, and they have been incredibly prolific. So much so that everyone we know has gotten a squash delivery this summer.)
This wonderful recipe uses such simple ingredients – you probably already have them all in your pantry!
Table of Contents
🥘 Ingredients Needed
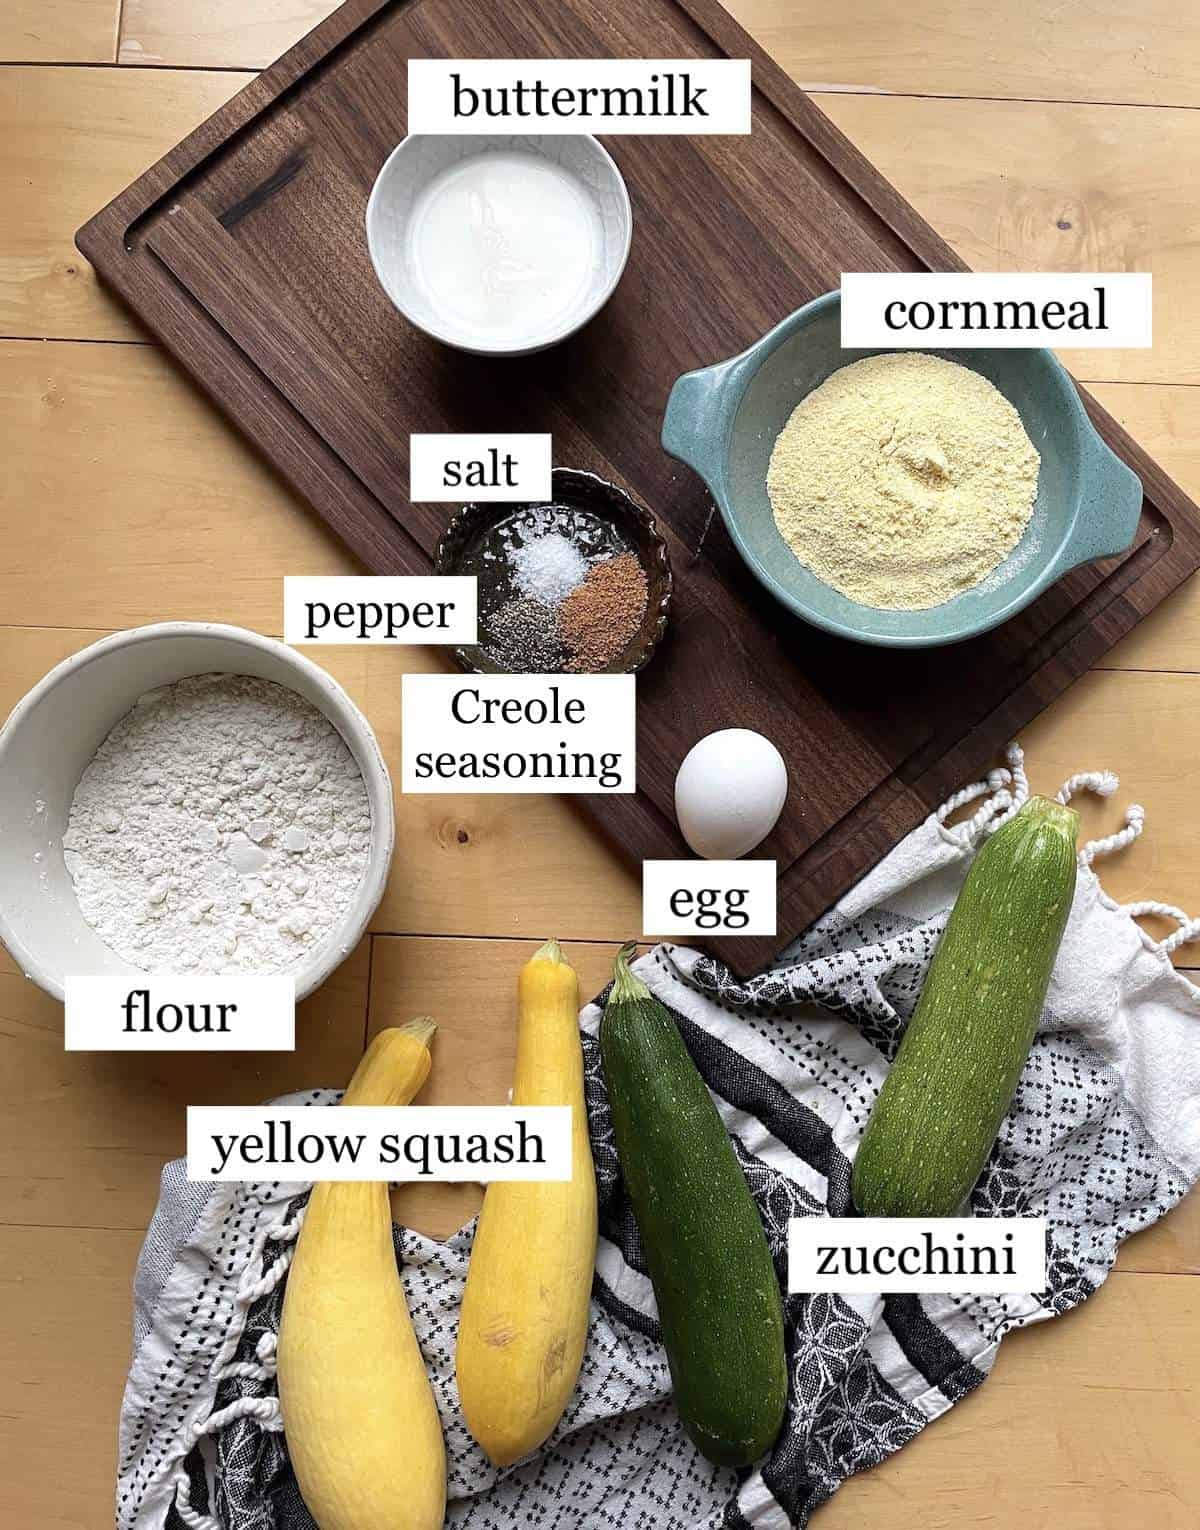
- Yellow Squash or Zucchini – You can fry most summer squash – patty pan squash slices, cocozelle, or 8-ball zucchini slices like this. (Just don’t use a squash that has a really thick skin or one that is sticky or watery when you cut it, like a tromboncino squash.)
- Buttermilk
- Egg
- Cornmeal (I use yellow cornmeal)
- All-Purpose Flour
- Kosher Salt
- Black Pepper
- Tony Chachere’s Creole Seasoning – If you don’t have Tony’s, use ½ a teaspoon each of salt & pepper, plus a pinch each of garlic powder, cayenne, & onion powder.
- Frying Oil – Peanut Oil, Vegetable Oil, or Canola Oil
🍽 Equipment Needed
- A Sharp Knife & Cutting Board
- A Large Skillet or Deep Fryer – I like to use a deep fryer because you can get a lot fried at one time, but if you do not have one, a cast iron skillet will work great. (While I have the fryer out, I like to make other side dishes like fried okra or fry up a batch of chicken tenders for the freezer.)
- A Thermometer
- A Slotted Spoon or Tongs
🥣 How to Make Fried Squash
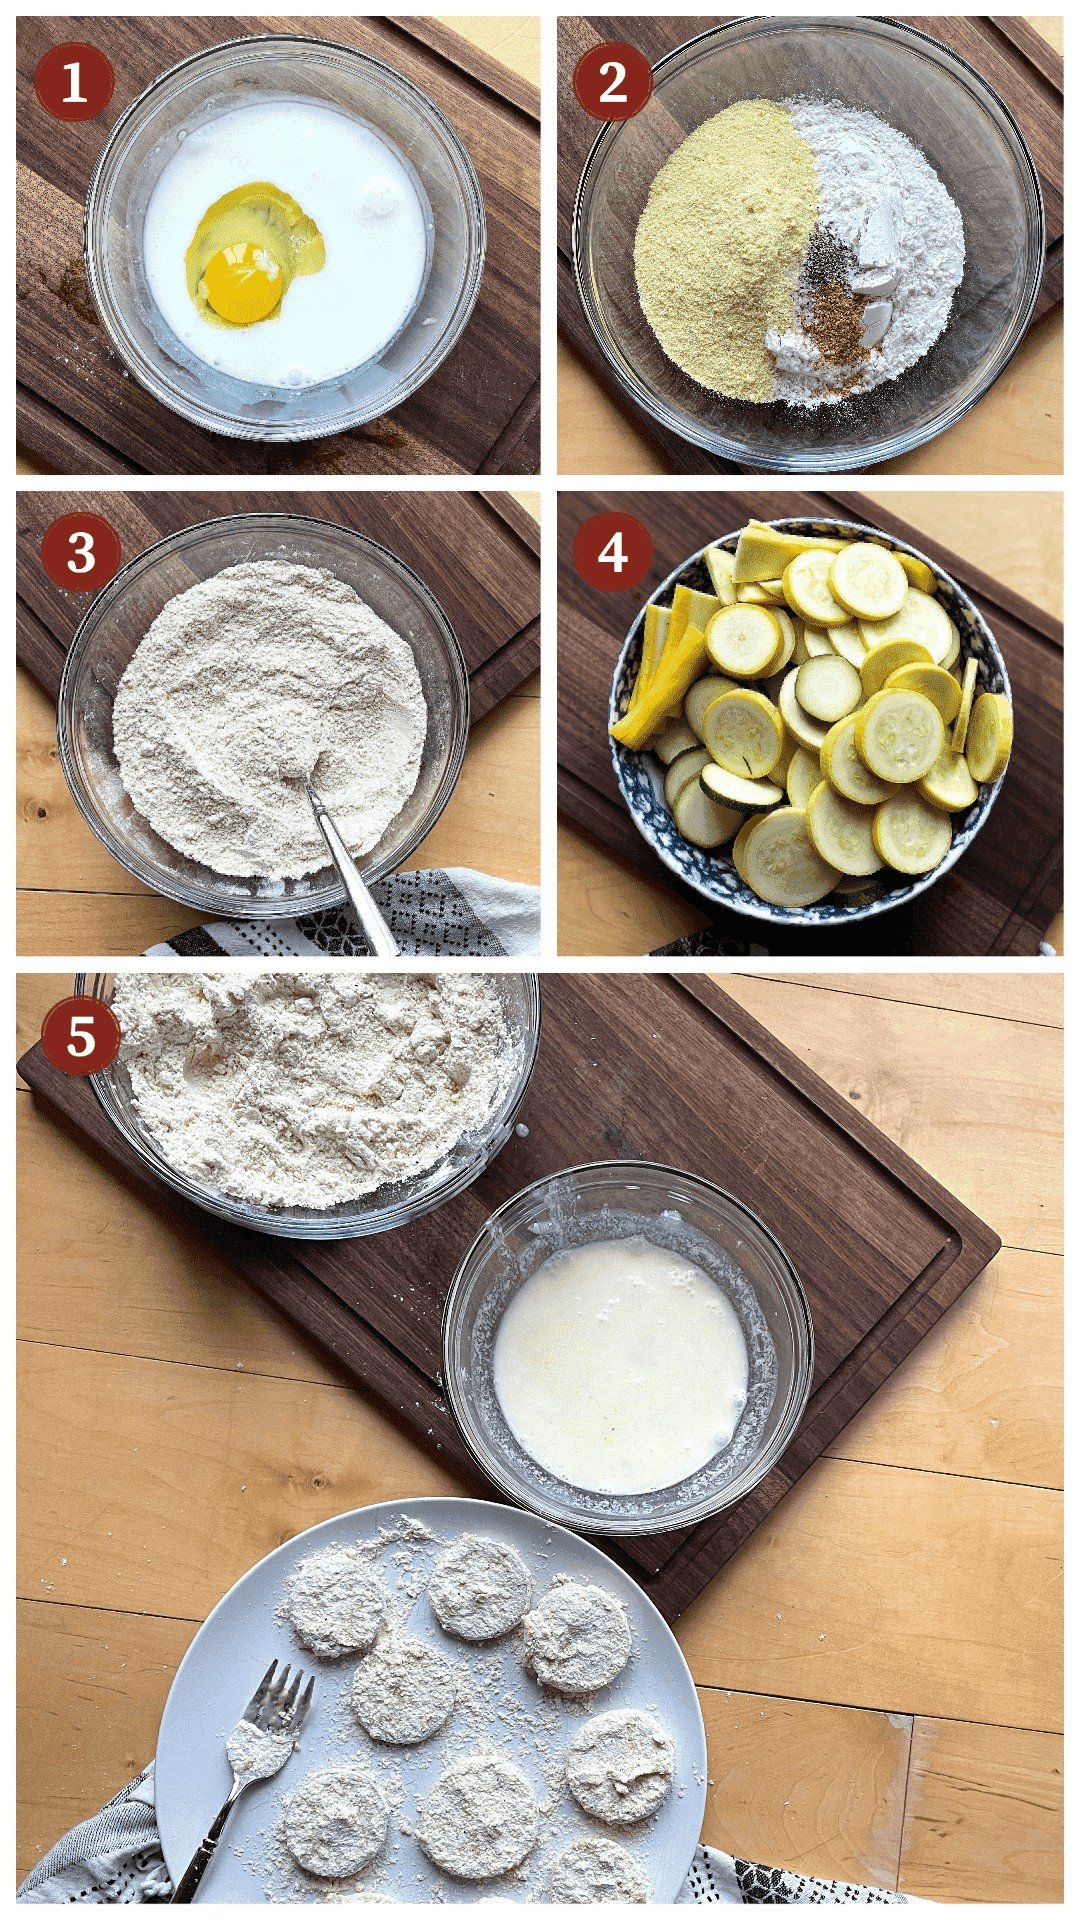
Slice up your squash into 1/4 – 1/2 inch slices. Try your best to slice all of the pieces evenly so that they cook in the same amount of time. You can cut bigger slices if desired – they will be a little crunchier. (Picture 4 – Sorry, it’s a little out of order. )
Do not peel the squash – the skin is soft and can be eaten as is. Just be sure to wash the squash. If the squash has a really skinny neck, you can also make long strips (like those pickle hamburger slices) – just make sure they are all the same thickness.
If your squash seems to have a lot of extra moisture, you can lay it out on paper towels while preparing the breading mixture. Pat dry to remove excess water.
In a small shallow bowl, whisk together the buttermilk and egg. (Picture 1)
In a second shallow bowl, combine the dry ingredients – flour, cornmeal, salt, pepper, and Tony’s Creole Seasoning. (Picture 2 – 3)
Begin heating your oil – either use a large deep skillet on the stove with about half an inch of oil or get your deep fryer heated up. If you can adjust the temperature, heat it to 360°F, about medium-high heat.
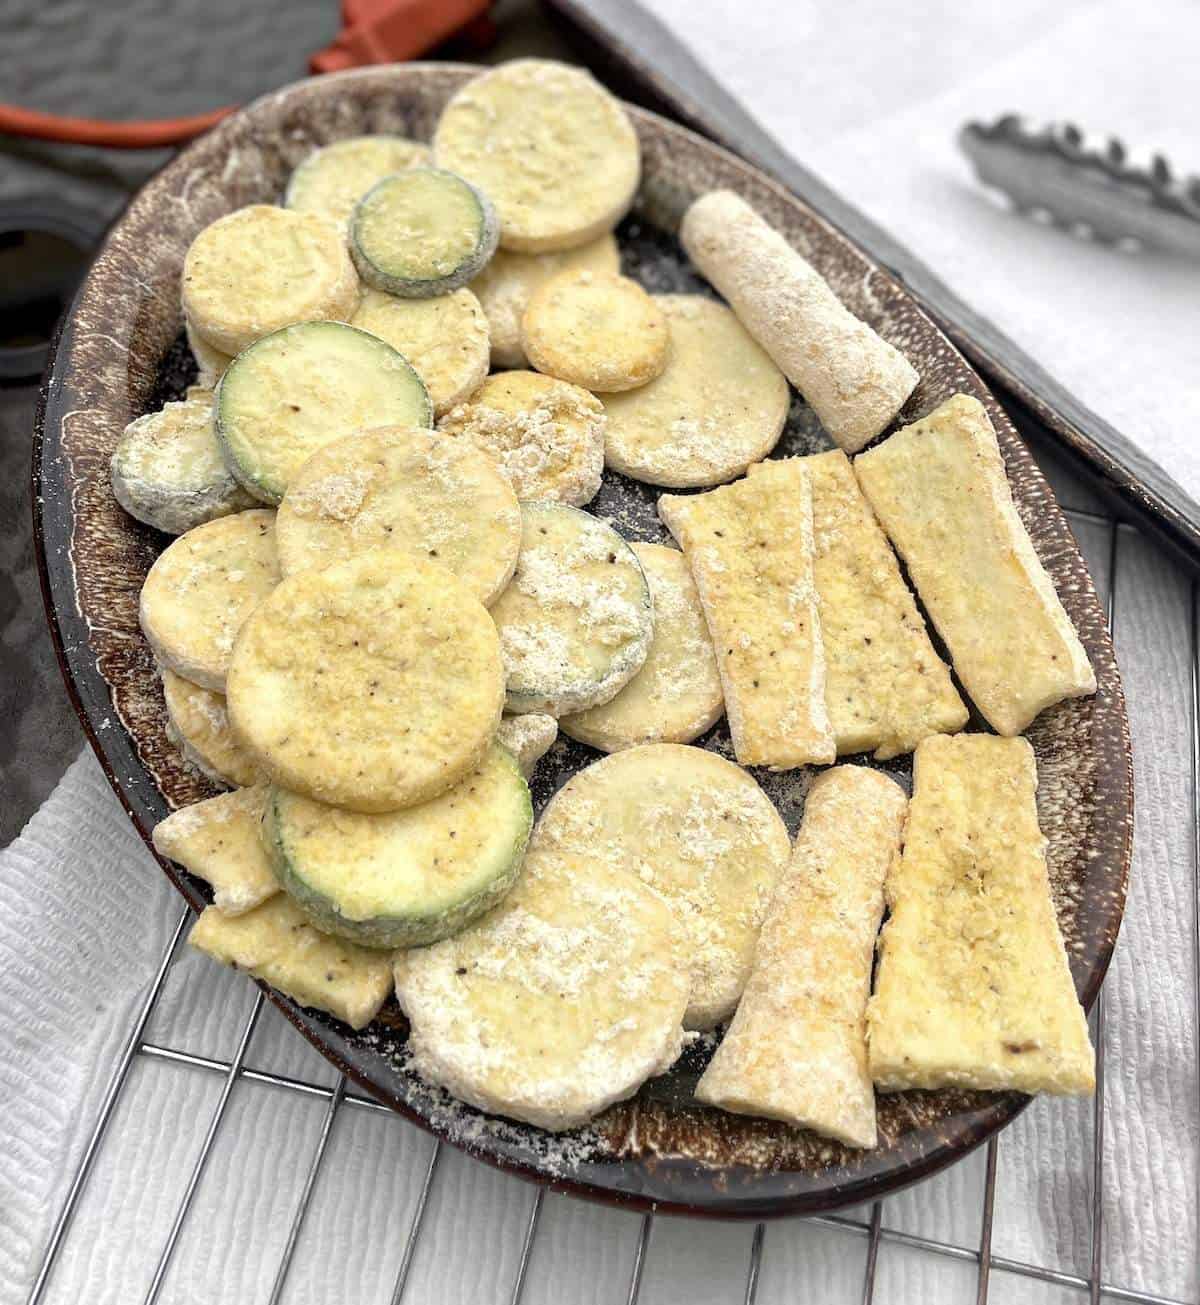
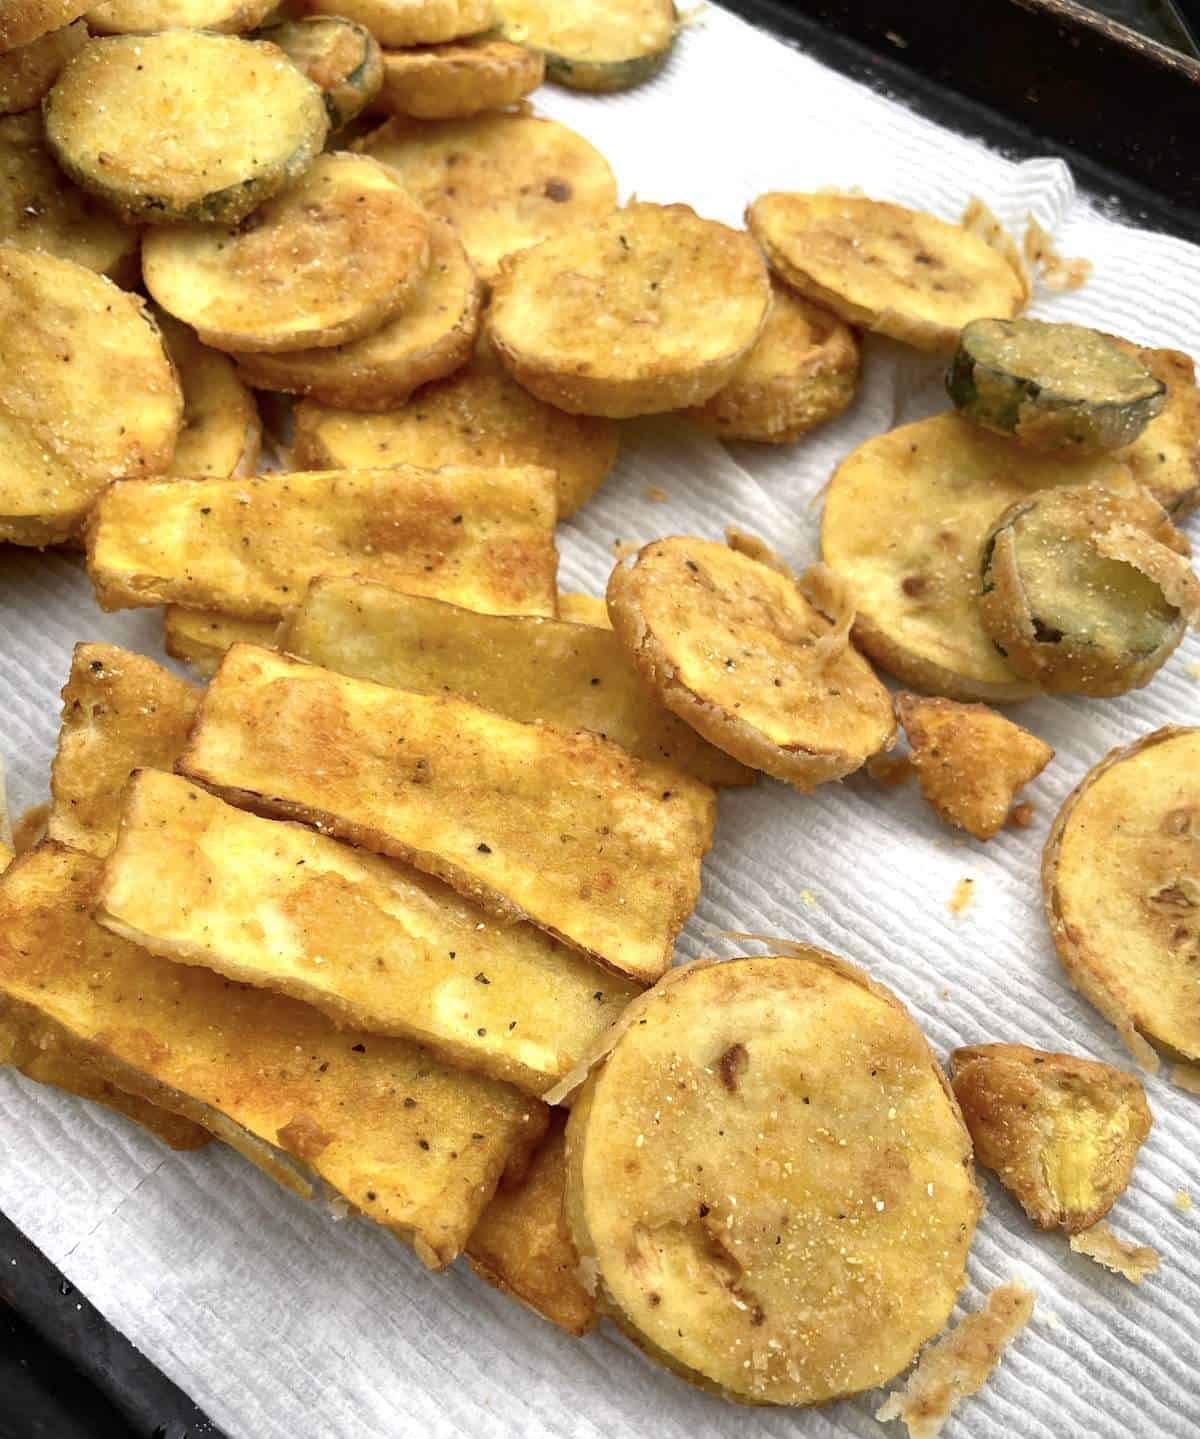
Dredge the squash circles in the buttermilk/egg mixture, then in the cornmeal mixture, making sure that they are completely coated. Place them in a single layer on a plate or baking sheet while you get them all done.
Letting the squash sit for a bit while the oil is heating up will help the breading stick to the squash because the squash will release some moisture, which will “grab” the breading. (Picture 5 – 6)
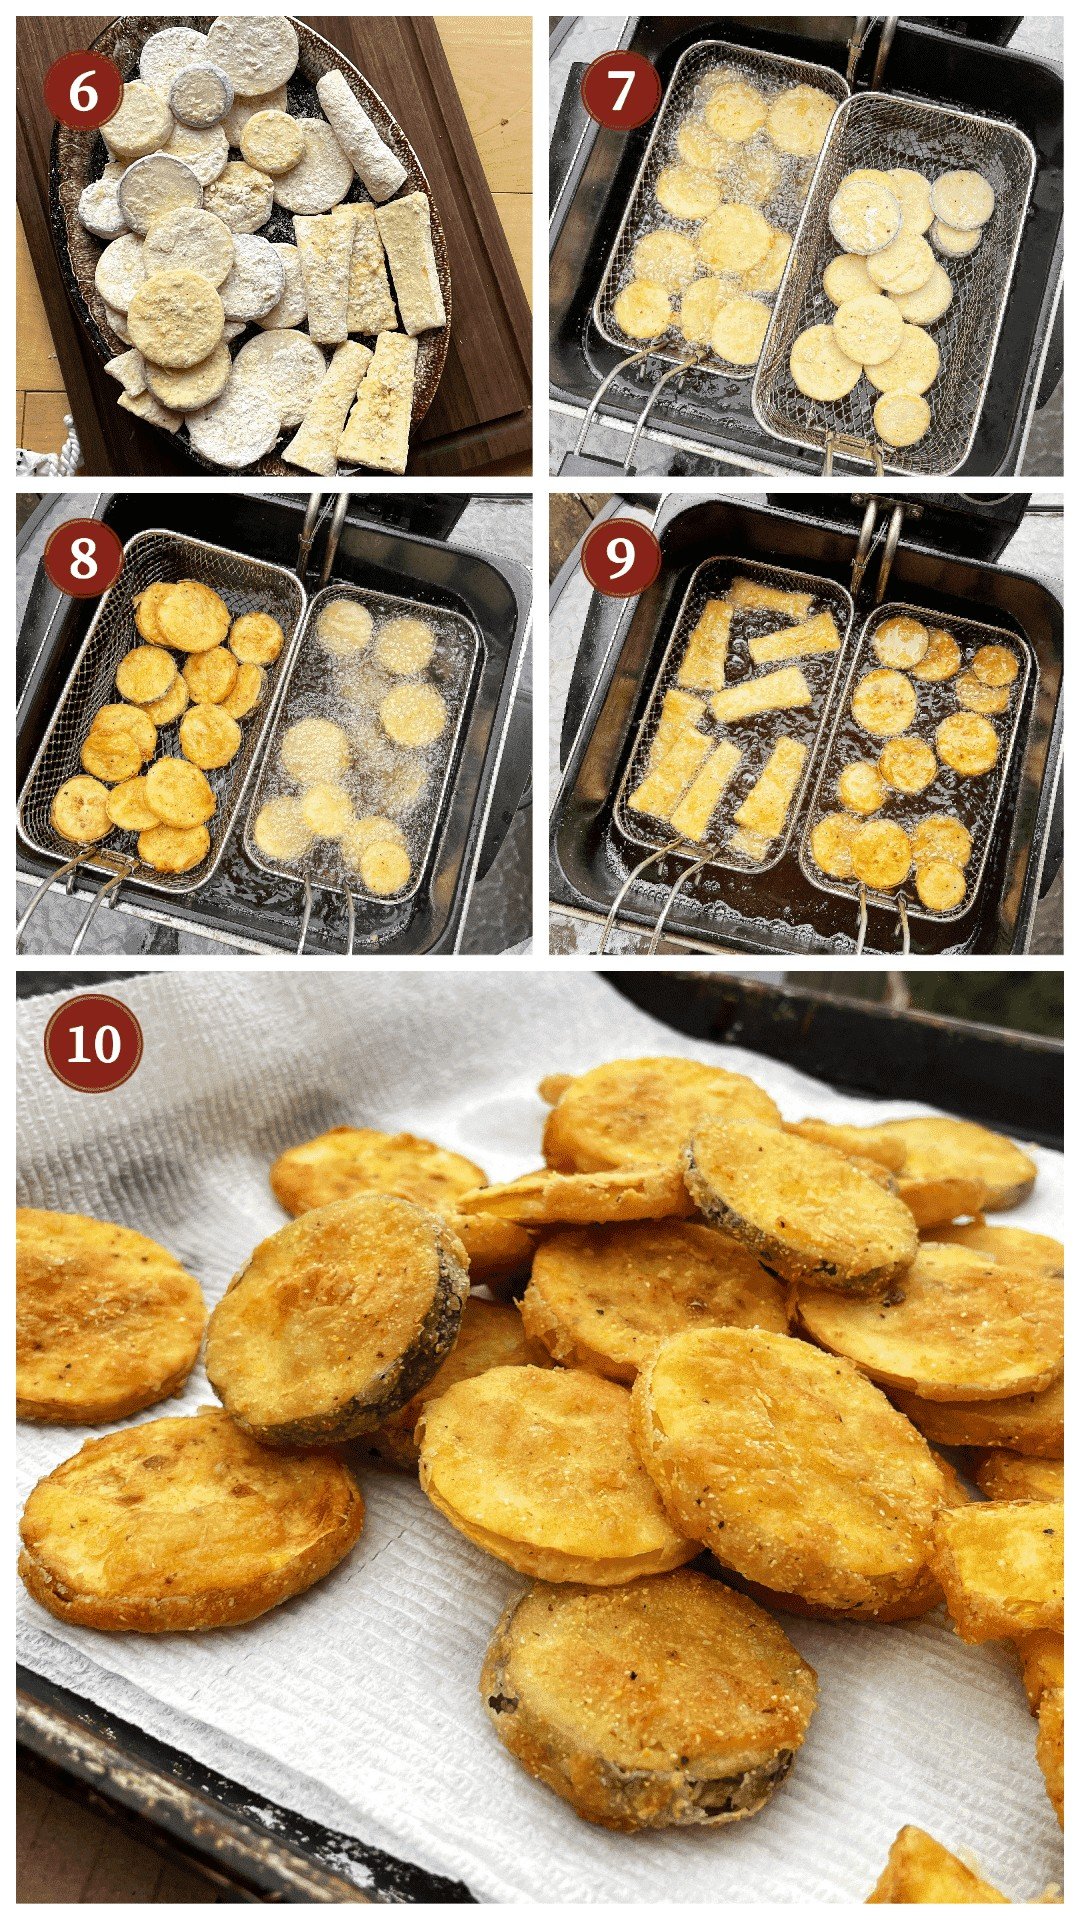
When the oil is hot, fry the squash rounds in small batches until golden brown. If you’re using a skillet on the stove, the squash will need to be flipped to ensure even cooking on both sides.
If you’re using a deep fryer, shake the fryer basket while frying to prevent the squash from sticking to each other. (Picture 7 – 9)
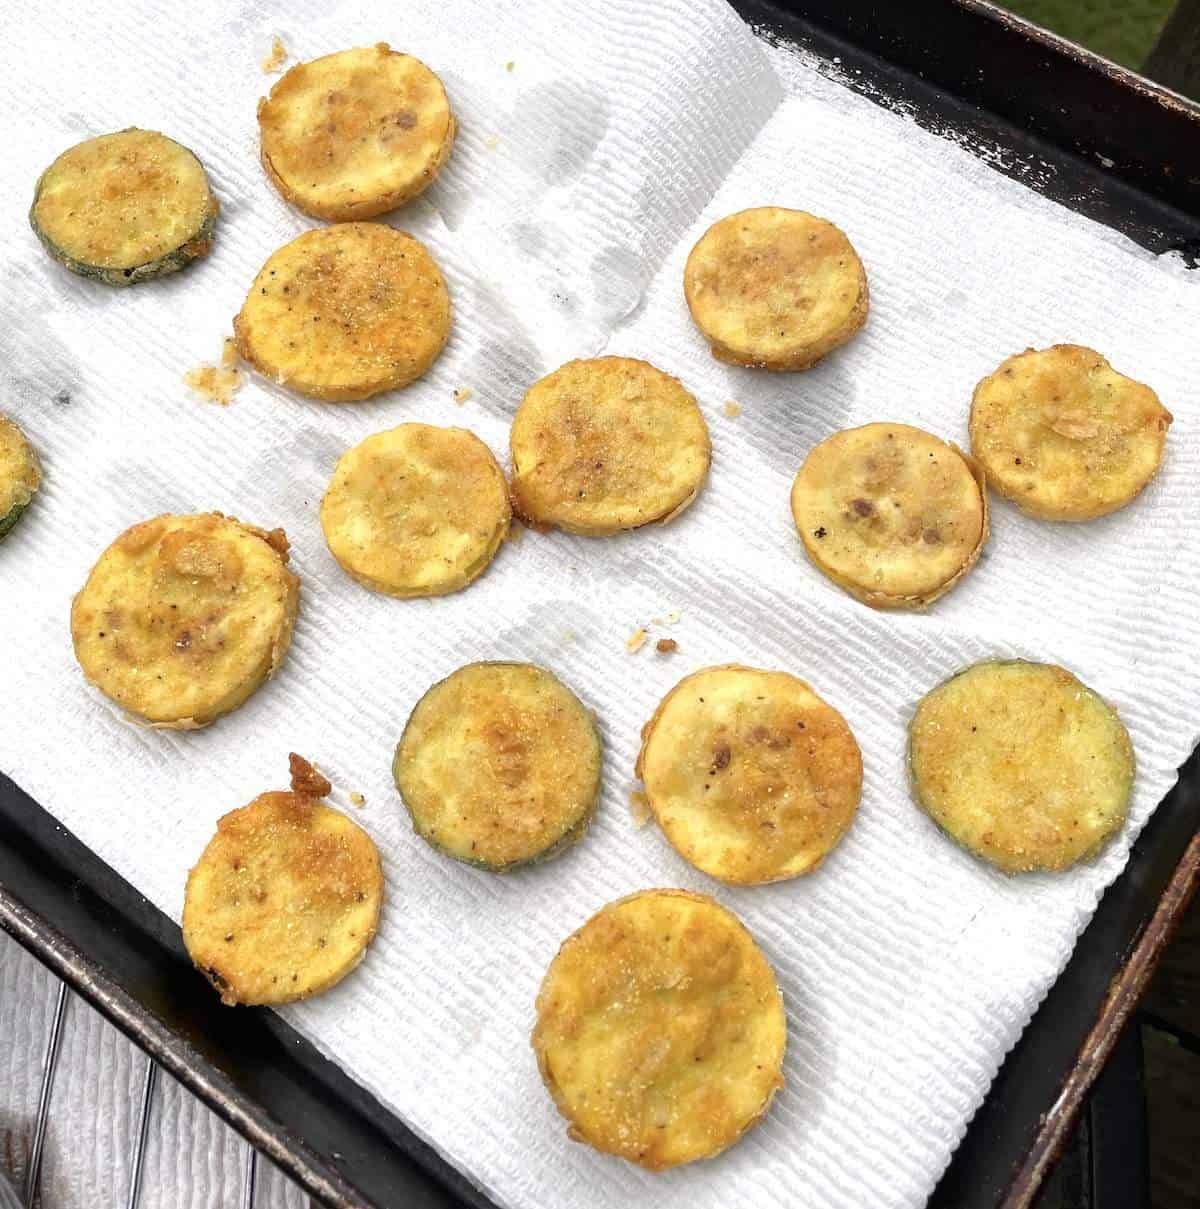
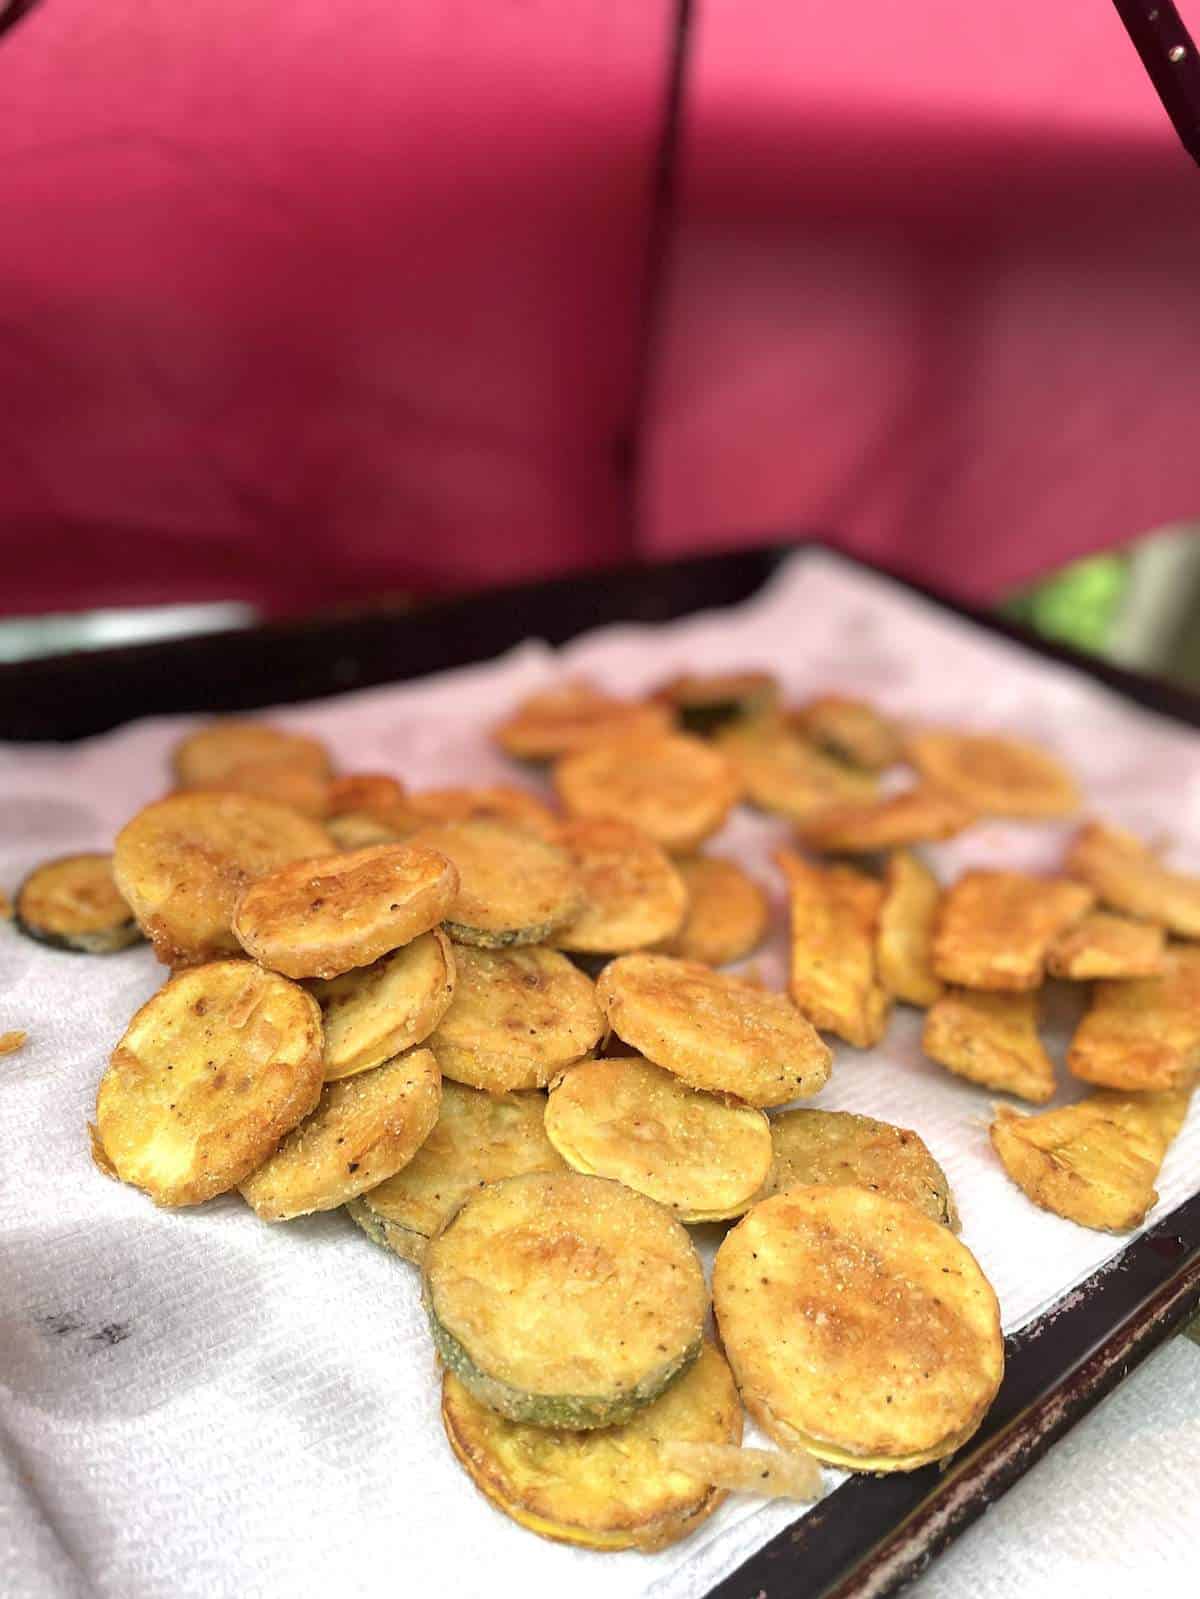
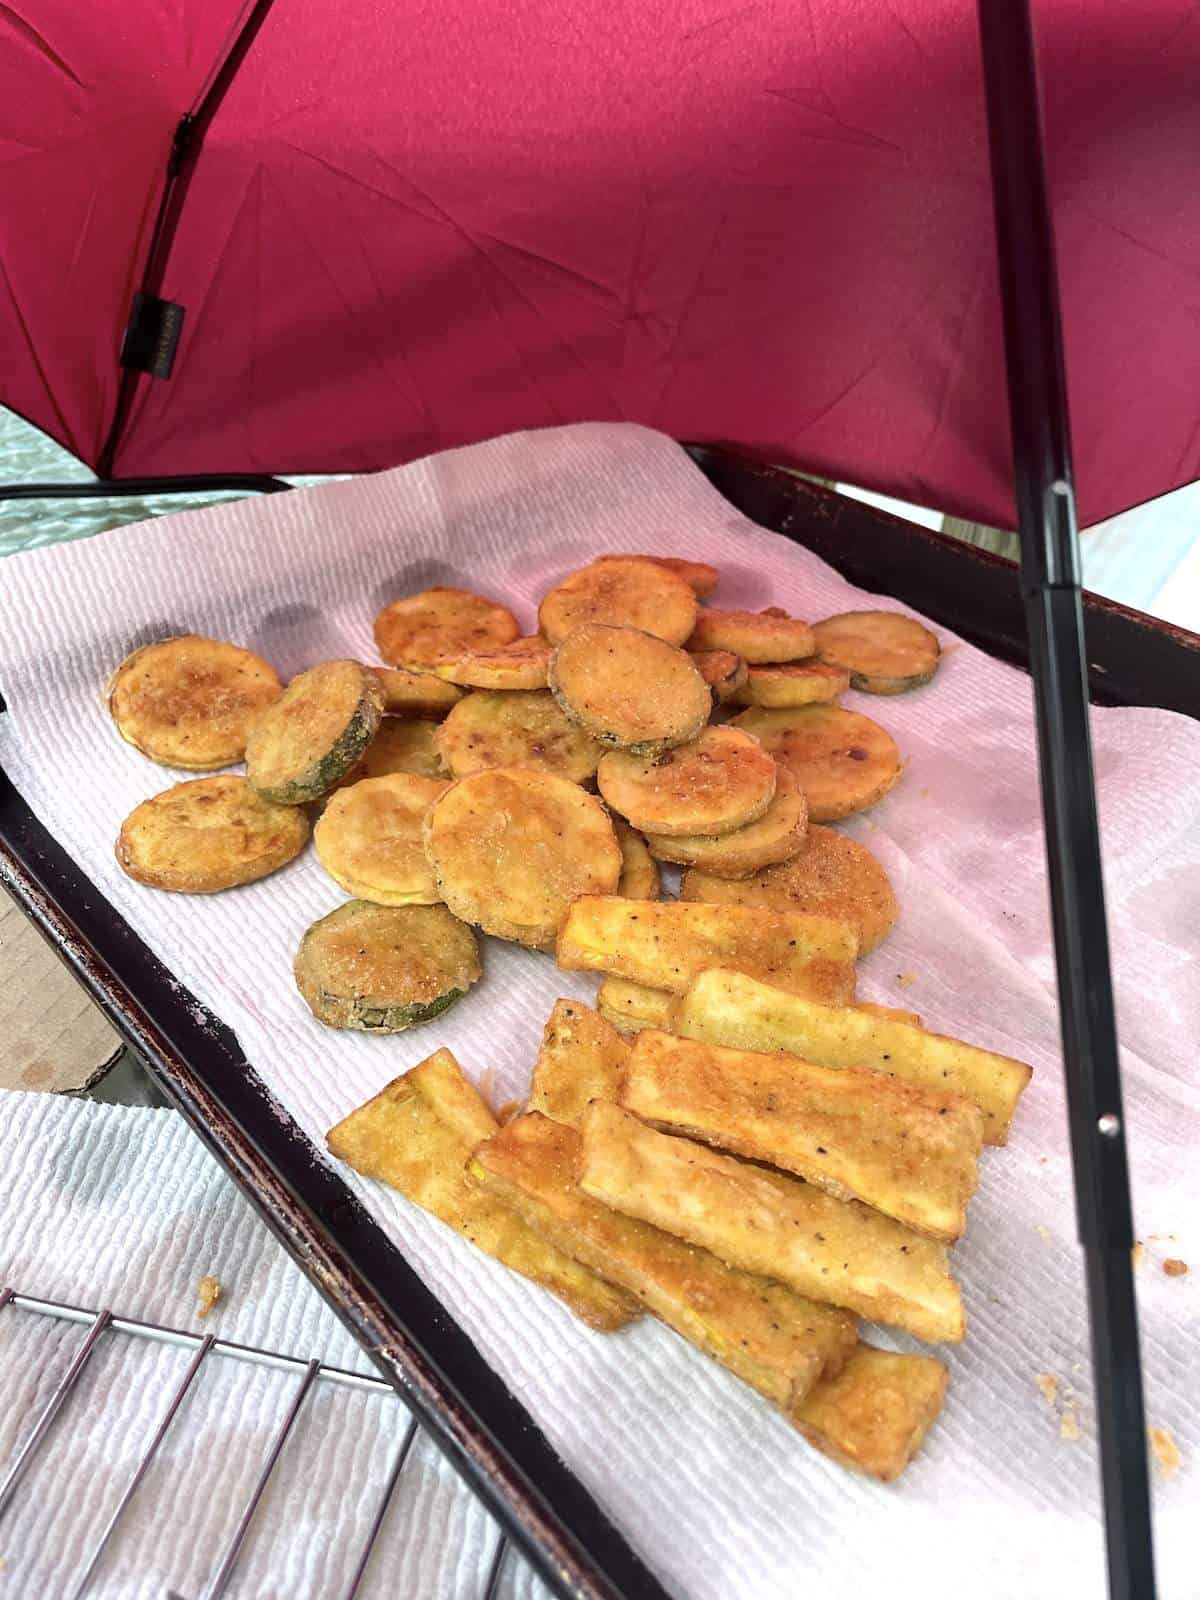
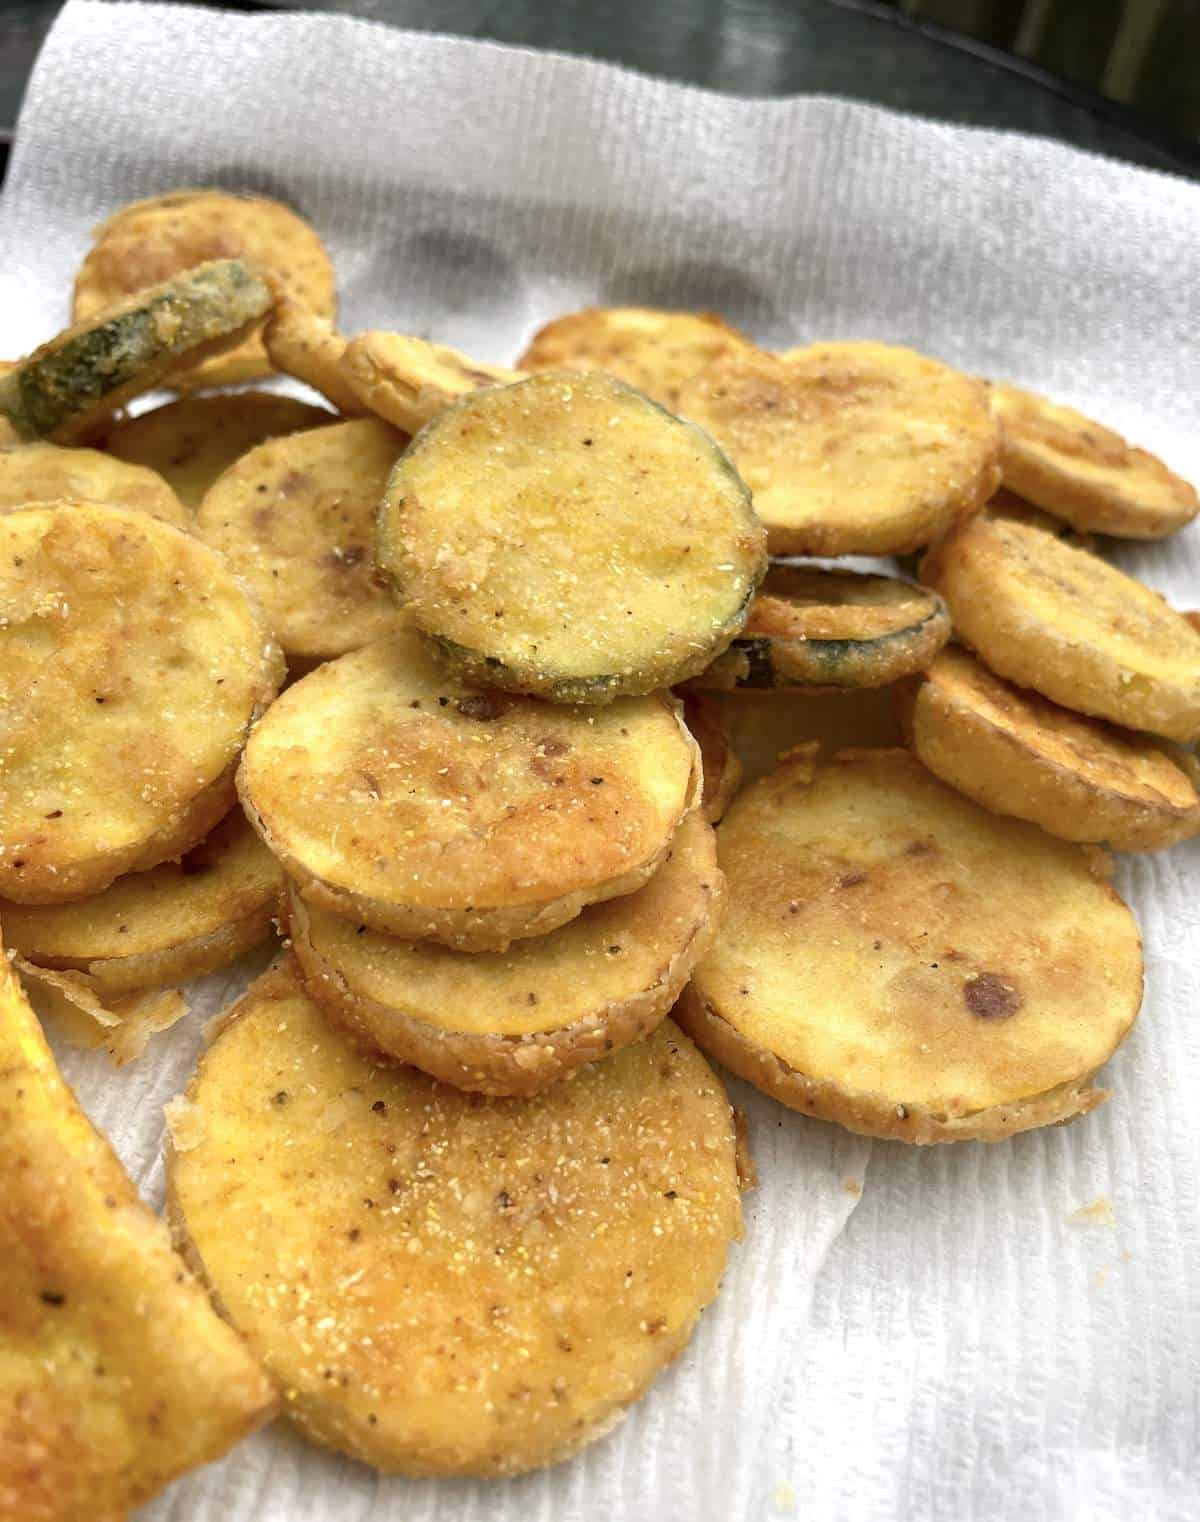
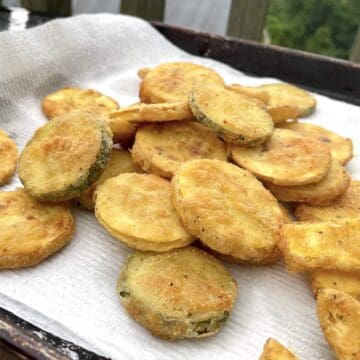
Drain off excess oil using paper towels on a wire rack or cookie sheet and allow the squash to cool a little, then serve while still warm. (Picture 10)
Serve fried squash with your favorite dipping sauce – hot sauce, ranch dressing, or Cane’s Sauce.
*I have also tried breading the squash using the awesome method that I use to bread fried okra – dunk it in the buttermilk mixture, then shake it up in a plastic bag.
It worked okay, but squash slices are not as inherently sticky as okra is, so I felt like those squash rounds did not get as much breading on them and were not as crispy.
🙋♀️ Frequently Asked Questions
You can freeze squash, but it is best served fresh. Frozen, then defrosted squash has a tendency to turn to mush. Whole Fed Homestead has a great recipe in her new cookbook for freezing squash as a mash that defrosts like mashed potatoes – I highly recommend trying that if you want to freeze squash.
Fried squash will get soggy if overcooked or if the slices are piled on top of each other before they are allowed to cool, and the oil is allowed to drain. Try to spread the squash out in a single layer while they are cooling. The squash will get soggy after sitting out for a while, as most fried things do, but you can keep them crunchy long enough to eat this way.
If you happen to be frying squash outside and it starts to drizzle, an umbrella makes a great temporary tent to keep the squash dry. (And cover the fryer so you don’t start a fire!)
🥫 How to Store Leftover Fried Squash
Leftover squash is going to get soggy because of the moisture in it – there’s no avoiding it, unfortunately. I like to store leftovers in an airtight container in the refrigerator and reheat them in the air fryer to crisp back up. Fried squash will keep for 3 – 5 days, but the quality will deteriorate over time.
I highly recommend NOT freezing fried squash – this recipe is best served fresh. Frozen, then defrosted squash has a tendency to turn to mush.
You can dredge, bread, then freeze squash in a single layer on a baking sheet, then store it in a plastic bag. Fry from frozen without defrosting.
This will allow you to have fried squash available year round and have a summer treat in the winter – however, the squash will be really mushy, so it’s up to you if you want to do this.
I think it is worth saving this treat to enjoy it fresh in the summer. (Freshly made, fried okra, however, freezes VERY well this way.)
If you have a lifetime supply of squash like we currently do and you want to freeze some of your squash, the book Freeze Fresh from Crystal of Whole Fed Homestead has a lot of great recipes. (We have several containers of her squash butter in the freezer right now!)
🫙 How to Store Leftover Oil
Thanks to a reader’s question, I’m adding this. When you have leftover frying oil, don’t throw it away! Let the oil cool, then strain it to get any debris out.
Store it in a mason jar and reuse it quite a few times. It will start to get dark after a few batches of food and get a toasty oil smell, and that’s when I know I’m done with it. I usually label it with what I fried in it and stick to similar things – I use the same oil a few times for fries, veggies, etc.
I’ll fry chicken and fish in the same oil as veggies, but once I fry fish – that oil is only for fish 🐠 If I make something sweet like beignets, that oil stays in a separate jar, and I only use it for sweet things.
When I’m totally done with the oil, I put it in an old jar and tape it shut, and it goes in the trash. I know some people just dump it in the woods, but there are too many animals around us that will try to eat it, so I don’t take the risk.
(I also store my fryer in a big bin so it is easy to access, and I have some more frying tips in my fried chicken tender post!)
Share on Facebook
Share with friends🍳 How to Reheat Leftovers
For best results, reheat fried squash in the air fryer, toaster oven, or air fryer. I like to spread leftover squash in a single layer in an air fryer basket, then bake until crispy again at 350-375°F for about 5 minutes.
You can also use leftover fried squash to make squash casserole – like you would make eggplant parmesan – topped with parmesan cheese; it is so delicious!
What to Serve with Fried Squash
Have You Tried This Recipe?
Please rate it and leave a comment below. I would love to hear what you think!
Southern Fried Squash
Ingredients
- 3 medium yellow squash or zucchini
- ½ cup buttermilk
- 1 egg
- 1 cup all-purpose flour
- ½ cup cornmeal
- ¼ teaspoon kosher salt
- ¼ teaspoon black pepper
- ½ teaspoon Tony Chachere's Creole Seasoning If you don't have Tony's, use ½ a teaspoon each of salt & pepper, plus a pinch each of garlic powder, cayenne, & onion powder.
- 2 cups frying oil I use peanut oil or vegetable oil.
Instructions
- Slice up your squash into ¼ – 1/2 inch slices. Try to slice all of the pieces evenly so that they cook in the same amount of time. Bigger slices will be a little crunchier. (There is no need to peel the squash, just clean them.)3 medium yellow squash or zucchini
- In a small shallow bowl, whisk together the buttermilk and egg.½ cup buttermilk, 1 egg
- In a second shallow bowl, combine the dry ingredients – flour, cornmeal, salt, pepper, and Tony's Creole Seasoning.1 cup all-purpose flour, ½ cup cornmeal, ¼ teaspoon kosher salt, ¼ teaspoon black pepper, ½ teaspoon Tony Chachere's Creole Seasoning
- Begin heating oil – either use a large deep skillet on the stove with about half an inch of oil or get your deep fryer heated up. (If you can adjust the temperature, heat it to 360°F, about medium-high heat.)2 cups frying oil
- Dredge the squash circles in the buttermilk & egg mixture, then in the cornmeal mixture, making sure that they are completely coated.
- Place them in a single layer on a plate or baking sheet while you get them all done. Letting the squash sit for a bit while the oil is heating up will help the breading stick to the squash.
- When the oil is hot, fry the squash in small batches until golden brown. (If using a skillet on the stove, the squash will need to be flipped to ensure even cooking on both sides.)
- If using a deep fryer, shake the fryer basket to prevent the squash from sticking to each other.
- Drain off excess oil using paper towels on a wire rack or cookie sheet and allow to cool a little, then serve right away.
- Serve fried squash with your favorite dipping sauce.
Video
Notes
🍳 How to Reheat Fried Squash
For best results, reheat fried squash in the air fryer, toaster oven, or air fryer. I like to spread leftover squash in a single layer in an air fryer basket, then bake until crispy again – at 350-375°F for about 5 minutes. You can also use leftover fried squash to make squash casserole – like you would make eggplant parmesan – topped with parmesan cheese; it is so delicious! Nutrition Facts are calculated assuming about ¼ of the frying oil will get absorbed.Special Equipment Needeed
- a large skillet
- a slotted spoon
Nutrition
Nutrition information is approximate and is automatically calculated, so should only be used as a guide.


OMG this was so good! Just like our favorite at a local restaurant.
I’m so happy to hear that! Glad you enjoyed it!
I love fried squash so does my hubby and my boys. They can’t get enough. Love this technique, it works great! the leftovers were great the next day reheated in the air fryer. They were just as crispy and fresh tasting as when I first fried them the day before. Thanks for sharing!
I am so glad you liked the recipe! Reheating in the air fryer helps so much – they are so useful 🙂
This is a really stupid question, but what do y’all do with the leftover oil? Deep frying is not in my culinary heritage, but my husband really really wants this recipe for dinner and I am balking at the oil situation.
Not a stupid question at all! I let the oil cool, then strain it to get any debris out, and then store it in a mason jar and reuse it a few times. It will start to get dark after a few times and get a toasty oil smell and that’s when I know I’m done with it. I usually label it with what I fried in it and stick to similar things – I use the same oil a few times for fries, veggies, etc. I’ll fry chicken in the same oil as veggies, but if I fry fish, that oil is only for fish 🐠 If I do something sweet like beignets, that oil stays in a separate jar and I only use it for sweet things.
When I’m totally done with it, I put it in an old jar and tape it shut and it goes in the trash. I know some people just dump it in the woods but there are too many animals around us that will try to eat it 🫣