
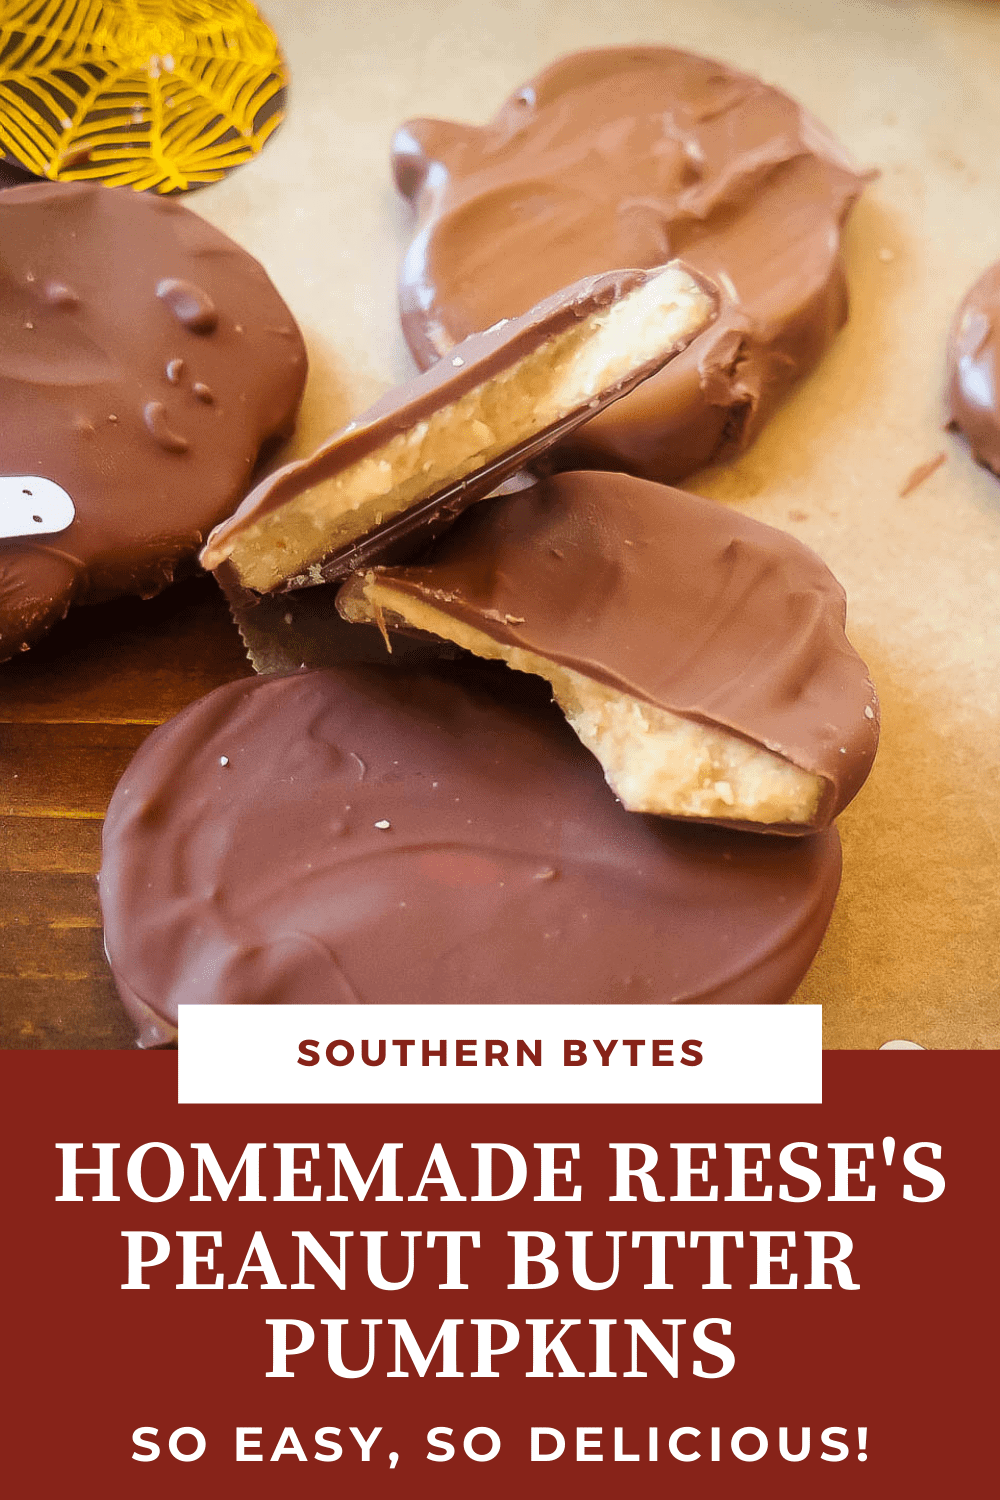


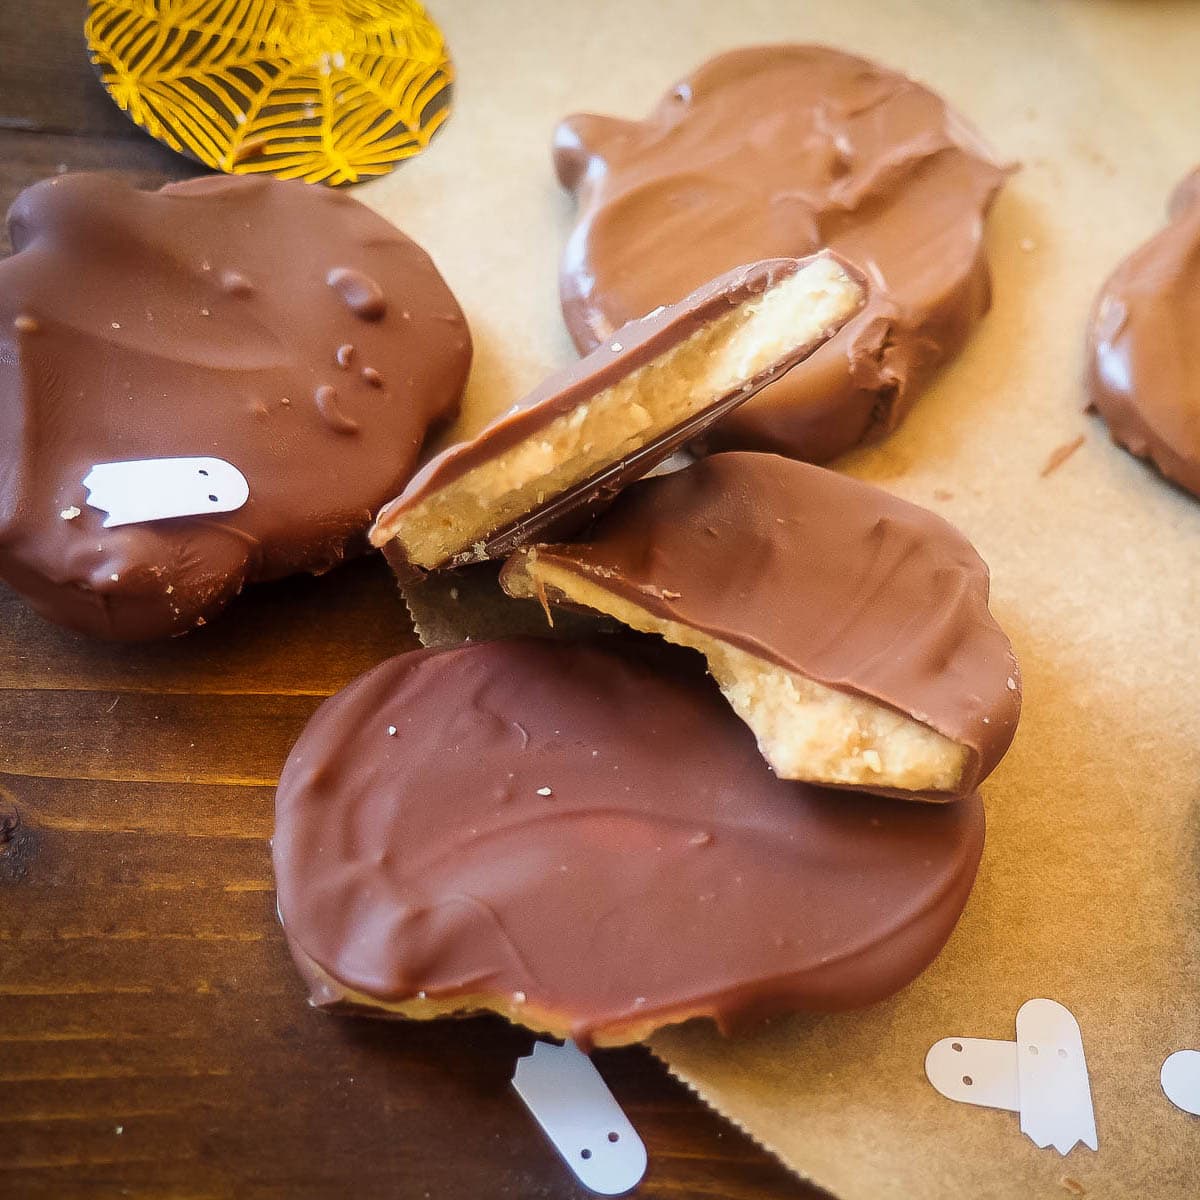
Homemade Reese’s Peanut Butter Cup Pumpkins are the perfect balance of sweet creamy peanut butter and melted chocolate. Cut into any shape that you want – they are so fun to make and they are so cute!
Someone once told me that they love the seasonal Reese’s candy because the proportion of peanut butter filling to chocolate is just right – way more peanut butter. I actually like the mini-cups best – they are almost all chocolate – but making your own means you can get the balance just right to what your family likes!
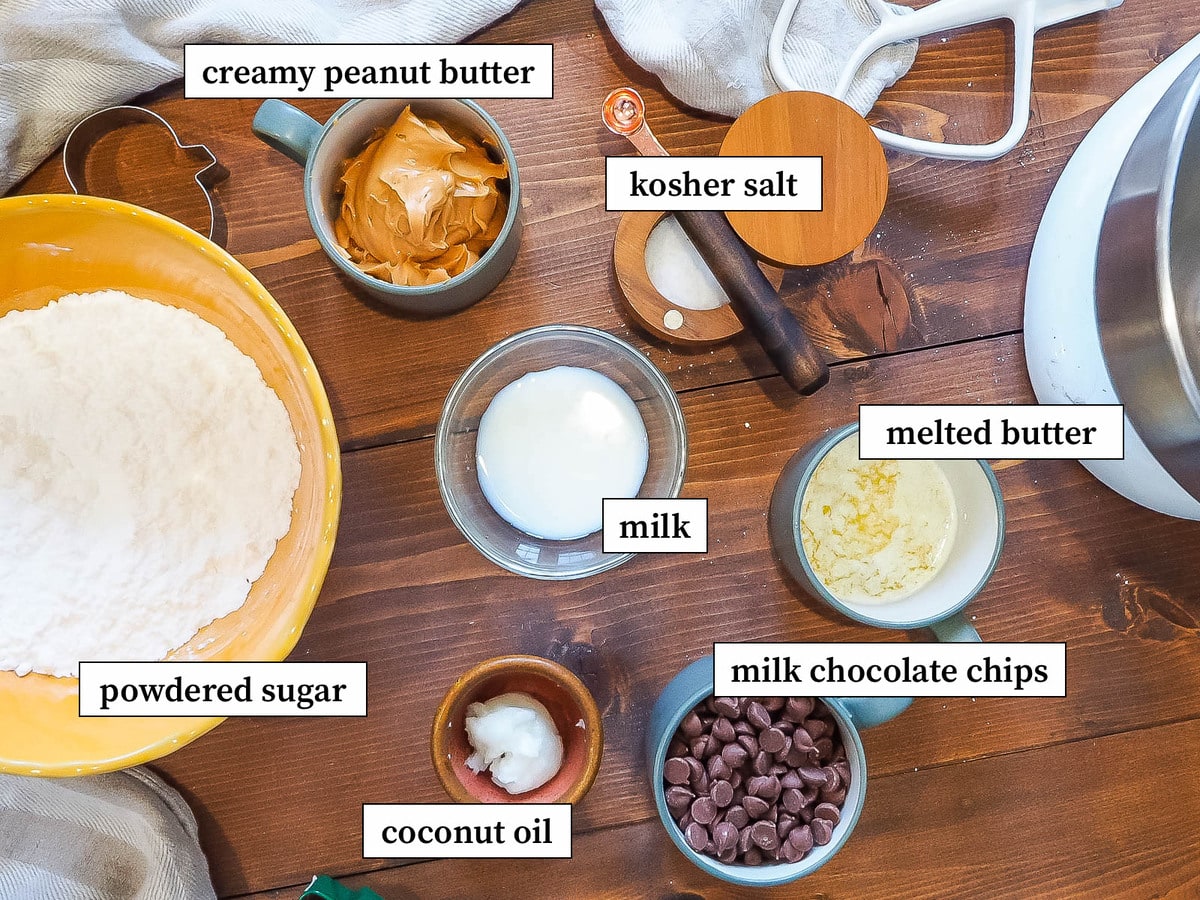
Ingredients in Reeses Pumpkins
This is just a quick overview of the ingredients that you’ll need to make Reeses Pumpkins at home. As always, specific measurements and complete cooking instructions are included in the printable recipe card at the bottom of the post.
- Powdered Sugar
- Creamy Peanut Butter – The jarred, gooey kind works best – not the natural kind that separates.
- Kosher Salt
- Melted Butter
- Milk
- Milk Chocolate Chips
- Coconut Oil
Special Equipment Needed
- A Stand Mixer or a Large Bowl and a Hand Mixer
- A Rolling Pin
- Cookie Cutters:
- A Freezer-Safe Container
- A Heat-Safe Bowl
- Parchment Paper
I highly recommend a mixer if you don’t have one already – mine is from 2006 and is still chugging along!
How to Make Copycat Reeses Pumpkins
These Copycat Homemade Reese’s Pumpkins are so easy to make!
Begin by combining powdered sugar, melted butter, salt, and peanut butter in the bowl of a stand mixer. (Pictures 1 – 5)
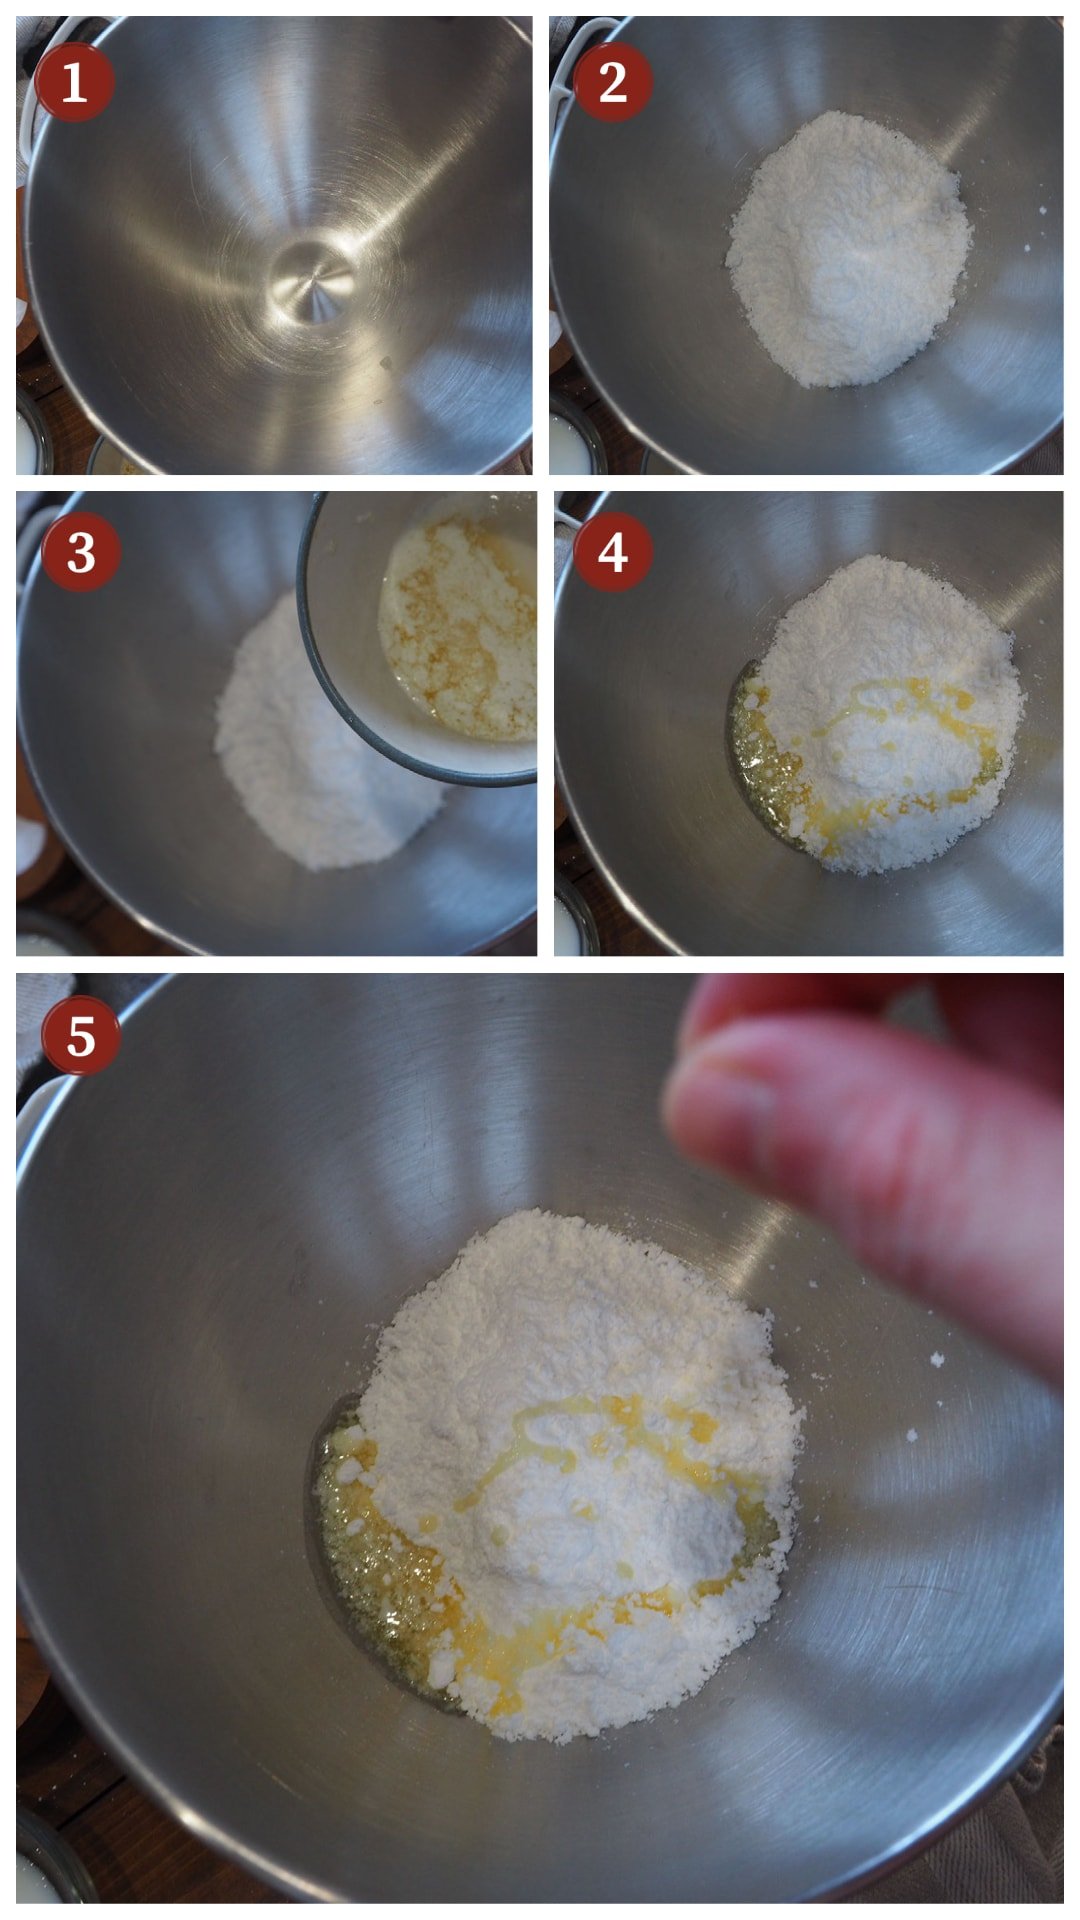
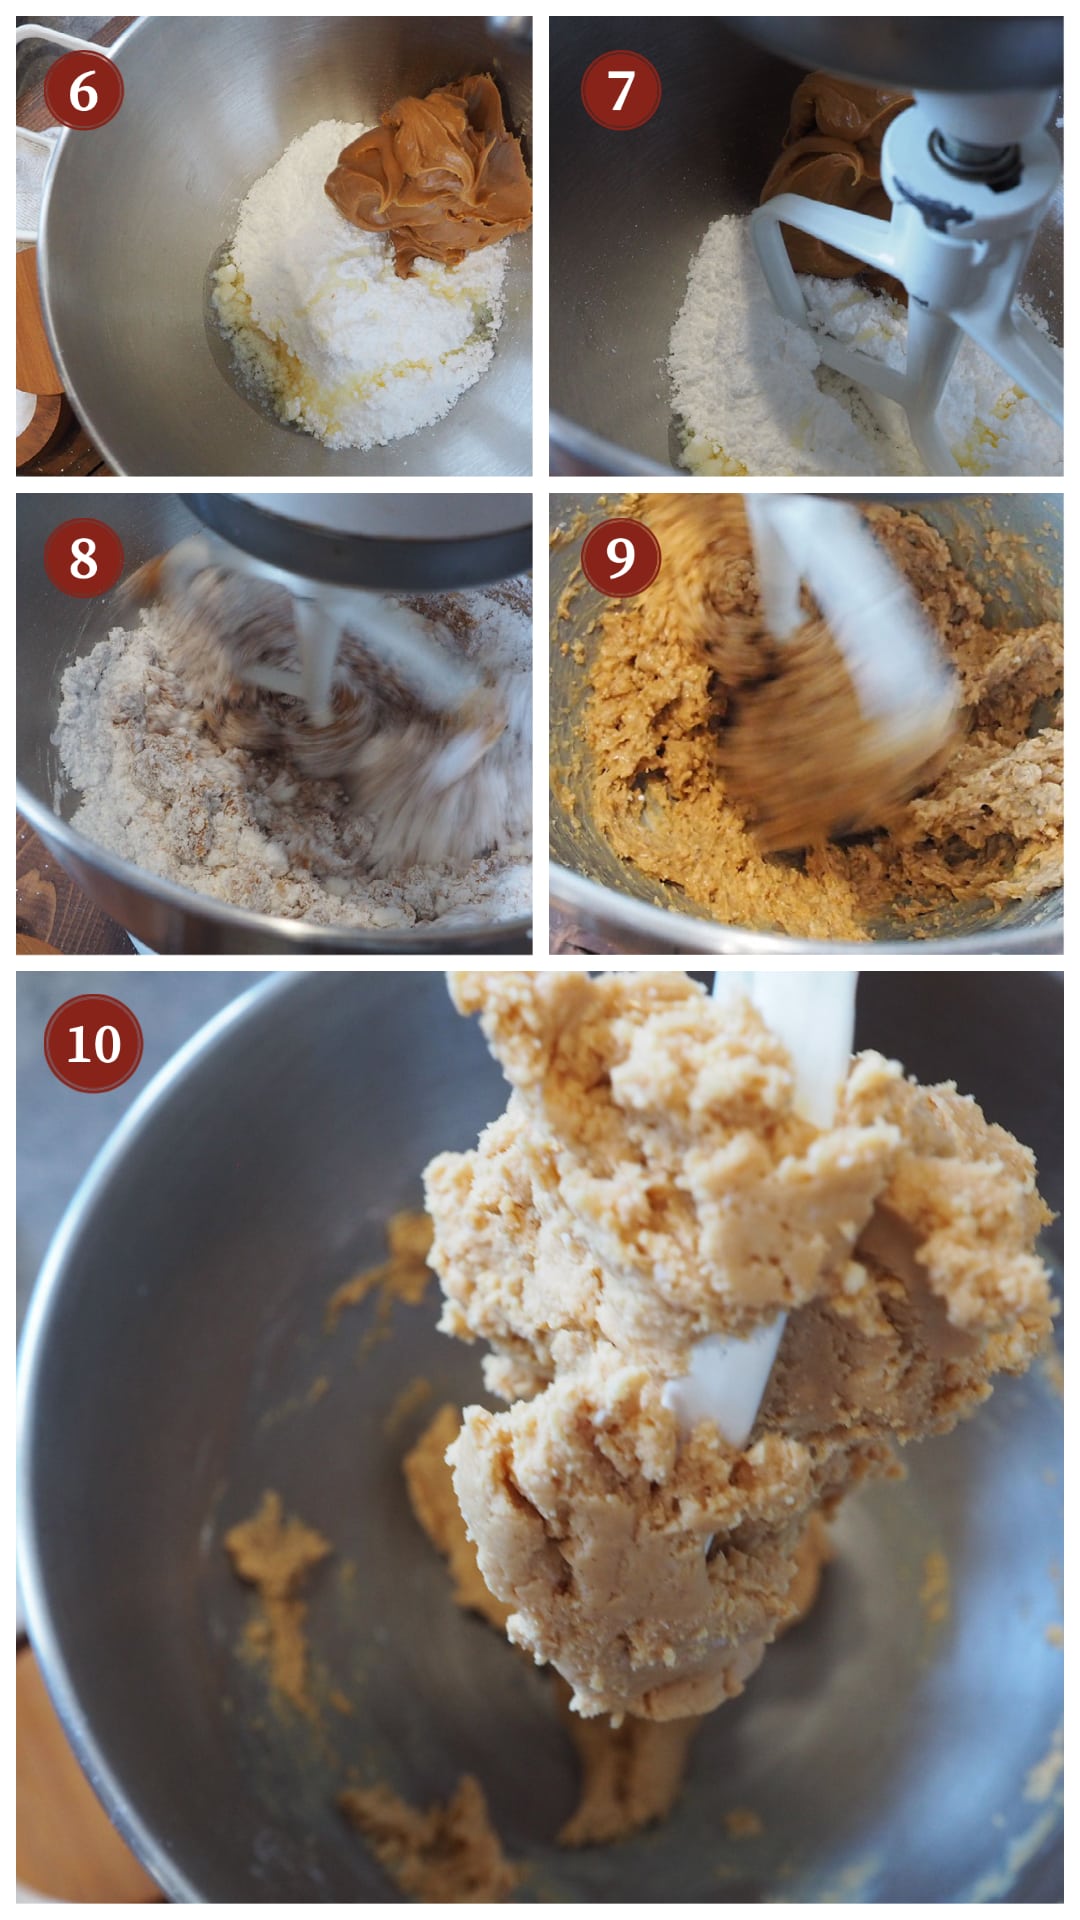
Mix it all together but do not be alarmed – it will look like a dry crumbly mess. (Pictures 6 – 8)
Then, mix in the milk. You want the dough to stick together and be like a dry cookie dough. You don’t want this to be sticky like chocolate chip cookie dough. (Pictures 9 – 10)
Now, sprinkle some powdered sugar on a clean surface for rolling out the dough. (I recommend using powdered sugar over flour because these are not being cooked – raw flour is not really meant to be consumed.) (Picture 11)
Roll the dough out using a rolling pin (you might need to sprinkle sugar on the rolling pin as well) until it is the thickness that you want for your treats. (I like to do some about ¼ inch thick for me – equal amounts of chocolate and peanut butter – and ½ inch thick for my husband – extra peanut butter.) I like to use a cold marble rolling pin for this – it seems to help keep the dough cold which makes it easier to work with. (Pictures 12 – 13)
Once the dough is rolled out, use your favorite cookie cutters to cut out different shapes. (Pictures 11 – 15)

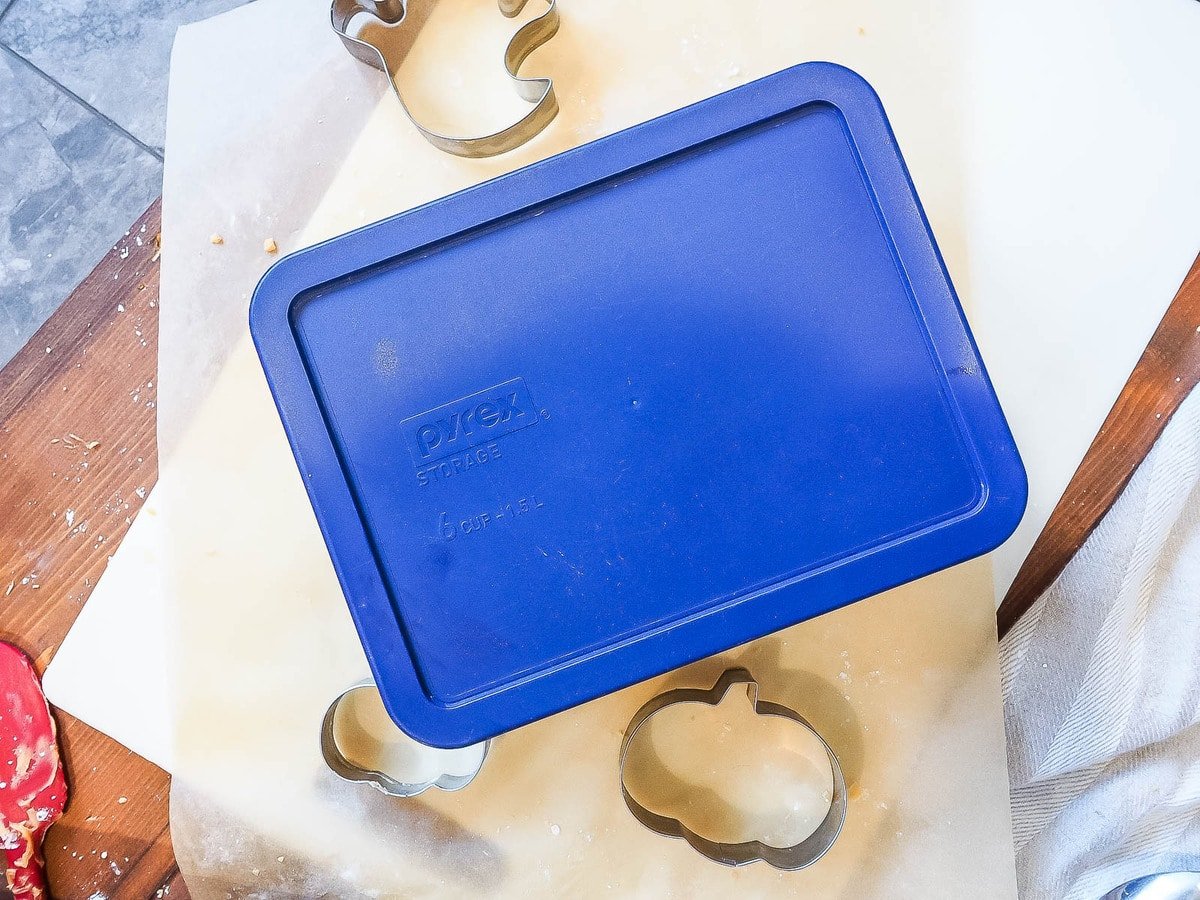
Either lay them on parchment on a cookie sheet that fits in your freezer or use my favorite method – fold a piece of parchment over in layers in a freezer-safe container. (It is much easier to fit a small container in the freezer than a cookie sheet.) (See Below)

Once you have cut out all of your shapes – you might have to ball the scraps back up and re-roll them out a few times – put the container in the freezer for 1 to 2 hours.
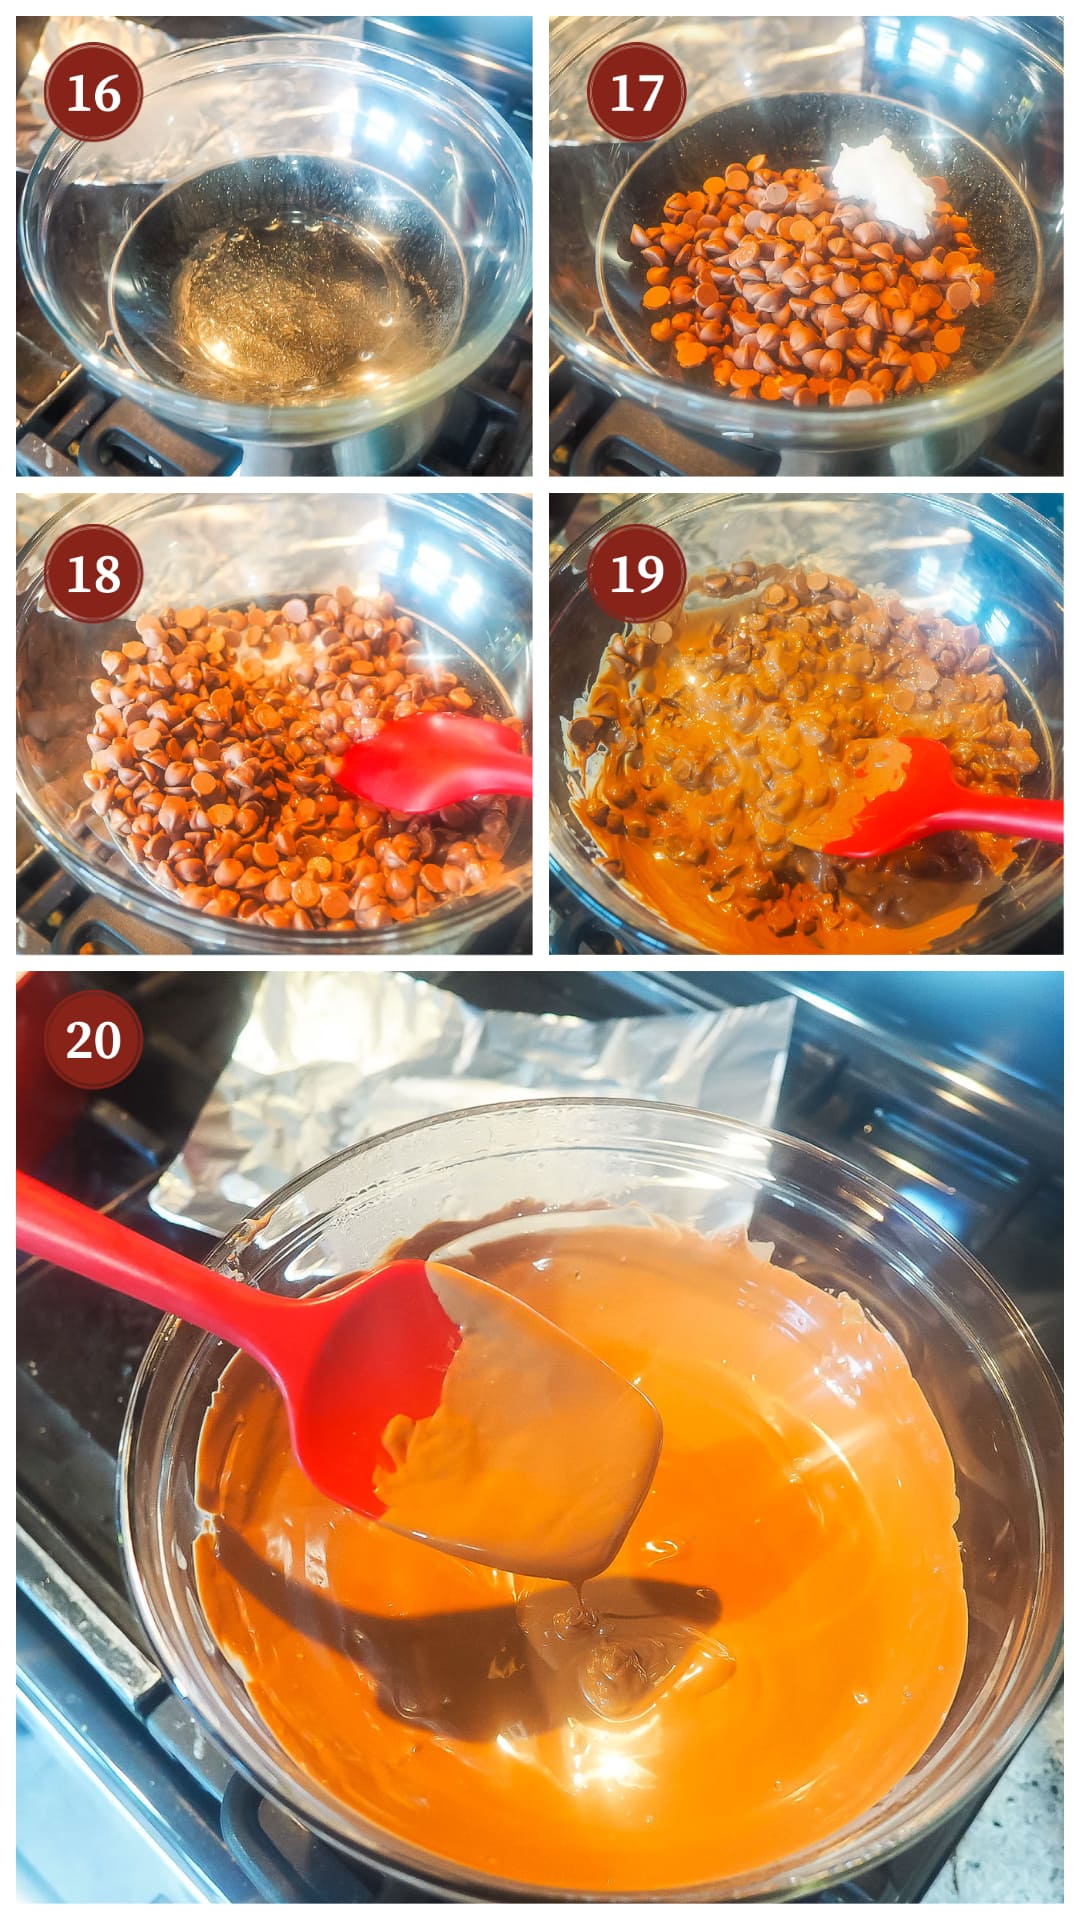
When you are about to take the peanut butter pumpkins (or ghosts, eggs, etc.) out of the freezer, start melting your chocolate. I like to use a double boiler as I find that this melts the chocolate more quickly, smoothly, and evenly. (This means to bring a pot of water to a boil and place a heat-safe bowl on top of it.)
Place the chocolate chips and coconut oil in the bowl and stir until the chocolate chips are melted. I like to use a rubber spatula to do this so I can scrape the sides of the bowl really well.
Once the chocolate is fully melted, remove the peanut butter shapes from the freezer and dip them in the melted chocolate. They will quickly soften, so do not leave them in the chocolate for too long.

Transfer them to wax paper to cool. (Do not place them directly on a baking rack – they will get stuck and break as you try to remove them – speaking from experience.) If you miss any spots, you can drizzle chocolate over the candies with a spoon.
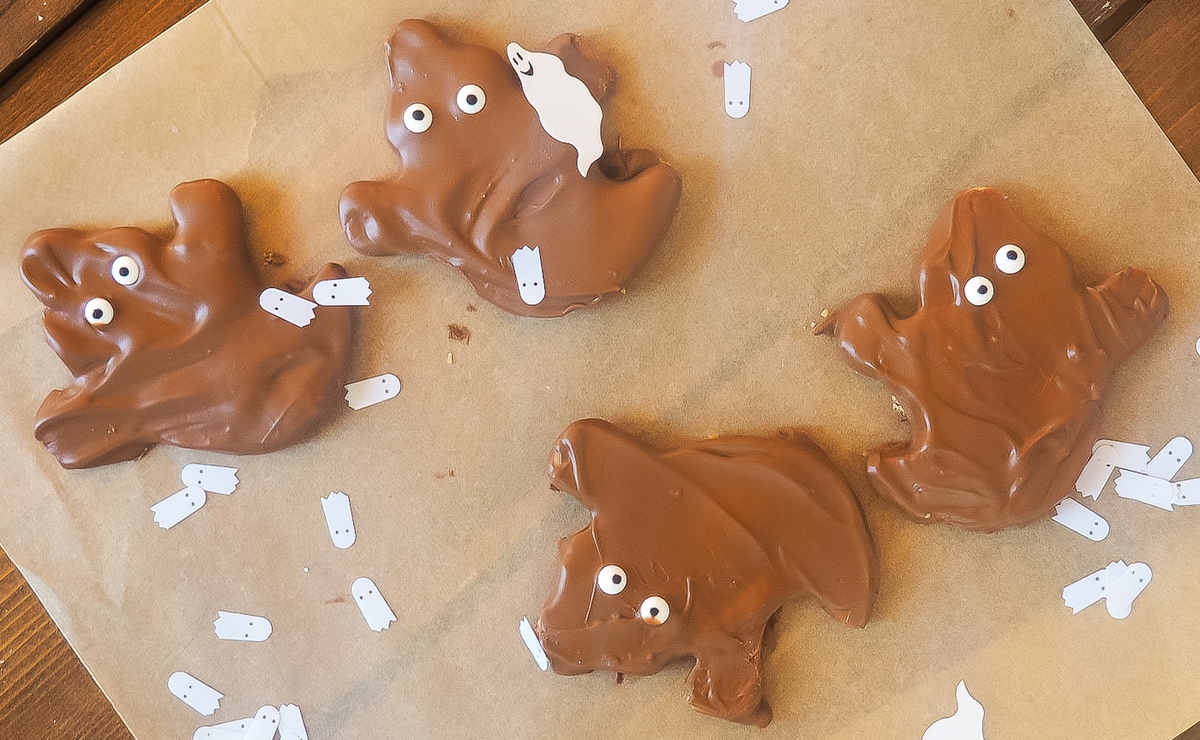
Once all your chocolates are coated, put them in the refrigerator for the chocolate to set. 30 minutes to an hour should be enough, but you can wait longer if you want to be sure they are really set. (If you are adding eyes, sprinkles, or chopped nuts, add them before refrigerating – while the chocolate is still soft. You can drizzle caramel on after they are cool.)
Once the chocolate sets, transfer your candies to an airtight container and store them in the fridge, or eat them immediately!
This recipe yields 10 – 15 pumpkins, depending on how thick you make the peanut butter. If you make larger shapes, you will also end up with less.

🙋♀️ Frequently Asked Questions
Absolutely – you can multiply this recipe and make a ton at a time for an event or party! Just work in small batches when dipping the shapes in chocolate. (Keep most of the peanut butter shapes in the freezer while you are dipping the others in chocolate – doing small batches at a time will help them to stay cold.)
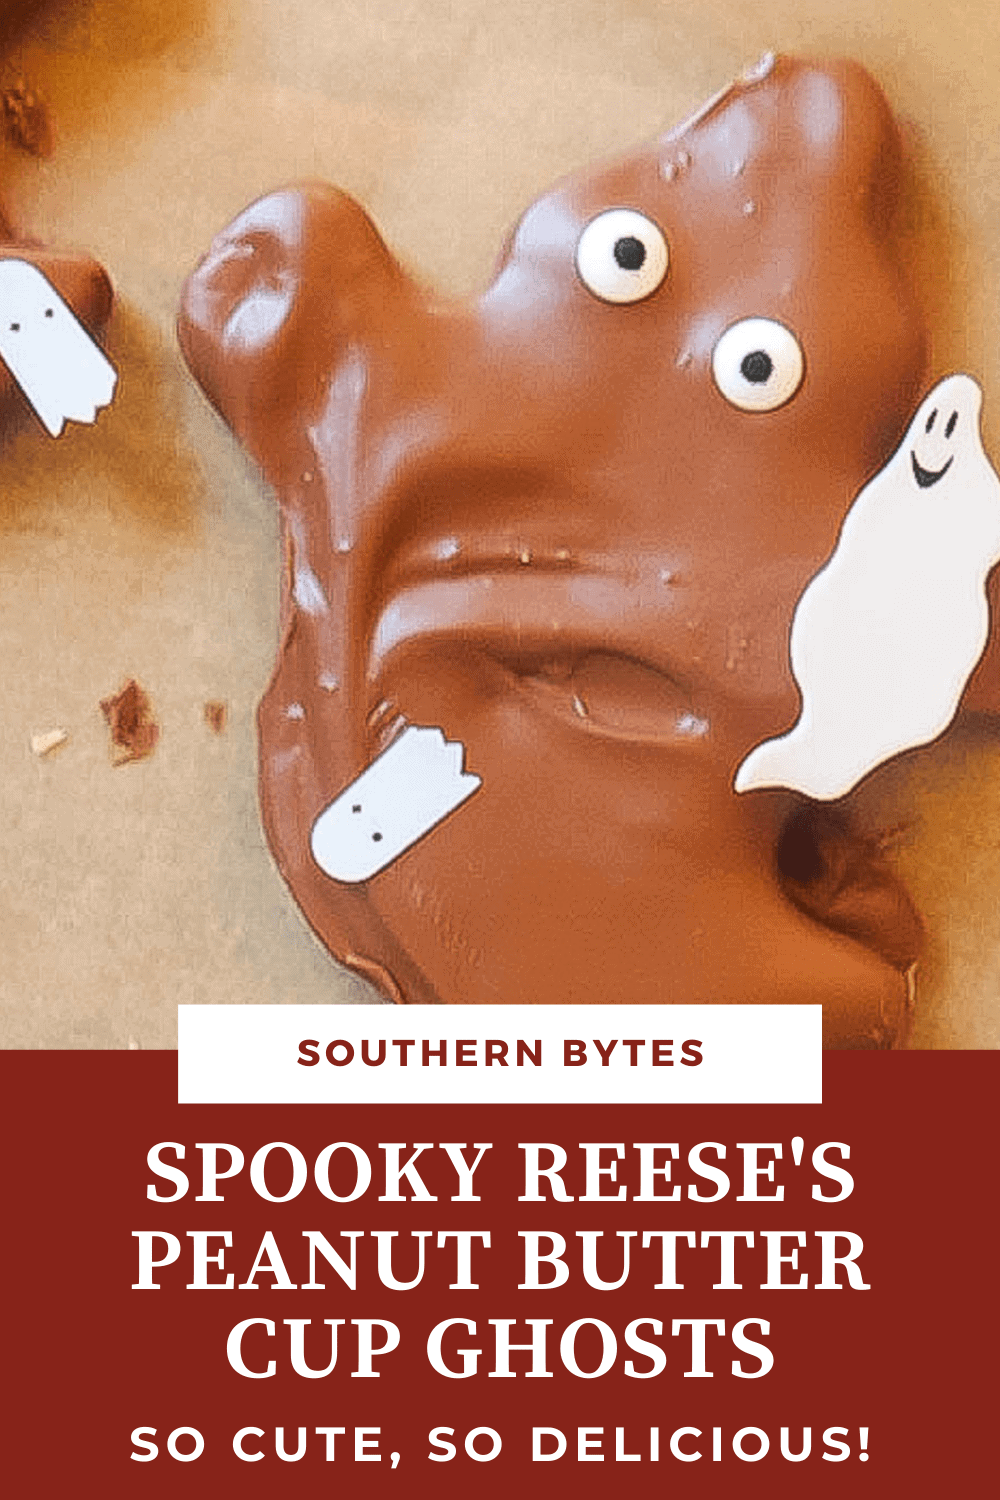
You can make any shape that you want – pumpkins, ghosts, Christmas trees, Easter eggs, hearts for Valentine’s Day, leaves for Fall – seriously, if you have a cookie-cutter, you can make whatever you want!
Yes! The fun part about making these at home is that you can make them using ingredients that you know have not been cross-contaminated.
You can use Sunflower Seed Butter – this will be the most peanutty taste. It is more expensive, but if you are allergic to peanuts – it is definitely worth it!
You can replace the milk with an equivalent amount of almond milk, oat milk, or cashew milk – I would not use coconut milk – you will notice the taste.
How to Store Homemade Reeses Pumpkins
I highly recommend storing these in the refrigerator or freezer if your home is kept at 65°F or warmer – they will get really soft as they do not have any stabilizers or preservatives in them.

Helpful Tips
- Store these Homemade Reese’s Pumpkins in the fridge or freezer when they are not being served – they will soften quickly at room temperature.
- Sprinkle a bit of sea salt on top of these as the chocolate is cooling – so yummy.
- I like to use a marble rolling pin when rolling out this dough – the marble is really cold, so it helps to keep the dough cold longer and it is easier to work with when it is cold. (Marble rolling pins are great for making biscuits and scones as well, where you need to keep the dough cold for longer.)
- Drizzle melted caramel over the shapes after they cool for added deliciousness!
Have You Tried This Recipe?
Please rate it and leave a comment below. I would love to hear what you think!

Homemade Reese’s Peanut Butter Cup Pumpkins
Ingredients
- 1 ½ cups powdered sugar
- 1 pinch kosher salt
- ⅛ cup butter , melted
- ¾ cup peanut butter , creamy
- 1 tablespoon milk
- 1 bag milk chocolate chips these usually come in 10 oz bags, so yes, just one small bag
- 1 tablespoon coconut oil , refined, you can also use shortening or butter
Optional
- caramel
- sprinkles/chopped nuts
- candy eyes
Instructions
- Begin by combining powdered sugar, melted butter, salt, and peanut butter in the bowl of a stand mixer.1 ½ cups powdered sugar, ⅛ cup butter, ¾ cup peanut butter, 1 pinch kosher salt
- Mix it all together but do not be alarmed – it will look like a dry crumbly mess.
- Then, mix in the milk. You want the dough to stick together and be like a dry cookie dough. You don't want this to be sticky like chocolate chip cookie dough.1 tablespoon milk
- Now, sprinkle some powdered sugar on a clean surface for rolling out the dough. (I recommend using powdered sugar over flour because these are not being cooked – raw flour is not meant to be consumed.)
- Roll the dough out using a rolling pin (you might need to sprinkle sugar on the rolling pin as well) until it is the thickness that you want for your treats. (I like to do some about ¼ inch thick for me – equal amounts of chocolate and peanut butter – and ½ inch thick for my husband – extra peanut butter.) I like to use a cold marble rolling pin for this – it seems to help keep the dough cold which makes it easier to work with.
- Once the dough is rolled out, use your favorite cookie cutters to cut out different shapes.
- Either lay them on parchment on a cookie sheet that fits in your freezer or use my favorite method – fold a piece of parchment over in layers in a freezer-safe container. (It is much easier to fit a small container in the freezer than a cookie sheet.) (There is a picture of this above for reference.)
- When you are about to take the peanut butter pumpkins (or ghosts, eggs, etc.) out of the freezer, start melting your chocolate. I like to use a double boiler as I find that this melts the chocolate more quickly, smoothly, and evenly. (This means to bring a pot of water to a boil and place a heat-safe bowl on top of it.) Place the chocolate chips and coconut oil in the bowl and stir until the chocolate chips are melted. I like to use a rubber spatula to do this so I can scrape the sides of the bowl really well.1 bag milk chocolate chips, 1 tablespoon coconut oil
- Once the chocolate is fully melted, remove the peanut butter shapes from the freezer and dip them in the melted chocolate. They will quickly soften, so do not leave them in the chocolate for too long.
- Transfer them to wax paper to cool. (Do not place them directly on a baking rack – they will get stuck and break as you try to remove them – speaking from experience.) If you miss any spots, you can drizzle chocolate over the candies with a spoon.sprinkles/chopped nuts, candy eyes
- Once all your chocolates are coated, put them in the refrigerator for the chocolate to set. 30 minutes to an hour should be enough, but you can wait longer if you want to be sure they are really set. (If you are adding eyes, sprinkles, or chopped nuts, add them before refrigerating – while the chocolate is still soft. You can drizzle caramel on after they are cool.)caramel
- Once the chocolate sets, transfer your candies to an airtight container and store them in the fridge or eat them immediately!
Notes
- Store these Homemade Reese’s treats in the fridge or freezer when they are not being served – they will soften quickly at room temperature.
- Sprinkle a bit of sea salt on top of these as the chocolate is cooling – so yummy.
- I like to use a marble rolling pin when rolling out this dough – the marble is really cold, so it helps to keep the dough cold longer and it is easier to work with when it is cold. (Marble rolling pins are great for making biscuits and scones as well, where you need to keep the dough cold for longer.
- Drizzle melted caramel over the shapes after they cool for added deliciousness!
Special Equipment Needeed
- a rolling pin
- holiday cookie cutters
- a baking sheet
- a large freezer-safe container
- a heat-safe bowl
Nutrition
Nutrition information is approximate and is automatically calculated, so should only be used as a guide.