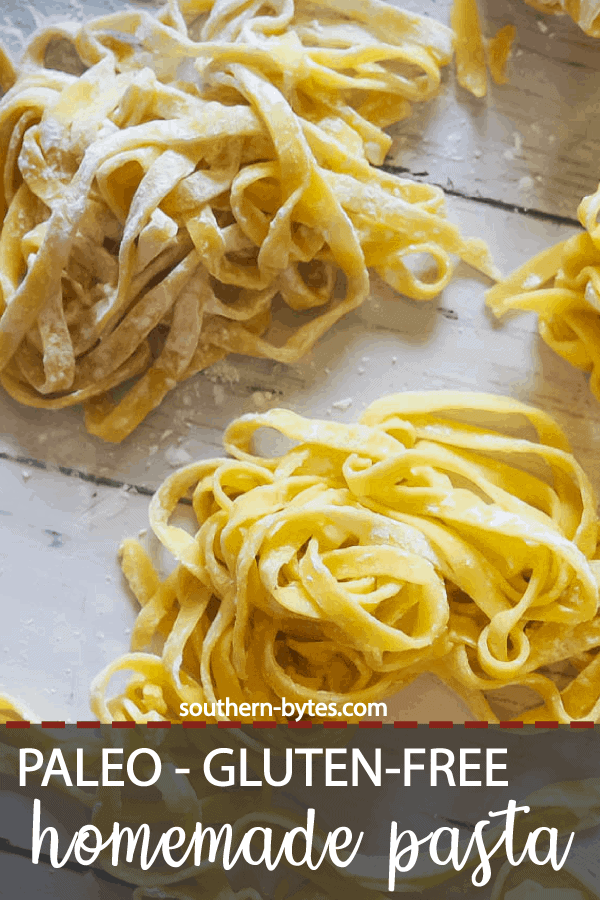
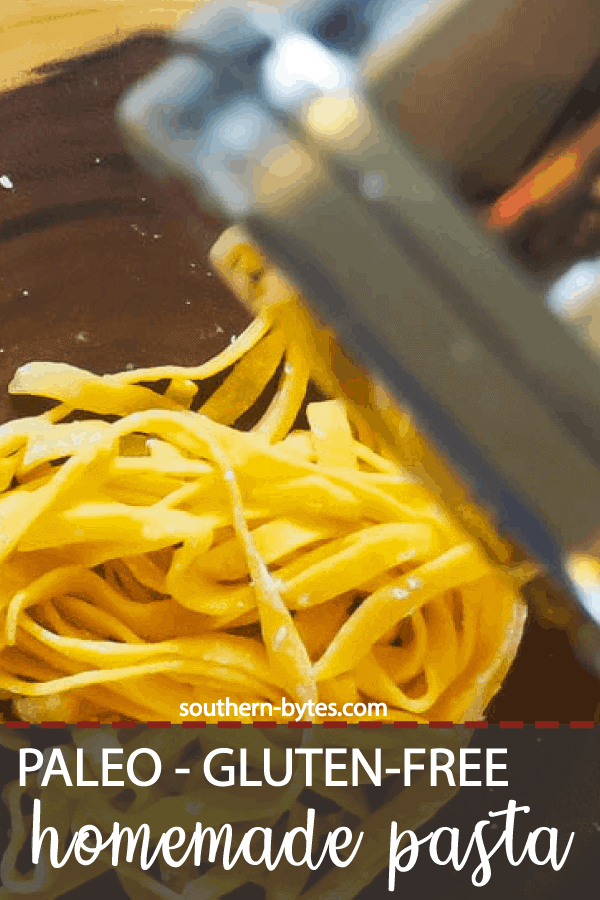
This Paleo pasta is so light and silky. These noodles are just the right amount of eggy and doughy for a big bowl of fettuccine or a comforting bowl of chicken noodle soup.
I love pasta, but it doesn’t always agree with me. I have been desperate to find a recipe for paleo pasta that didn’t taste like olive oil or wasn’t hard to work with. This recipe is it.
It is even easier to work with than traditional pasta because it doesn’t get overworked easily, which makes it even better!
🥘 Ingredients Needed

- Almond Flour – Anthony’s is my favorite brand to use for most of my Paleo baking. If you can’t get the Anthony’s brand, just make sure that it is blanched almond flour that is finely milled so it isn’t chunky and gritty.
- Tapioca Starch – Tapioca starch is such a strange flour. It is another kind of flour made from the Cassava Root (different than Cassava Flour) but it is virtually flavorless and makes a great thickener.
- Xanthan Gum – Because there is no gluten in this pasta dough, you need something to keep the dough elastic. Xanthan gum helps the pasta hold together and gives it that same silky texture that you expect from traditional pasta. (I like to use Anthony’s for this as well.)
- Eggs – Large eggs will do.
- Kosher Salt – I prefer kosher salt to sea salt because the crystals are more evenly sized, so you can be more consistent with your salting. Plus, it is way cheaper. (I do use sea salt in a grinder on the table though.)
- Olive Oil – I highly recommend that you do NOT over-do it on the olive oil. You only need one teaspoon of good olive oil to round this pasta out. If you add more, your dough will 100% taste like olive oil and that is not a good taste. If your dough is dry, add water.
🍽 Equipment Needed
So, here is what I use to make this pasta.
- A Mixer: You can make this pasta without a mixer – it involves a bit more work and is a great arm workout, but you CAN do it. We like to use a KitchenAid Stand Mixer. I have had the same one for over 10 years and it still runs great.
- A Rolling Pin: You need some kind of rolling device to roll out your pasta. If you do not have a rolling pin, you can remove the label from a wine bottle and use that instead – just be careful not to crash it into anything or drop it.
- A Pasta Maker: A pasta maker is HIGHLY recommended. If you do not have one, you can roll your pasta dough as thin as you can and use a ruler and a pizza cutter to cut your pasta into strips. It won’t be as pretty, but it can help you make the best of what you have! (We like to use the pasta maker attachment for the KitchenAid Mixer – we have a hand pasta maker also, but our countertop has a rounded edge so we can’t clamp it down. It is VERY difficult to use like that!)
🥣 How to Make It
This pasta is so easy to make.
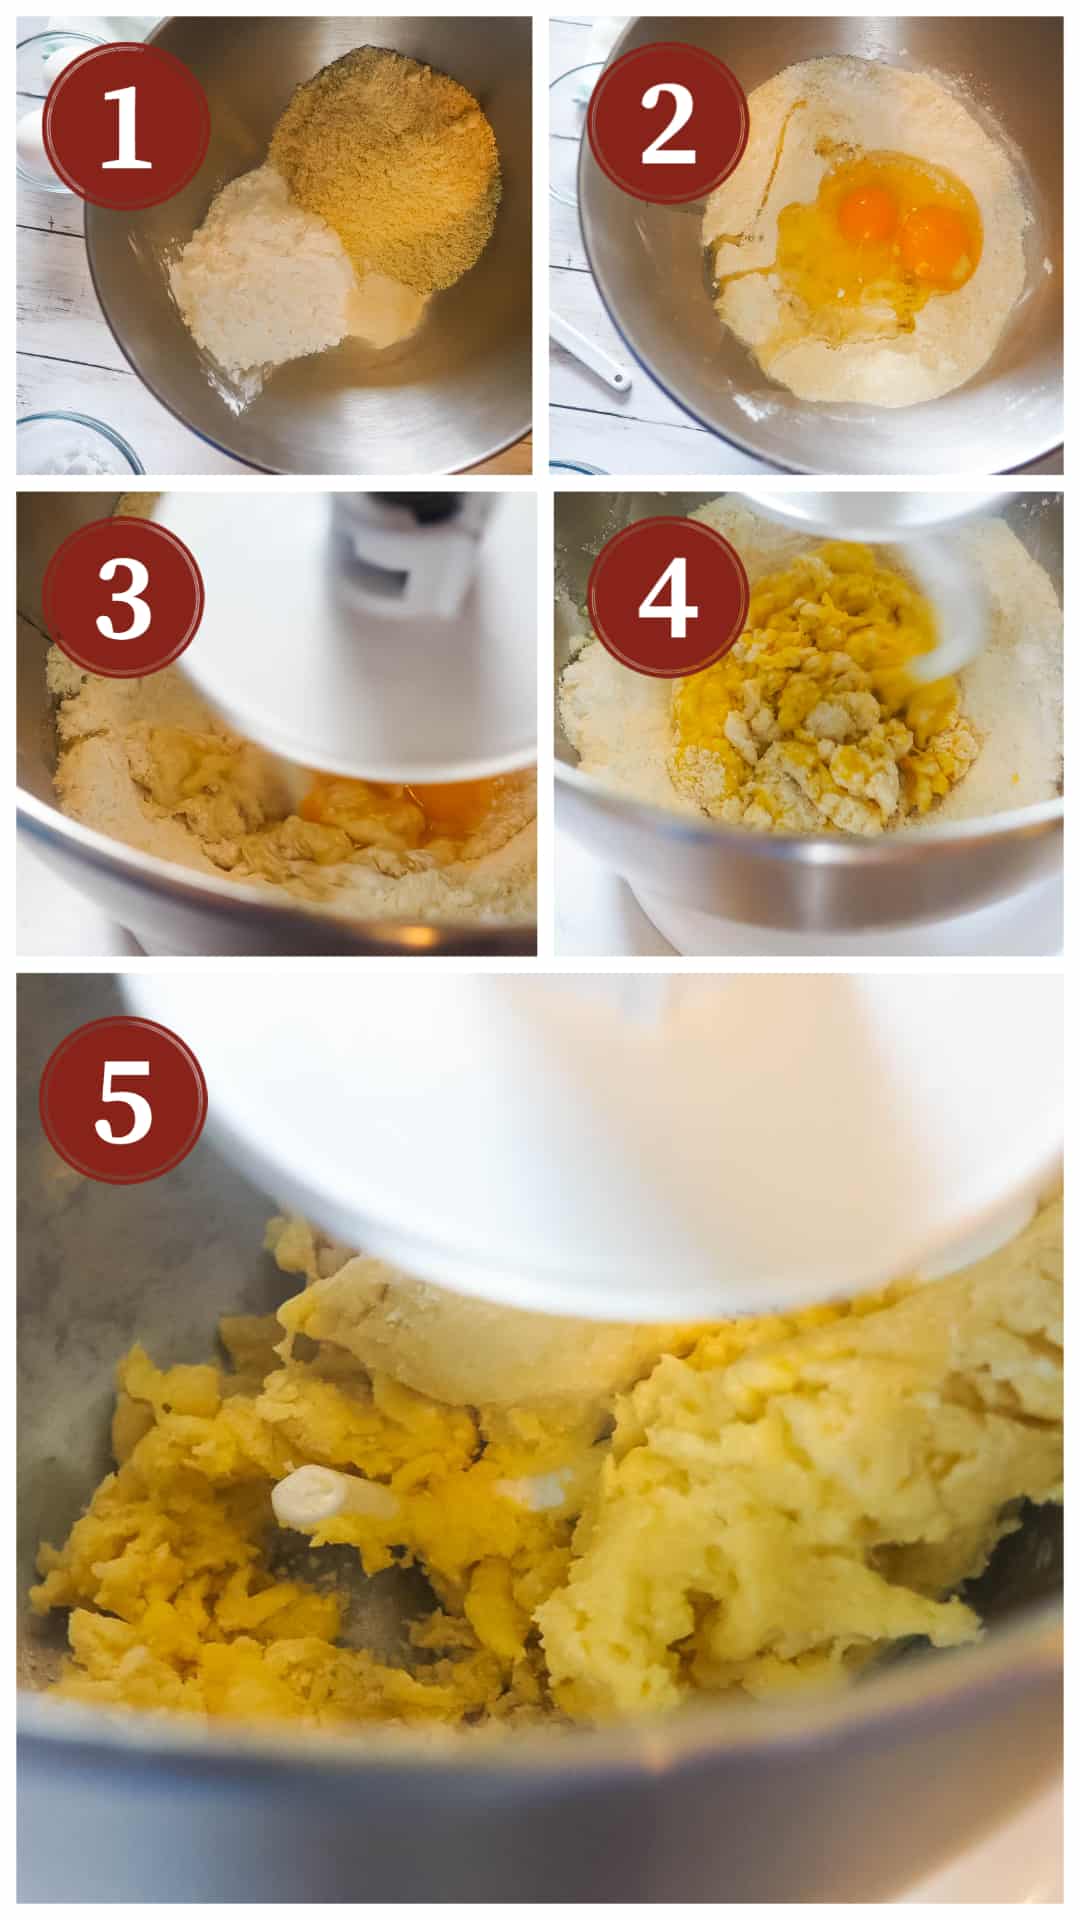
First, add your dry ingredients to the bowl of a mixer with a dough hook. (Picture 1) Make a small well in the middle and drop in your eggs. (Picture 2)
Then, let your dough hook do the work. You may need to stop the mixer and scrape down the sides a few times, but it will eventually all start sticking together into a ball. Let the mixer knead the dough for a few minutes – there is no gluten in this, so it won’t seize up on you if you over mix it. (Picture 3 – 5)
If it seems too dry or crumbly, you can add a little bit of water to stick it all together. I have not had that happen with this recipe, but I did have that happen with another pasta recipe – I added extra olive oil as the recipe suggested and it was SO GROSS. So, use water if needed 🙂
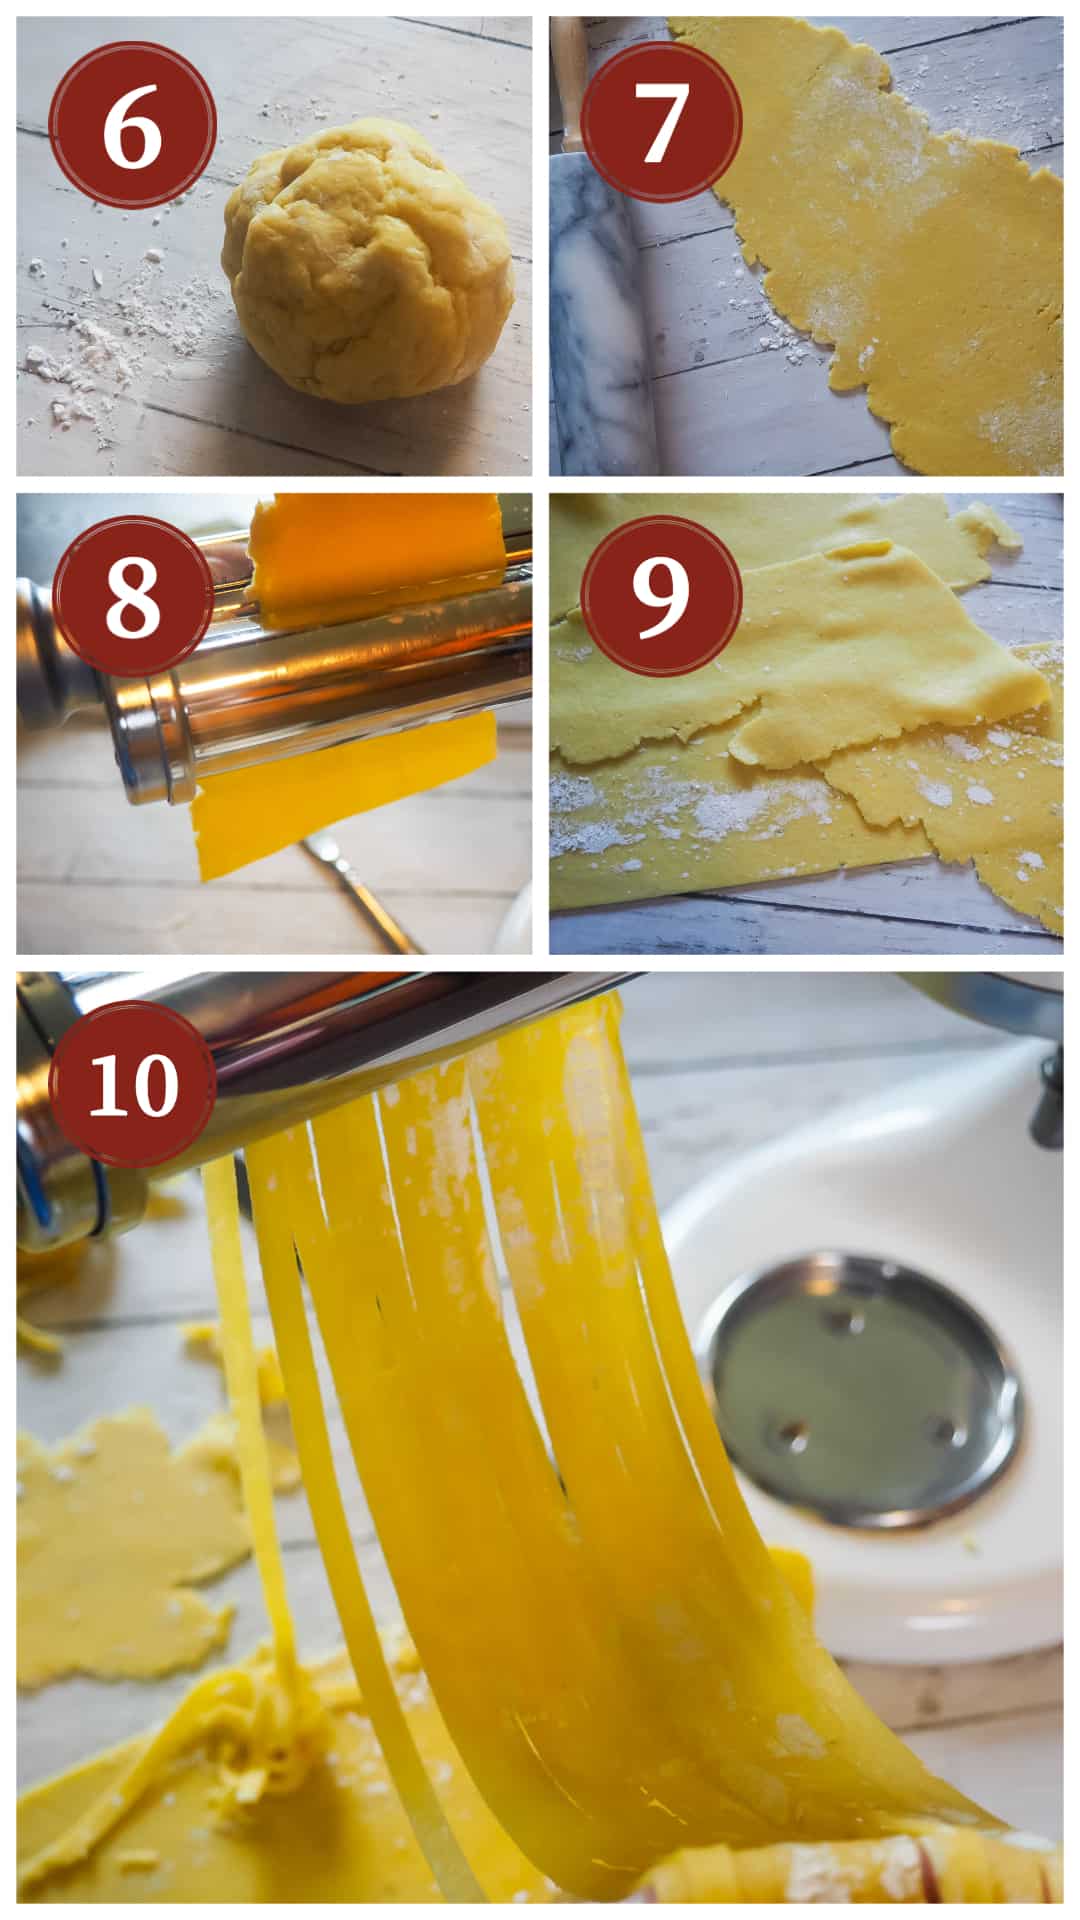
Next, remove your ball of dough and place it onto a surface that is sprinkled with tapioca starch. (Picture 6)
Roll the dough flat with a rolling pin. (Picture 7)
Then cut the dough into strips about 1/2 to 2/3 the width of your pasta maker. (Once you start feeding the dough through the pasta maker, it will get thinner and wider.)
Now, feed the dough through the sheet pasta maker on the widest setting, once or twice to smooth it out. On my pasta maker, that is #1. When you are laying out the flattened sheets, dust them with a little bit of tapioca starch to keep them from getting stuck to anything. (Picture 9) After I put all of the sheets through at #1, I switch it to #2 and put them all through again. It doesn’t really matter if the dough makes perfect rectangles when being flattened – I love to use these noodles for soup, so I can use the short pieces from this as soup “egg noodles.” When the sheets have all gone through #2, you can switch to #3 or switch to your spaghetti or fettuccine cutter.
Note: You can try to take it thinner than #2 or #3, but the dough becomes pretty thin and fragile this way. (With traditional pasta, you can go all the way down to #6 or #7, but this dough will tear if you do that.)
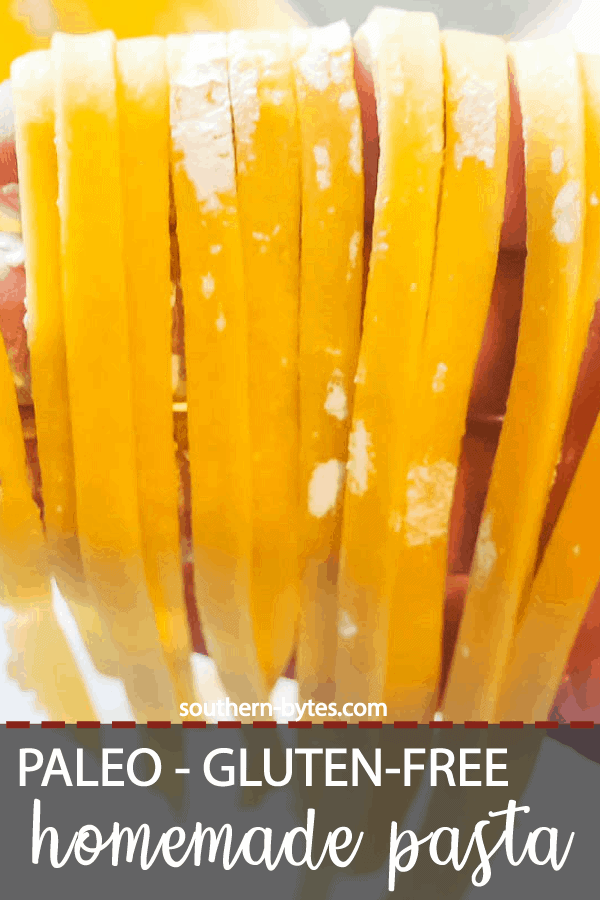
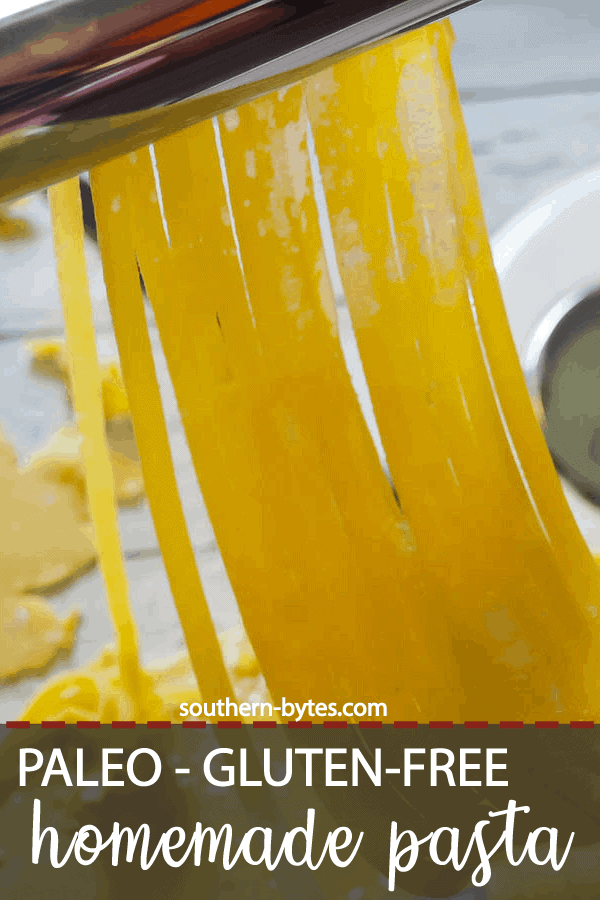
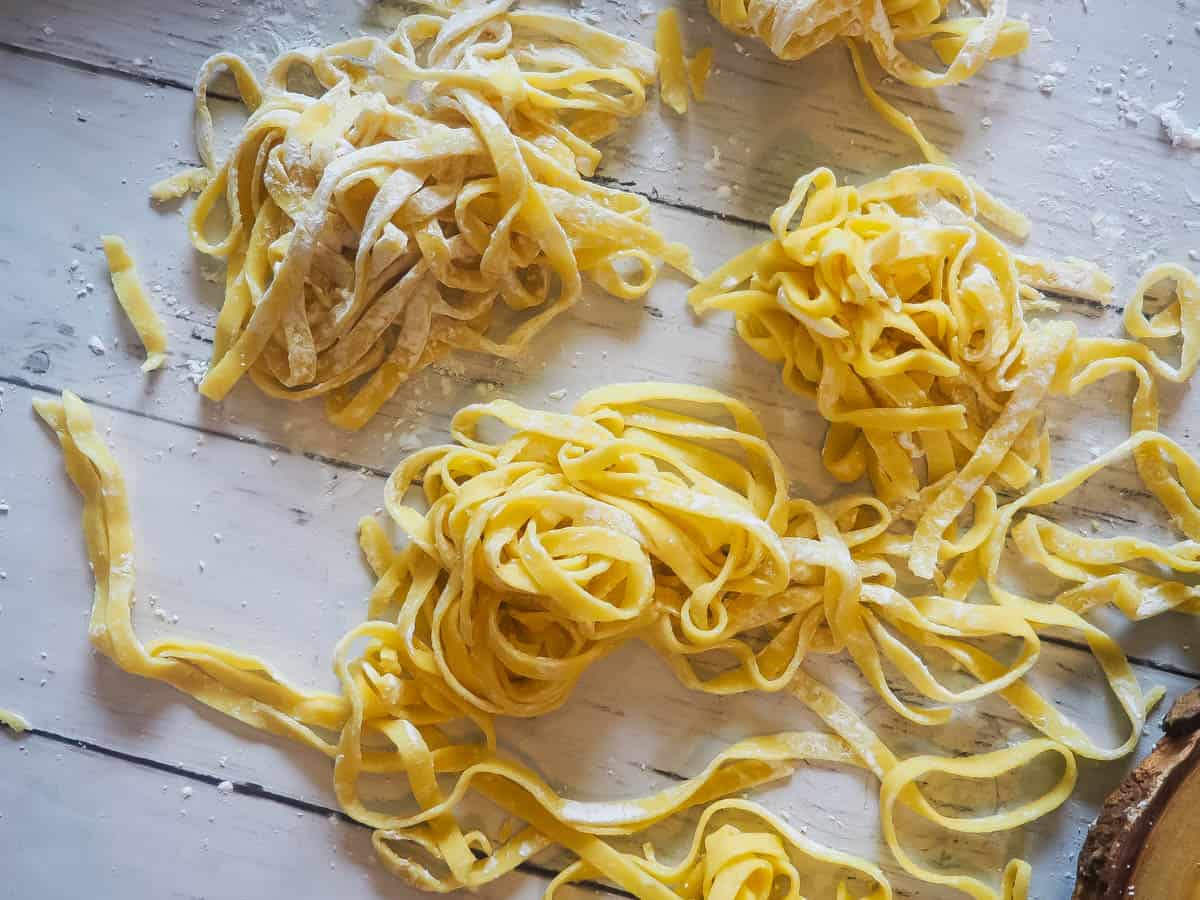
When using the fettuccine cutter, feed the pasta sheet through and allow the beautiful fettuccine to drape over your hands at it comes out. (Picture 10)
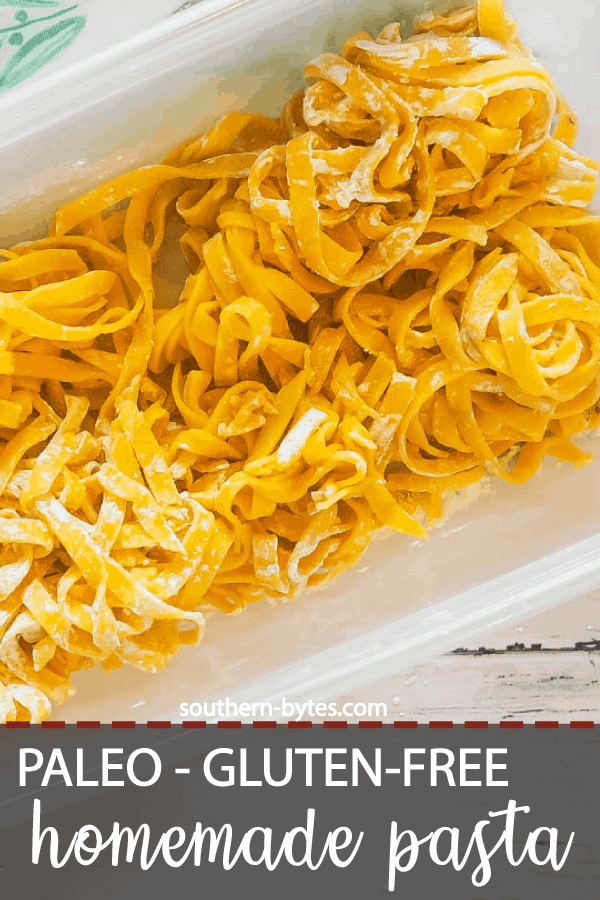
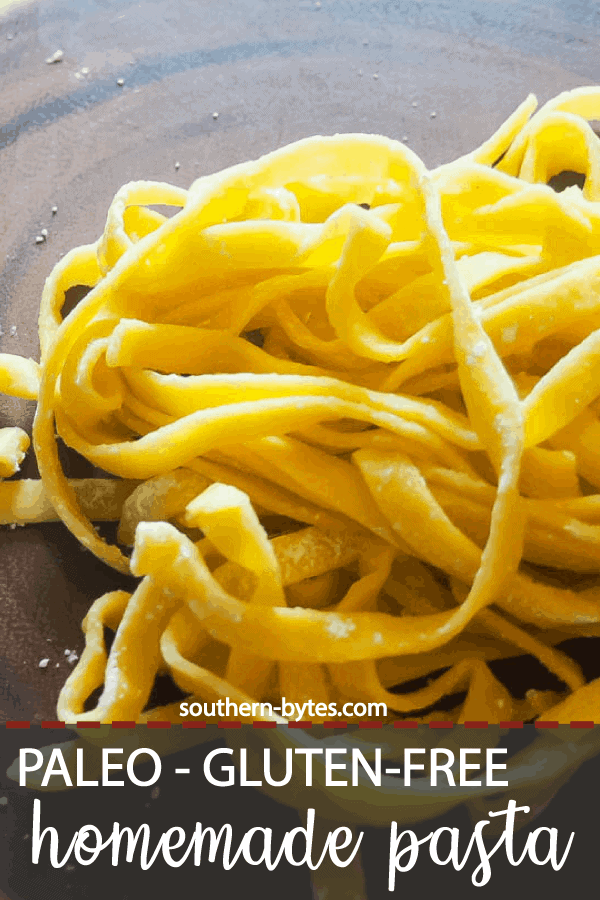
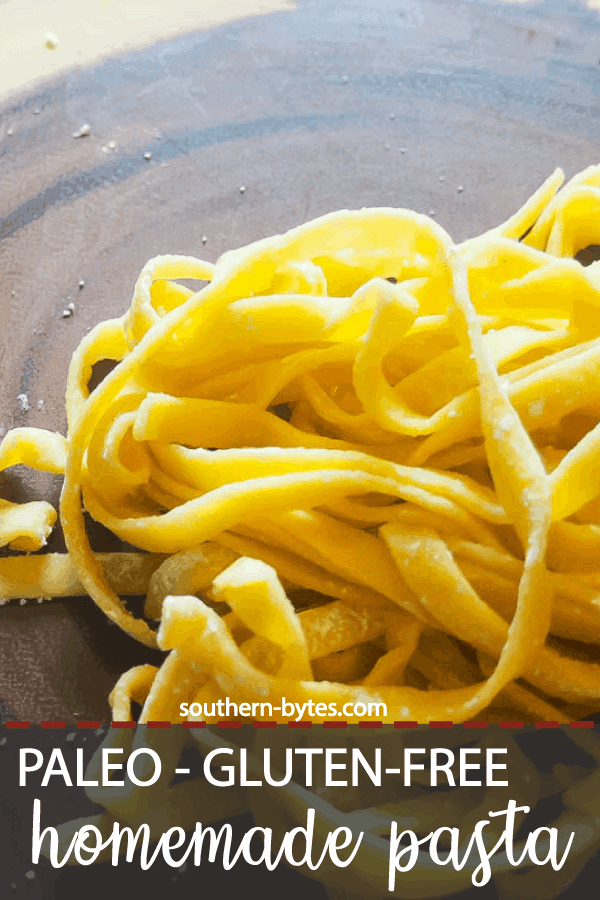
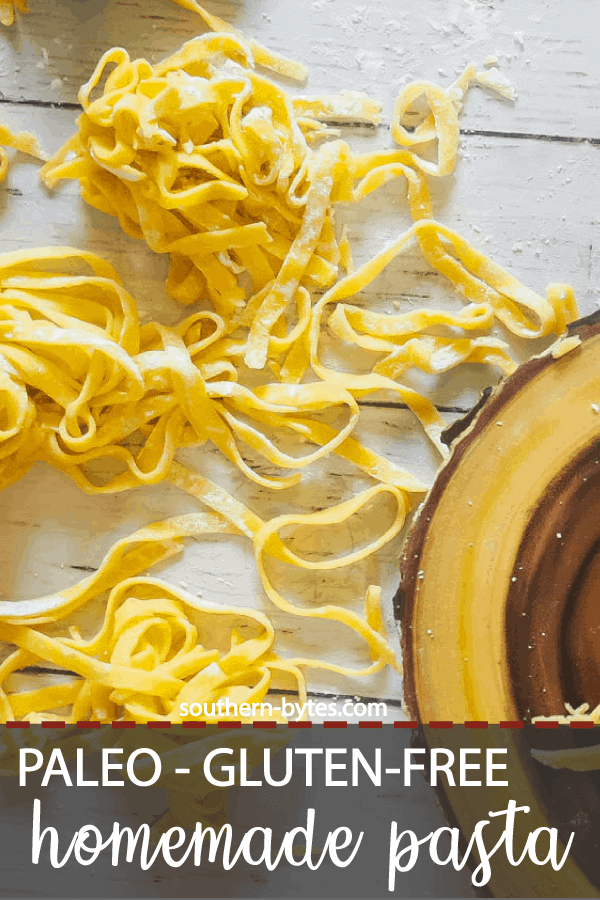
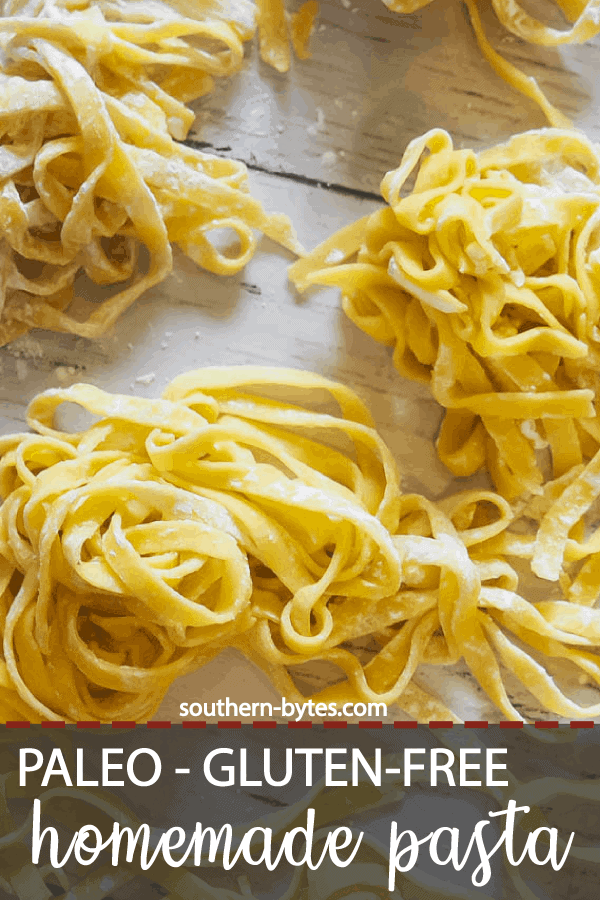
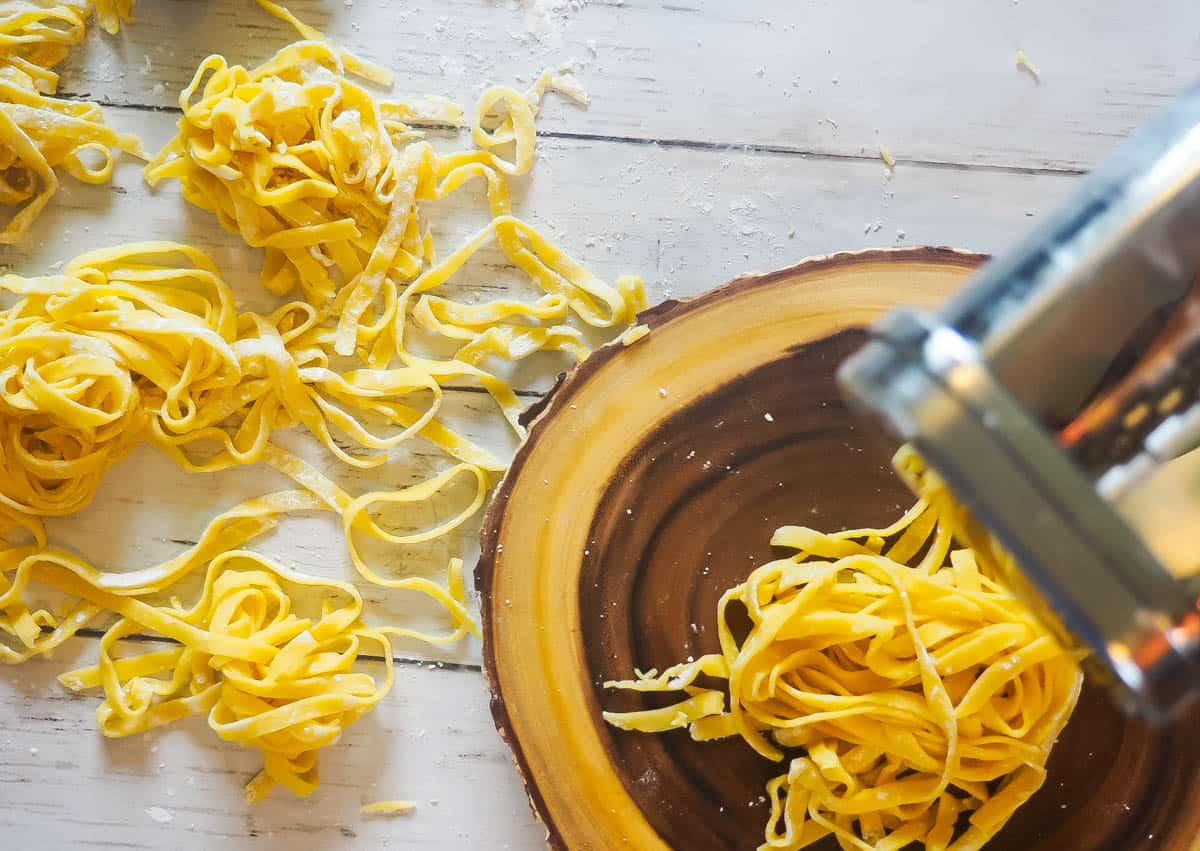
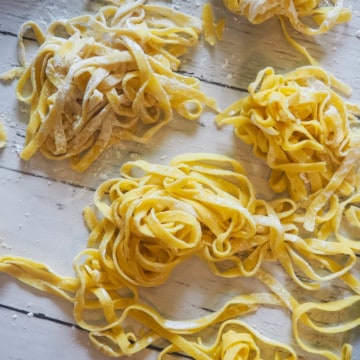
The great thing about this pasta is that it doesn’t need to be hung to dry like traditional pasta and it won’t stick to itself as soon as you cut it. It is actually easier to work with than traditional pasta.
Cook the pasta in boiling water with a drizzle of olive oil. It will cook quickly – you will know it is cooked when it floats to the top. Alternatively, freeze your pasta “nests” on a cookie sheet then transfer to a ziplock bag or Tupperware for storage.
✏️ Helpful Tips
- Do not make your pasta too thin – this dough does not have gluten in it like regular pasta, so it can tear easily if rolled too thin.
- Sprinkle tapioca starch on everything, even if you don’t think you need to. This dough is not as sticky as traditional pasta, but you don’t want to ruin all your hard work. Plus, making a huge mess is fun.
- If your dough gets dry, add water. I highly recommend that you do NOT over-do it on the olive oil. You only need one tablespoon. If you add more, your dough will 100% taste like olive oil and that is not a good taste. Water is your friend.
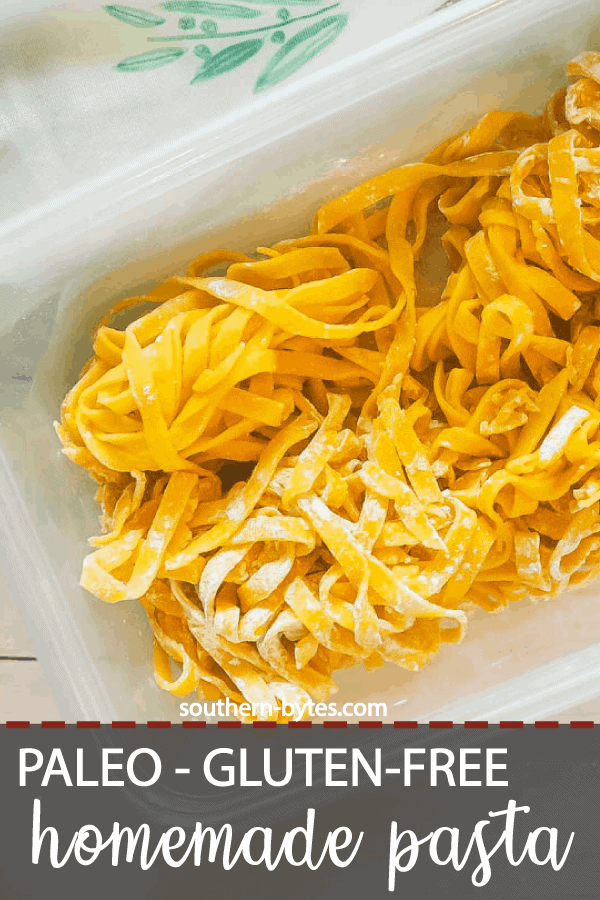
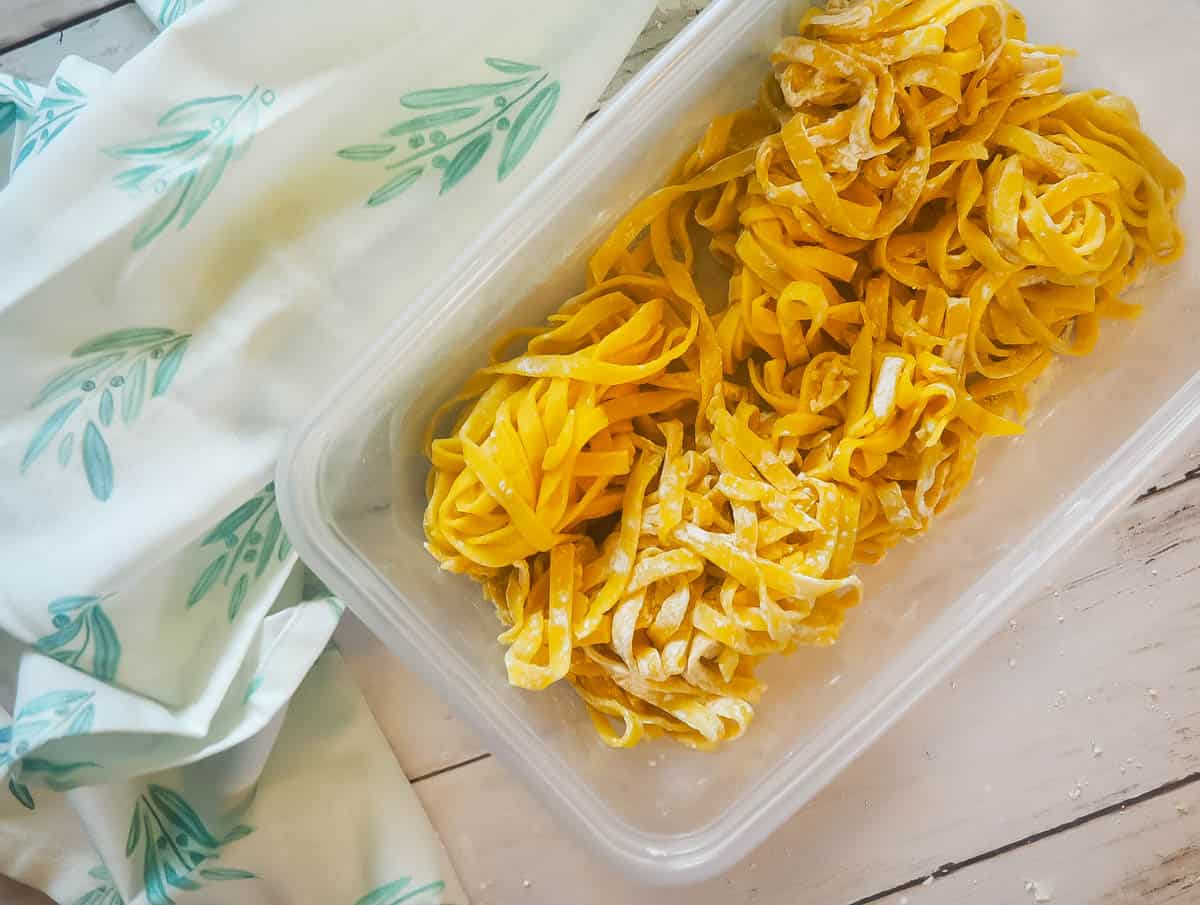
- This pasta freezes really well. I make little “nests” and freeze them on a cookie sheet. Then they can be packaged together in a Tupperware or zip-top bag. To cook, just drop the nests into boiling water or soup from frozen.
- If you do not have a pasta maker, you can roll your pasta thin with a rolling pin, then using a ruler and a pizza cutter – slice your dough into nice long ribbons. This is also how I make dumplings for Chicken and Dumplings – roll the dough to about an eighth or quarter of an inch, then cut into small rectangles using a ruler and a knife or pizza cutter.
What I Love About this Recipe
- I LOVE homemade pasta, but traditional pasta made from flour and eggs doesn’t always agree with me. This pasta tastes great and makes me feel great!
- I love that there are so many variations that you can make with this dough: spaghetti, noodles for ramen, fettuccine, cut into smaller pieces for soup, cut into thicker, wide strips to make chicken and dumplings, left as whole sheets to make ravioli or cut into thin wide strips to make lasagna.
🍳 Serving Suggestions & Uses
This pasta recipe is great for:
- pasta with marinara sauce
- egg noodles with beef stroganoff
- egg noodles in soup
- with an alfredo sauce for fettuccine alfredo
- making paleo lasagna (cut the pasta into sheets and don’t pre-cook!)
- making dumplings for chicken and dumplings (leave the dough a little thicker)
- ravioli
🥫 Storage/Shelf Life/Reheating
This pasta should be used immediately, refrigerated, or frozen. If you are refrigerating or freezing it, cook the cold pasta from frozen – drop it straight into boiling water and don’t defrost it.
It should last about a week in the fridge or 6 months in the freezer.
Have You Tried This Recipe?
Please rate it and leave a comment below. I would love to hear what you think!
Paleo Egg Noodle Pasta
Ingredients
- 1 cup almond flour
- ½ cup tapioca starch
- 1 tsp xanthan gum
- ¼ tsp kosher salt
- 1 tsp olive oil
- 2 eggs
Instructions
- First, add your dry ingredients to the bowl of a mixer with a dough hook.
- Make a small well in the middle and drop in your eggs.
- Then, let your dough hook do the work. You may need to stop the mixer and scrape down the sides a few times, but it will eventually all start sticking together into a ball. Let the mixer knead the dough for a few minutes – there is no gluten in this, so it won't seize up on you if you over mix it.
- Next, remove your ball of dough and place it onto a surface that is sprinkled with tapioca starch.
- Roll the dough flat with a rolling pin.
- Then cut the dough into strips about ½ to ⅔ the width of your pasta maker. (Once you start feeding the dough through the pasta maker, it will get thinner and wider.)
- Now, feed the dough through the sheet pasta maker on the widest setting, once or twice to smooth it out. On my pasta maker, that is #1.
- When you are laying out the flattened sheets, dust them with a little bit of tapioca starch to keep them from getting stuck to anything.
- After I put all of the sheets through at #1, I switch it to #2 and put them all through again. It doesn't really matter if the dough makes perfect rectangles when being flattened – I love to use these noodles for soup, so I can use the short pieces from this as soup "egg noodles."
- When the sheets have all gone through #2, you can test out feeding some through #3 or switch to your spaghetti or fettuccine cutter. (You don't want to make this pasta too thin.)
- When using the fettuccine cutter, feed the pasta sheet through and allow the beautiful fettuccine to drape over your hands at it comes out. (This pasta doesn't need to be hung to dry like traditional pasta and it won't stick to itself as soon as you cut it. I toss the pasta in a little tapioca starch and pile it into small "nests."
- Cook the pasta in boiling water with a drizzle of olive oil. It will cook quickly – you will know it is cooked about the time when it floats to the top (a reader noted that it takes about 4 minutes for them – thanks!) Alternatively, freeze your pasta "nests" on a cookie sheet then transfer to a ziplock bag or Tupperware for storage.
Video
Notes
Special Equipment Needeed
- pasta maker
- a rolling pin
- stand mixer with a dough hook
Nutrition
Nutrition information is approximate and is automatically calculated, so should only be used as a guide.


I love this recipe. I’ve used it for lasagna and ravioli too. It works great! Thank you!
I just wanted to say…Thank you, Thank you, Thank you. I am making gluten free recipes for a family member and have tried several recipes. This is the first one that came out just as it shows in the picture and your descriptions. The only thing I did different was I only put the pasta through the pasta roller twice on the largest setting then cut it. I made the “Nests” and then froze them prior to cooking. They are perfect. The pasta stays together and tastes wonderful. My family member is beyond excited to have yummy and healthy pasta to eat. Great recipe!!!
I’m so happy to hear that! We love this pasta as well and I’m so glad you’re able to share it!