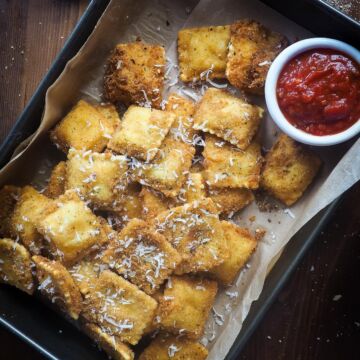
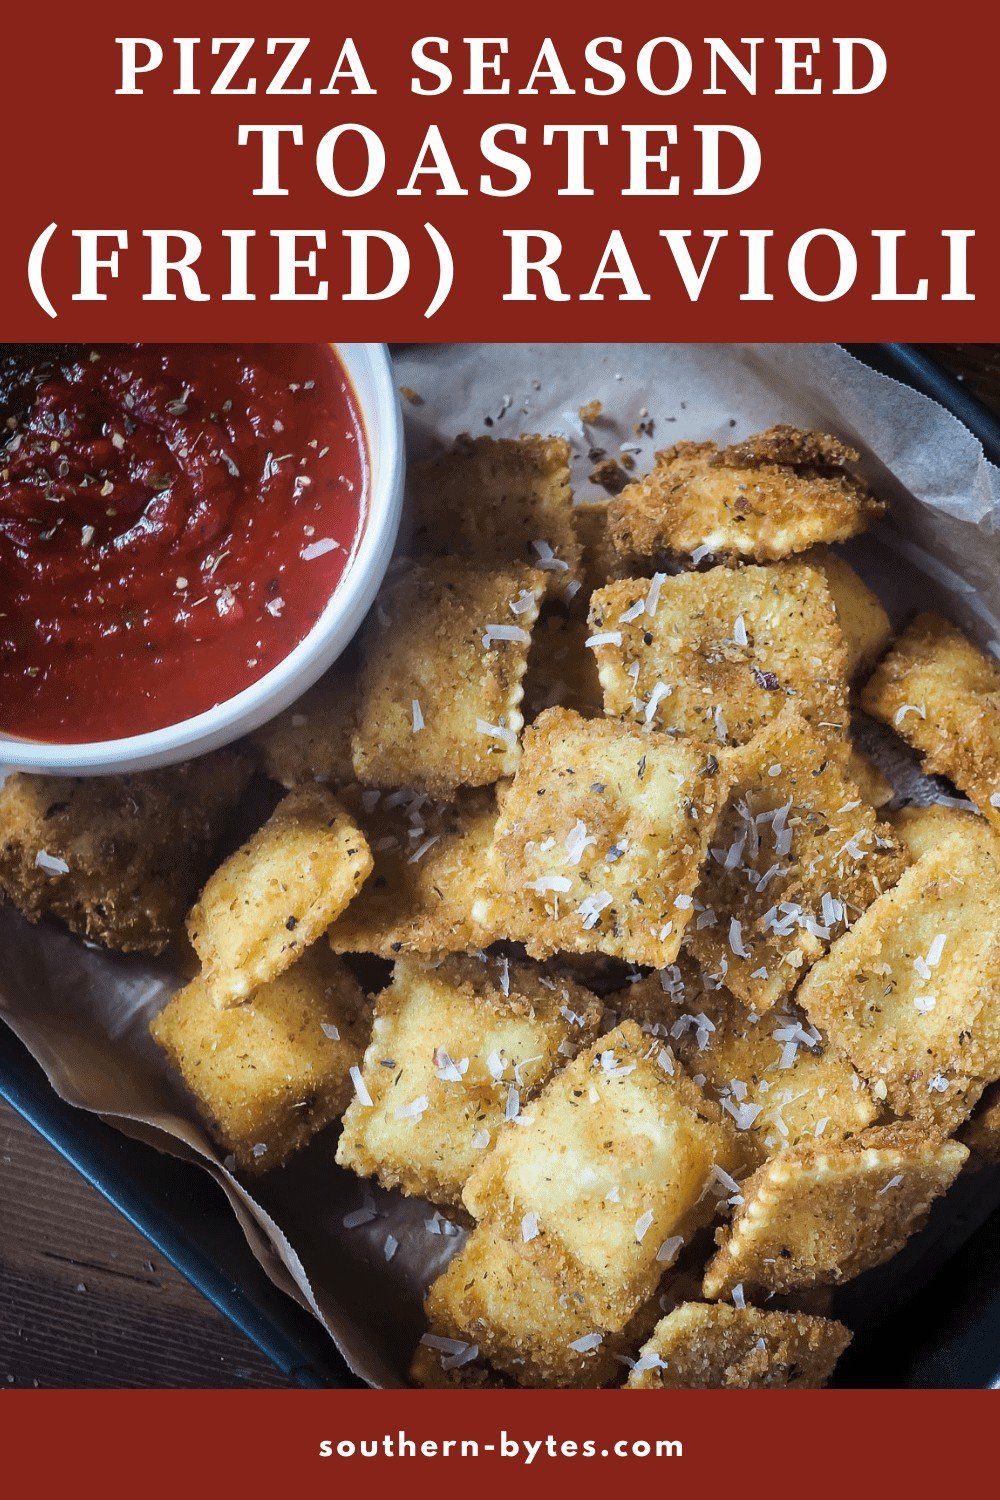
Toasted Ravioli are a St. Louis staple but this recipe can be made at home in less than 30 minutes. Flavored with pizza seasoning, this homemade version is fried until crispy and is so delicious.
Traditional “Toasted” Ravioli are still fried (some of the original creators thought toasted would sound more appealing than fried – they weren’t wrong!) They are also traditionally made with meat-filled ravioli, but I love using four-cheese ravioli – the gooey cheese filling, crispy breading, and marinara sauce for dipping is like a delicious marriage of pasta and mozzarella sticks.
These toasted ravioli are SO easy to make and the addition of pizza seasoning will really blow your mind.

Table of Contents
🥘 Ingredients Needed
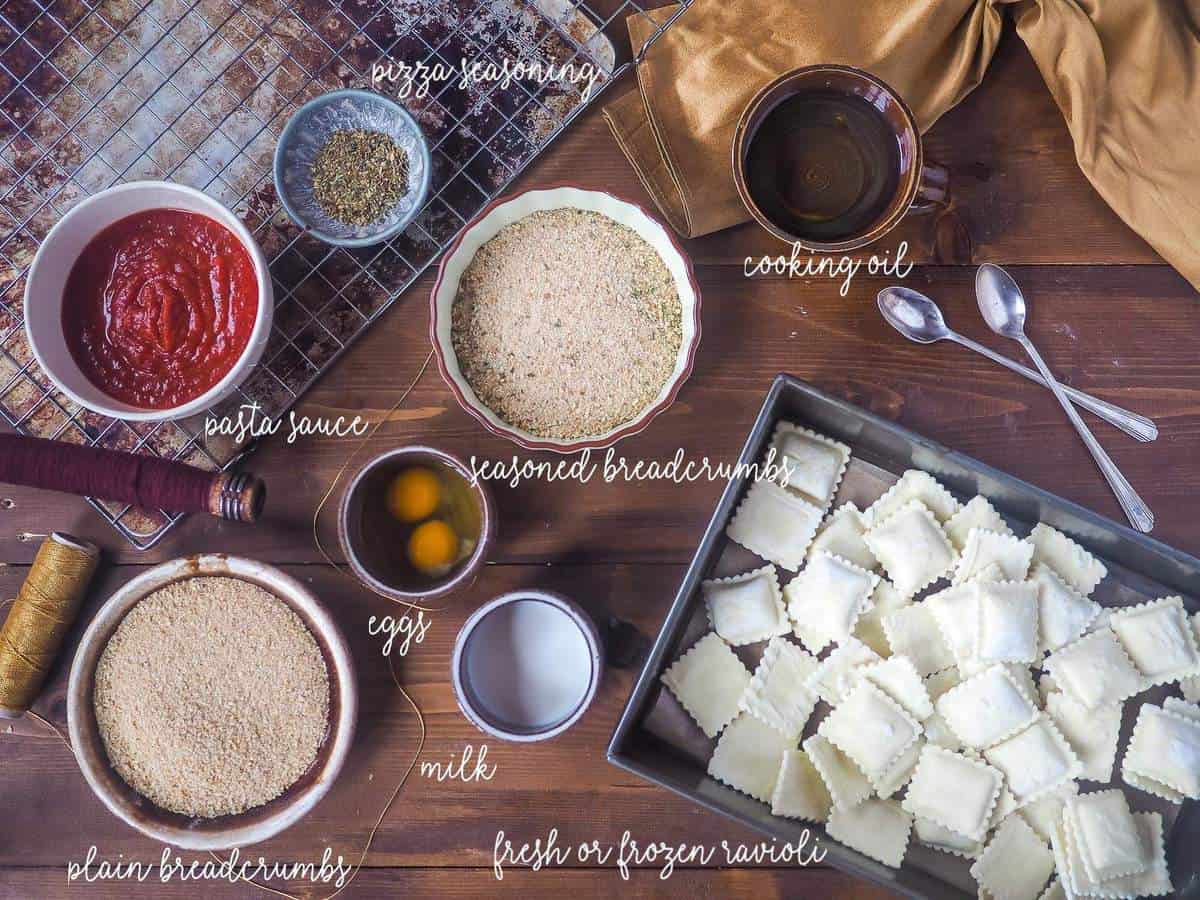
- Fresh or Frozen Ravioli – I like using cheese ravioli, but you can use whatever your favorite kind is!
- Bread Crumbs – I use a mix of plain and Italian breadcrumbs. I use some plain because I add pizza seasoning to the breading and I want it to be able to stand out.
- Pizza Seasoning – This is the kind that I use – Frontier Co-op Pizza Seasoning – but it isn’t sold in small bottles anymore. They now have it in a big bag and honestly, if you like the taste of pizza – it is worth it. We put it on chicken, in salad dressing, on steak, in pasta salad – you name it, you can use it. It is different than regular Italian Seasoning – when you open the container, it should smell like you are in a pizzeria.
- Eggs
- Milk – Any kind is fine – you don’t need much and it doesn’t add much to the taste.
- Marinara/Pasta Sauce for Dipping (or if you are Italian – Red Gravy) – I like to use jarred Tomato & Basil sauce if I am short on time, or I will use my homemade meat sauce. When I heat it up on the stove, I add more pizza seasoning.
- For Garnish: Grated Parmesan Cheese & MORE Pizza Seasoning,
🍽 Equipment Needed
- Mixing Bowls
- A Whisk or Fork
- A Deep Skillet or Dutch Oven for Frying
- A Cookie Sheet + Cooling Rack
- A Slotted Spoon – Optional, but makes scooping the boiling hot ravioli out of the oil a heck of a lot easier. (The exact one that I have, I got at an antique market to use as a food prop and I became obsessed with it – I think I have used it every day since I got it – cooking pasta, frying ravioli, stirring soup, poaching eggs – it is awesome. This one is really close to it!
- A Cheese Grater – My mother-in-law and sister-in-law just introduced me to this wonderful thing and it is a game-changer for zesting and grating.
🥣 How to Make St. Louis Toasted Ravioli
Believe it or not, these “toasted” ravioli are really easy to make.
Begin by removing the frozen ravioli from the freezer and letting them sit at room temperature while you prepare the rest of the ingredients. This way, they will still be mostly frozen and easy to work with but not so frozen that they won’t cook.
Now, whisk together two eggs and the milk in a small bowl. (Big enough to dunk the ravioli but small enough that the mixture is deep enough to fully submerge them.) (Pictures 1 – 2)
In a separate and larger bowl or dish, toss together both kinds of breadcrumbs and the pizza seasoning. I like to use my fingers to toss it around – just enough so that the pizza seasoning is incorporated into the breadcrumbs. (Pictures 2 – 3)
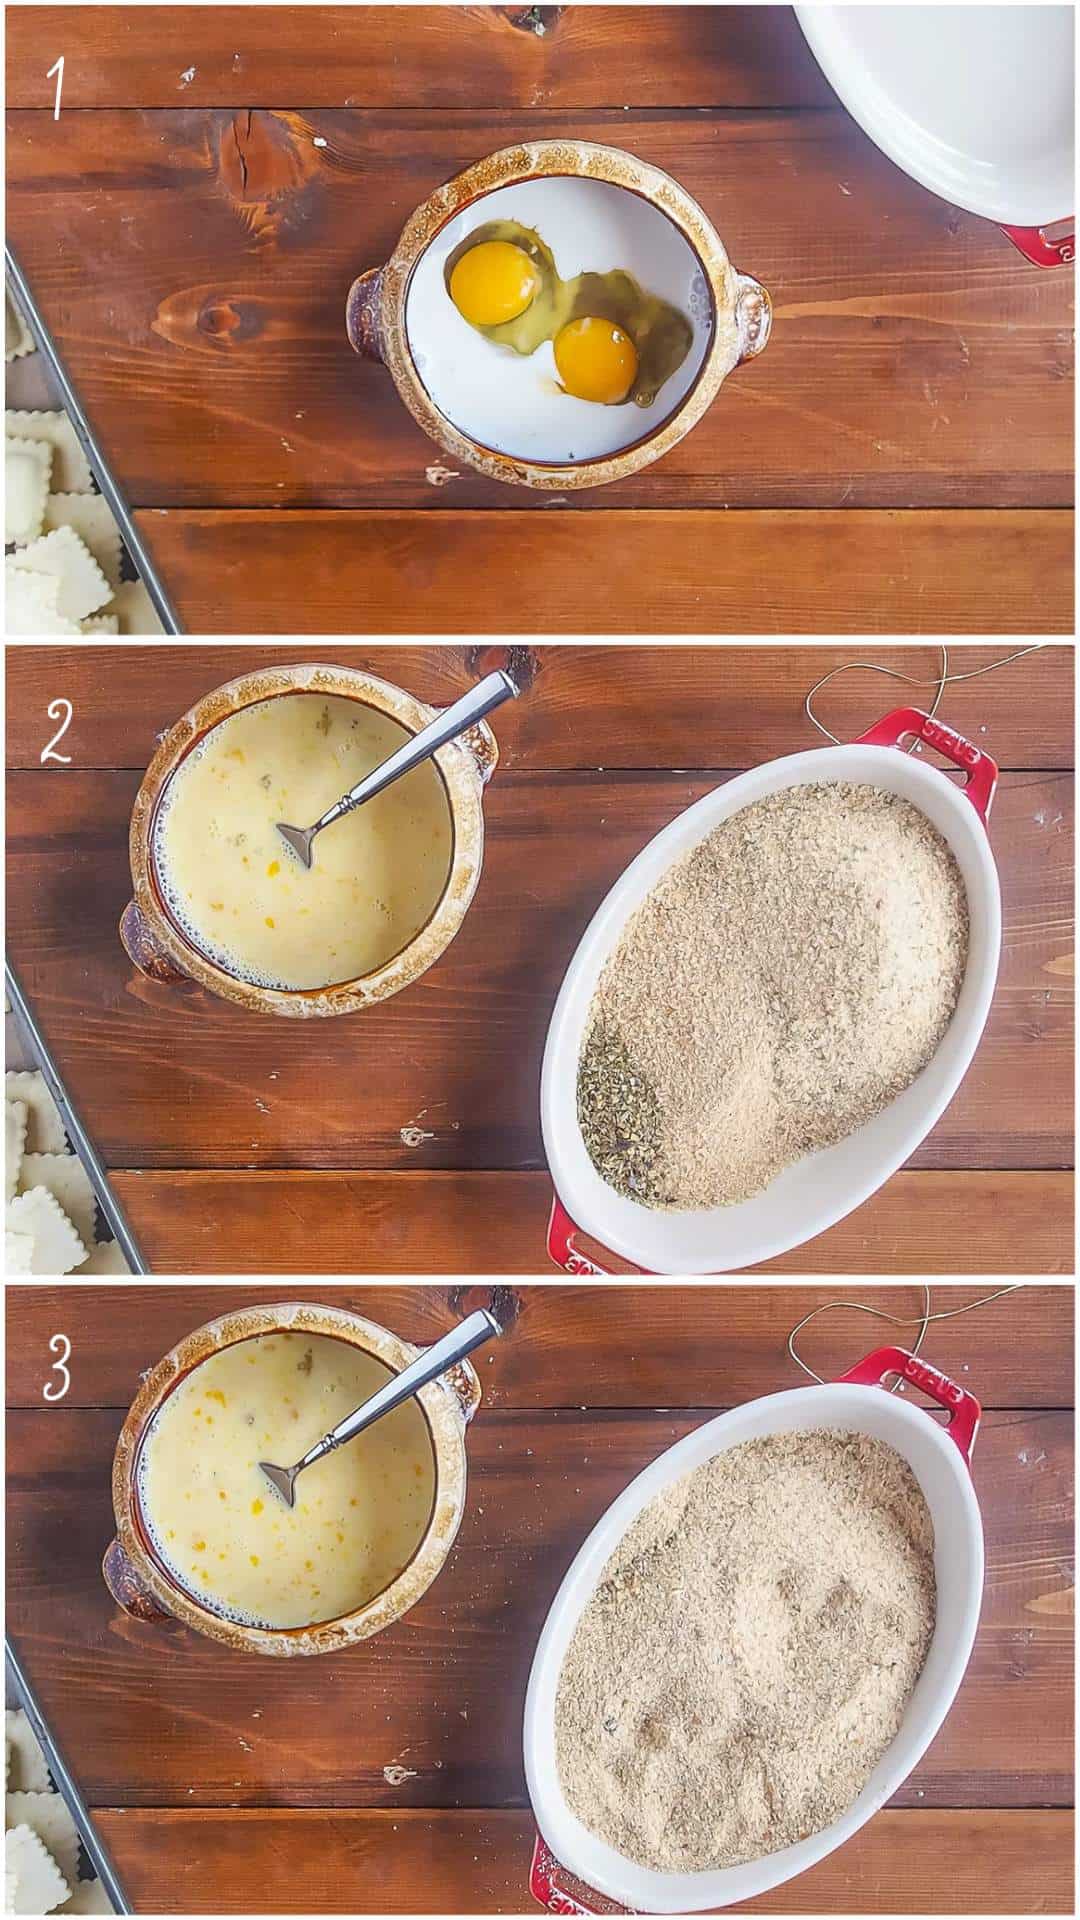
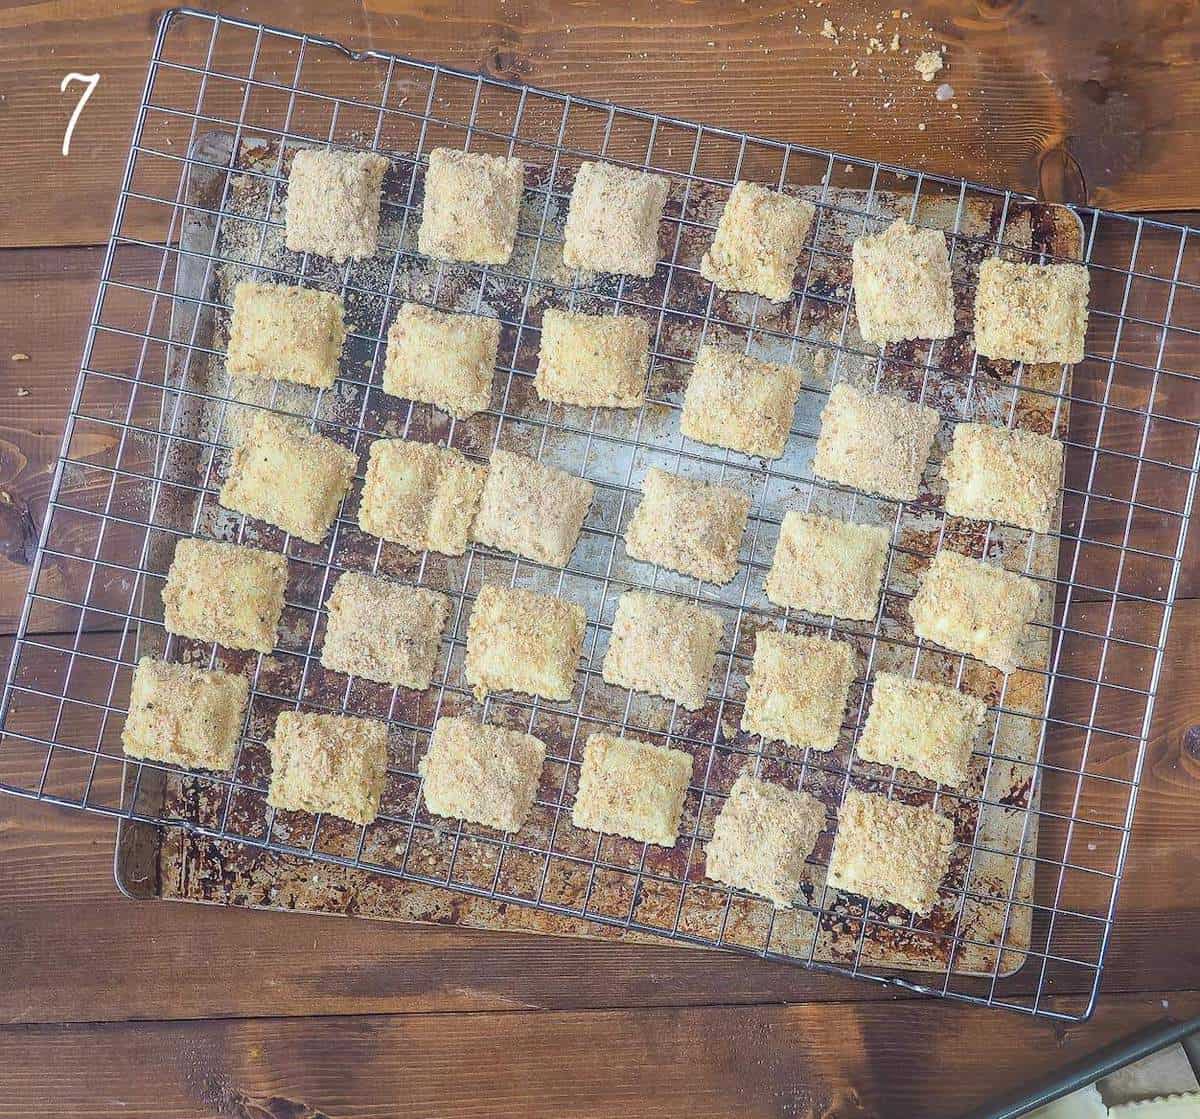
Optional, but helpful – take a baking sheet and put a cookie rack on top of it – use this to “rest” the ravioli before frying them. Placing the ravioli on a rack instead of directly on a tray will let any of the breadcrumbs that do not stick to the ravioli fall off so that 1) there will be a nice thin crust on the ravioli without any lumps, and 2) the excess breadcrumbs fall off before getting in the oil so you don’t end up with a pile of burnt breadcrumbs in the bottom of your oil!
(For the sake of filming this recipe, I breaded all of the ravioli and then fried all of the ravioli. If you have someone helping you in the kitchen, you can make an assembly line and move faster – just make sure to knock off the excess breading before dropping the ravioli in oil.)
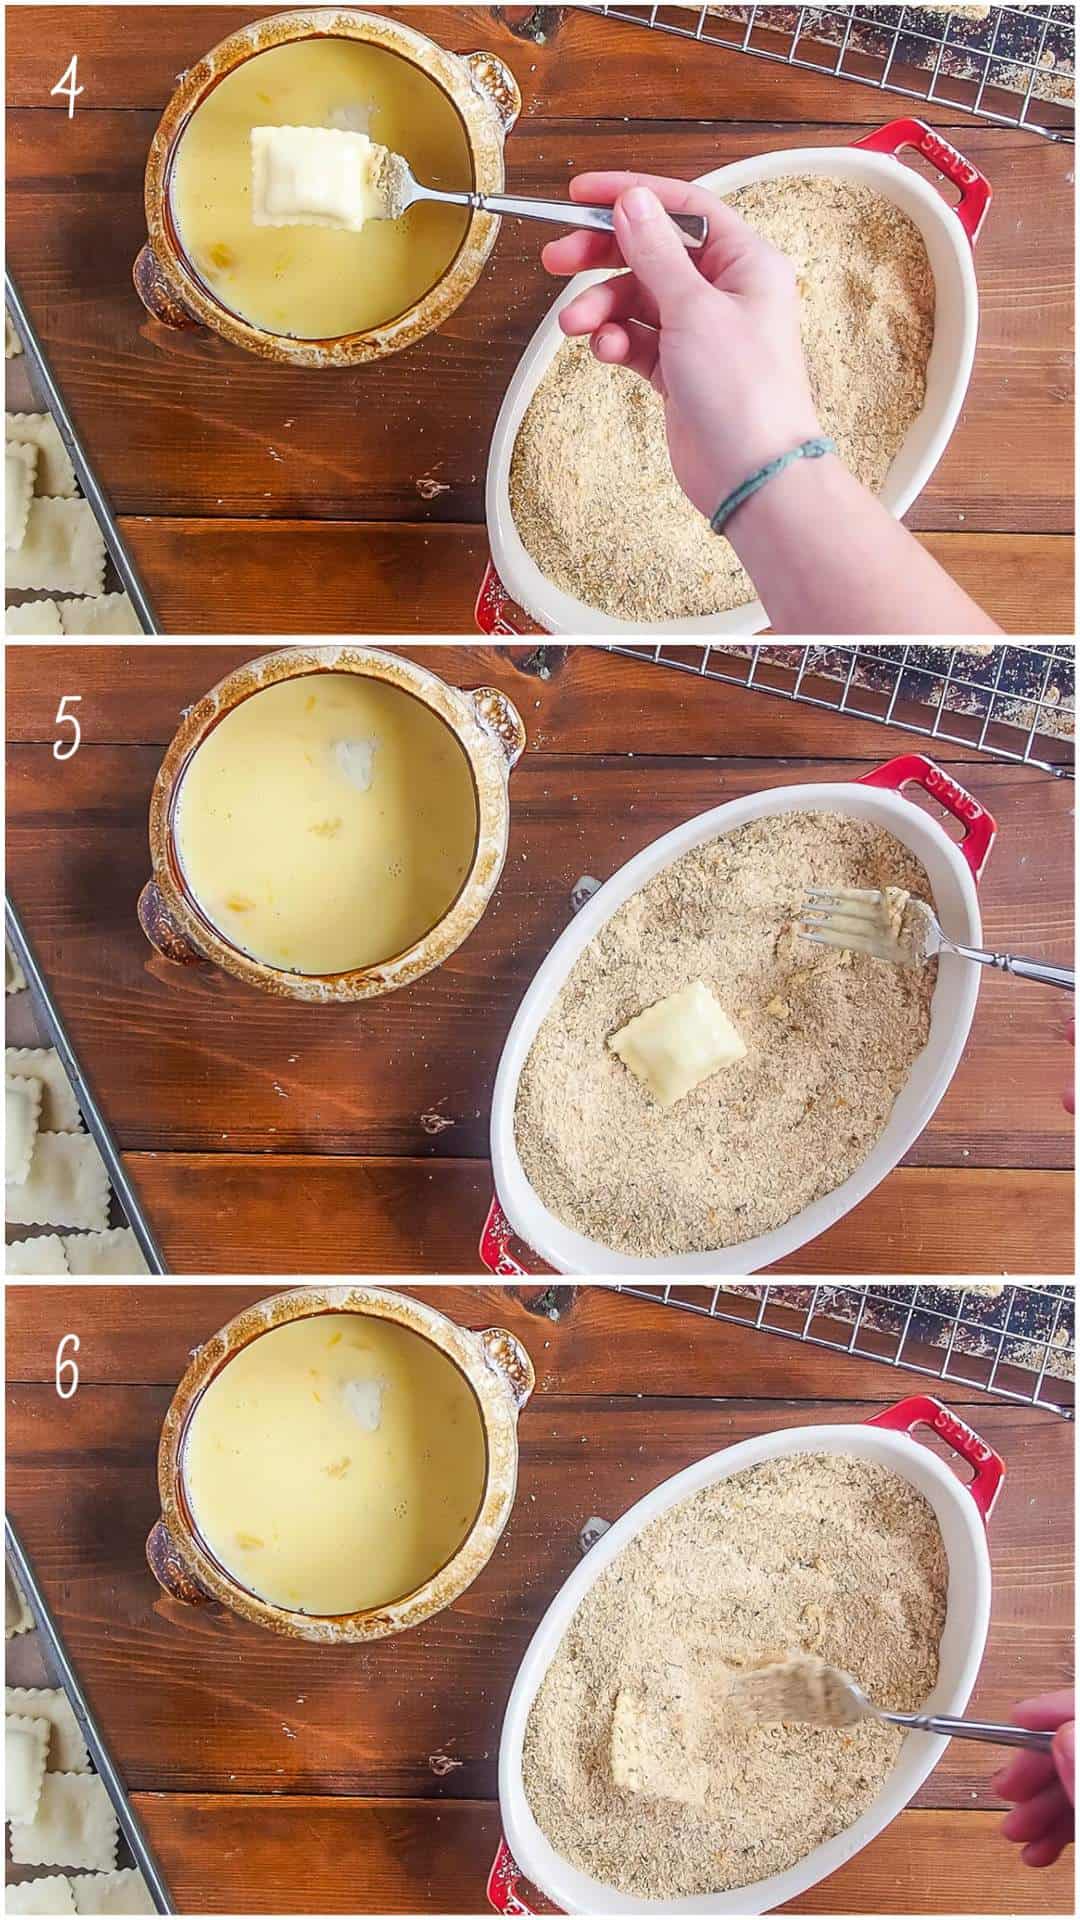
Now, dunk each ravioli in the egg/milk mixture, then the breading mixture – making sure they are fully coated. (Pictures 4 – 6) Place on the cookie rack and continue until all of the ravioli is coated. (Picture 7) You may need more breadcrumbs or more of the egg/milk mixture depending on how much gets spilled or if the breadcrumbs get clumpy. Just follow the recipe ratios and add more as needed:
- Eggs/Milk – Start with 1 egg and 1/6 cup of milk (just fill your 1/3 cup halfway.)
- Breadcrumbs – Start with 1/2 cup of each kind of breadcrumbs and 1 teaspoon of pizza seasoning.
When you are about halfway through, begin heating the oil on the stove and preheat the oven to 200/250°F. The Warming setting will work as well.
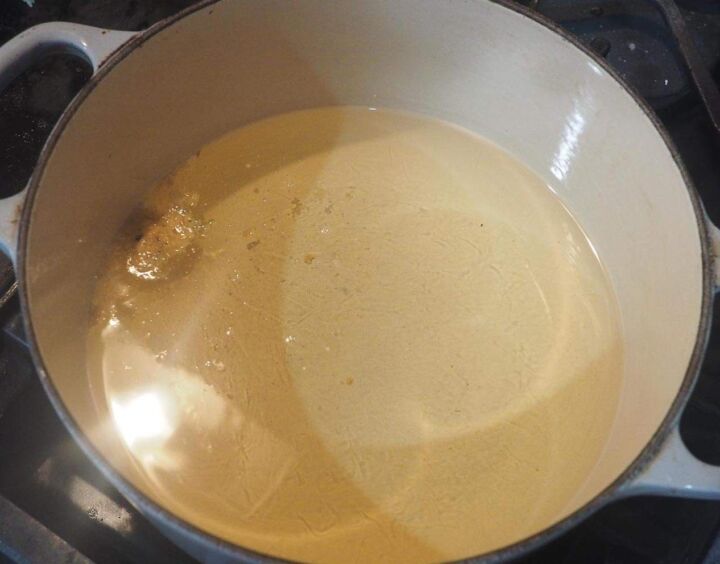
When all the ravioli is coated, test the temperature of the oil. If you have a thermometer, you are aiming for 350°F – 375°F. The oil does not need to be a precise temperature, it just needs to be hot enough and not too hot.
If you don’t have a thermometer and want to work on your natural instincts in the kitchen, you can test the oil by tossing a clump of the breadcrumb/egg goo (there will be some in the breadcrumb bowl) in the oil. If it floats and starts bubbling right away, the oil is hot enough. If the breadcrumb blob sinks, the oil is too cold. (This picture is horrible, but just to get an idea – the breadcrumbs should float and start bubbling right away. ) The opposite of this is if you can smell burning oil or if in a few seconds, the breadcrumb blob starts to brown – the oil is too hot. This will be pretty obvious as the oil will kind of spit at you. Remove the pot from the heat for a few minutes or anything you drop in will burn on the outside but not cook on the inside.
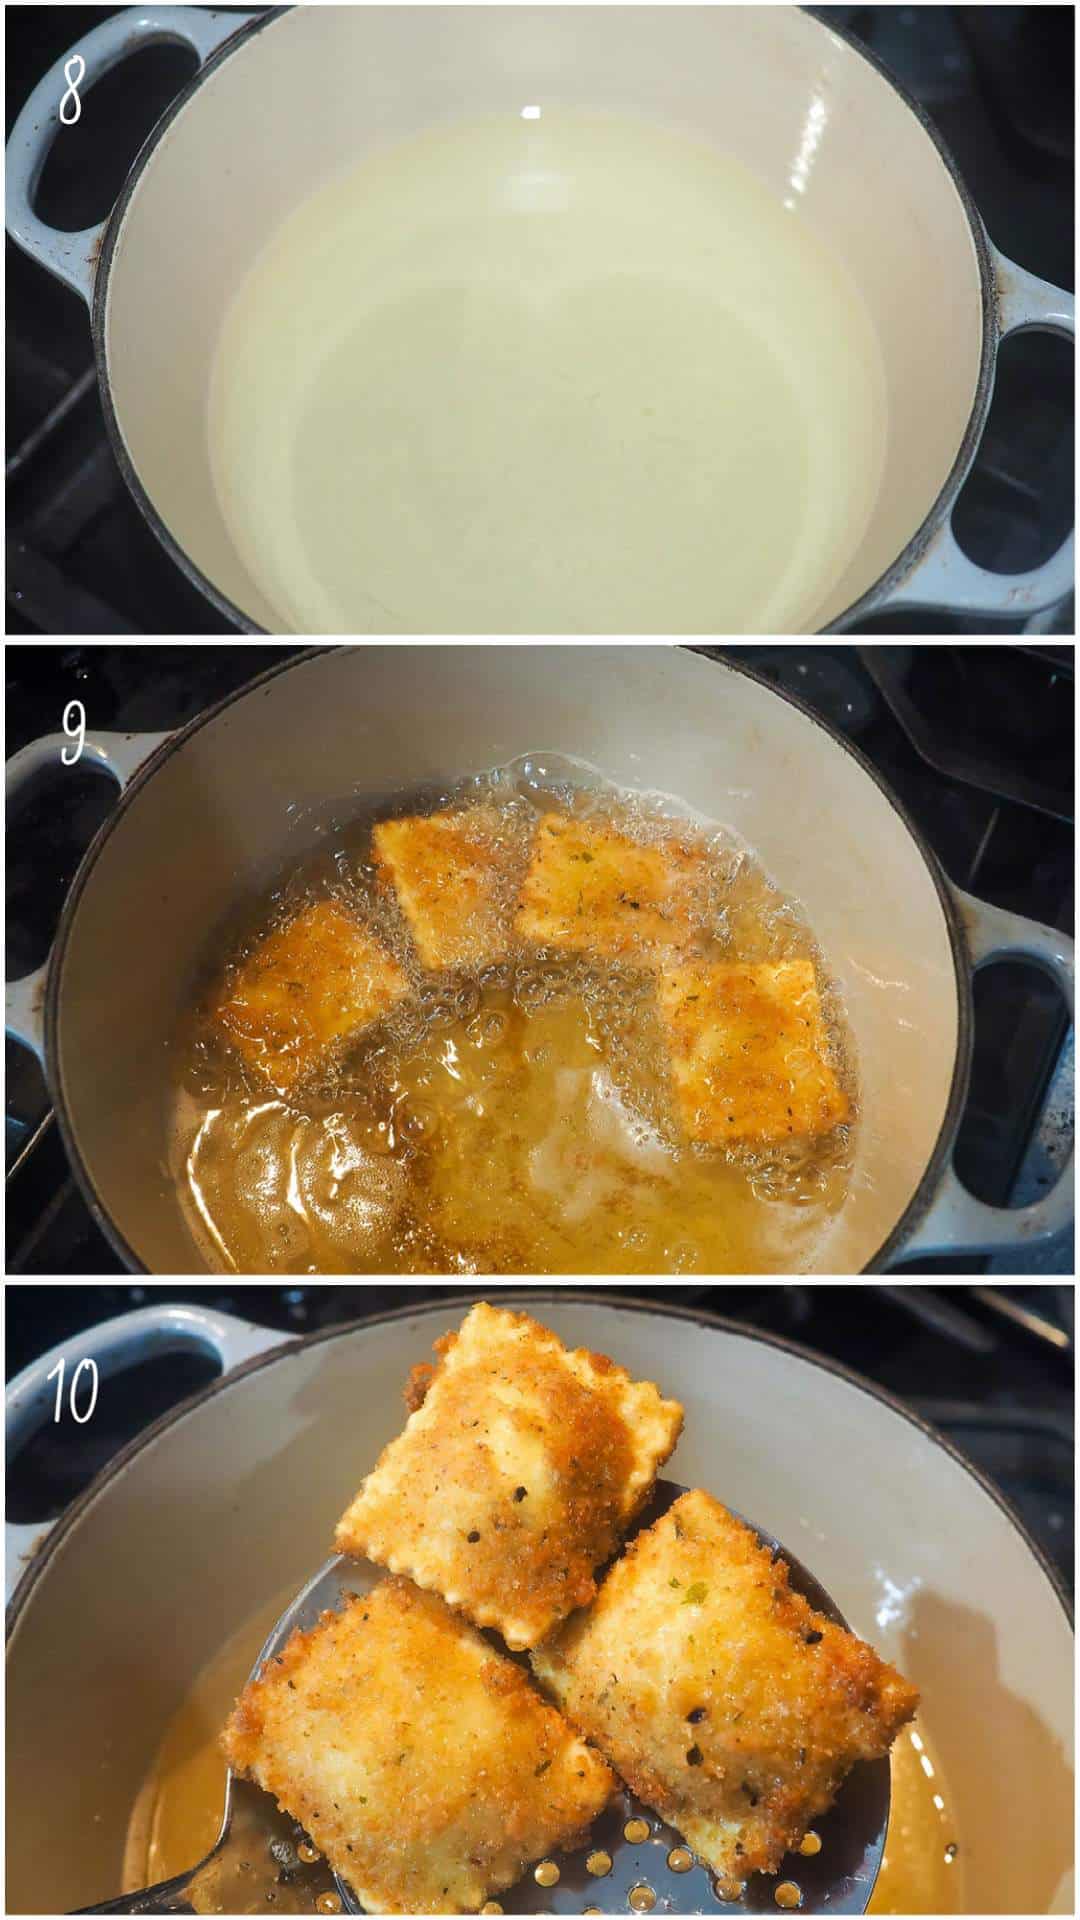
Now, fry the ravioli in batches based on the size of your pot. (Ideally, 4 – 5 at a time unless you have a giant pot or a deep fryer.) You don’t want to crowd them or the oil temperature will decrease and they won’t cook well. Fry until lightly browned. (Pictures 8 – 10)
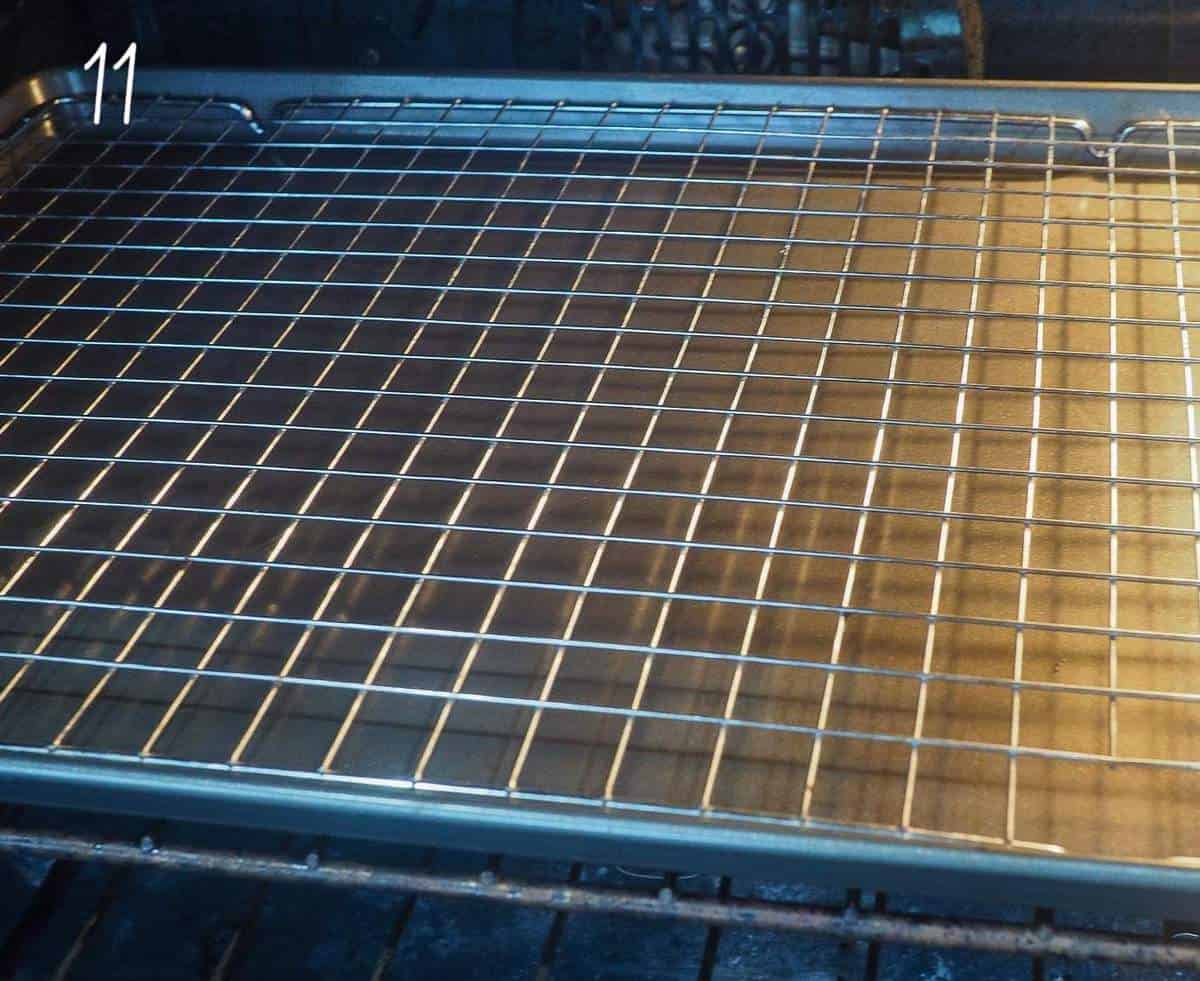
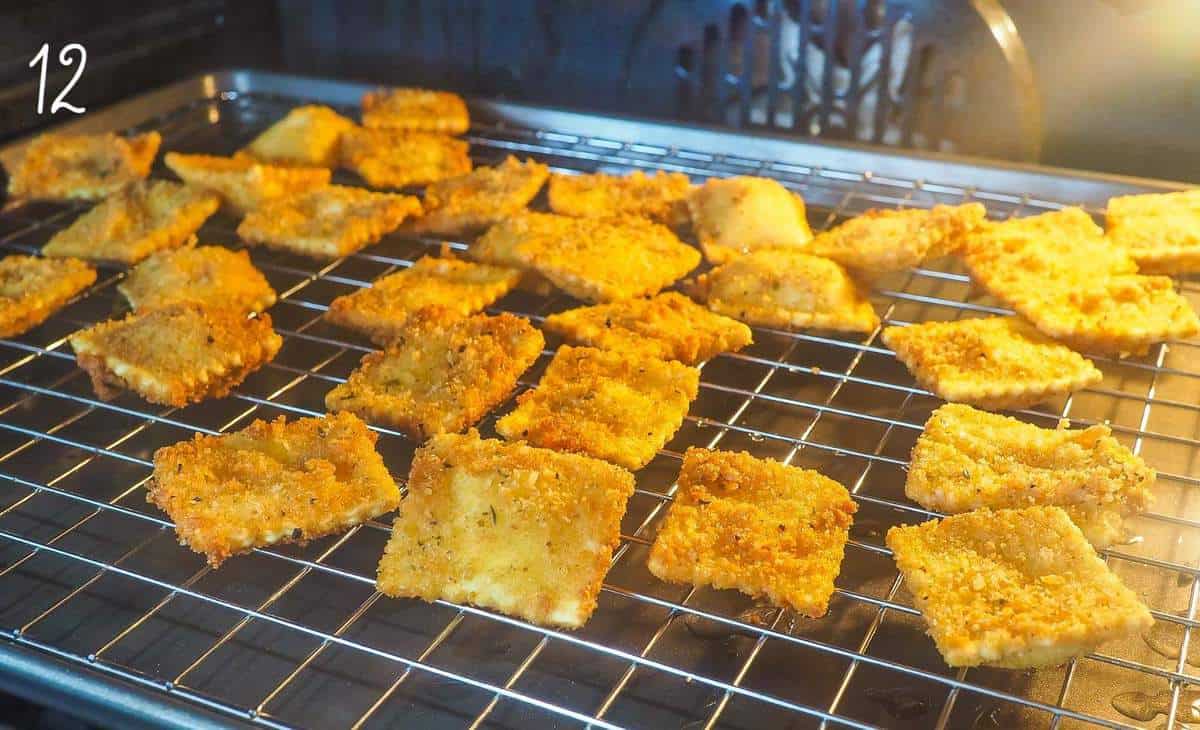
Transfer the fried ravioli to the baking sheet in the oven – this will finish crisping them up and will help them to be less greasy. (Tip: If you have a gas oven, be careful spooning the ravioli onto the rack with the exposed flames on the bottom of the oven – if the oil drips on the flame, you might have a small… “whoosh” of flames. I just slide the baking sheet out and drop them on, then slide it back in. )
While the last few ravioli are frying, heat up the sauce – whatever kind is your favorite – and mix in some pizza seasoning. (If you are using pizza sauce, you can leave the seasoning out.)
Once all the ravioli have been fried, remove them from the oven and transfer them to a dish or large bowl to serve. Garnish with some freshly grated parmesan cheese on top and a sprinkling of pizza seasoning.

(There are a few ravioli in my finished pictures that look a little… rough. I tested dredging the ravioli in milk, then flour, then egg, then breadcrumbs – it doesn’t work for ravioli as it does for chicken parm – the breading just gets too clumpy and thick.)
🙋♀️ Frequently Asked Questions
Toasted ravioli is actually fried, but the original creators thought it wouldn’t appeal to people because “fried” has such a bad stigma associated with it. To me, Fried Ravioli sounds delicious!
You can use any flavor of ravioli that your heart desires. I like to use all cheese because it is like a bowl of pasta and a mozzarella stick had a baby – but meat ravioli is more traditional and is also delicious!
You can use either kind. Fresh ravioli may cook a little bit faster, but by the time you go through the dredging and heating oil, the frozen ravioli will thaw enough that it won’t take very long for them to cook.
🍳 Serving Suggestions & Uses
Serve toasted ravioli as an appetizer or snack with a bowl of warm marinara sauce for dipping. These are a great party appetizer or you can store them in the freezer to pop out and reheat for a light dinner or an afternoon snack!
My favorite way to eat these is to dunk one in the sauce and bite it in half, then fill the other half with sauce. So good!
🥫 Storage/Shelf Life/Reheating
Once cooled, store fried ravioli in the refrigerator for up to a week. (Meat ravioli I would say up to 5 days.) Reheat by spreading the ravioli on a cookie rack over a baking sheet in the oven at 325°F for about 8 minutes, then flip them for another 5 – 8 minutes. These can also be reheated and re-crisped back up in an air fryer.
If they cannot all be eaten in one sitting or if you want to save them for a quick snack for another day, the fried ravioli can be frozen and reheated in the oven or air fryer. To best freeze ravioli, spread them out on a small cookie sheet or on a dish – whatever can fit in your freezer – then transfer them to an air-tight container once frozen. I like to use Stasher bags for freezing things – they don’t get damaged by the temperature changes as plastic Tupperware does and I don’t have to lose my prized Pyrex containers into the abyss of the freezer. Freezing them this way will prevent them from getting stuck together in a huge clump. This method also works really well for freezing fruits, vegetables, and baked goods.

✏️ Helpful Tips
- If you need more breadcrumbs or more of the egg/milk mixture — depending on how much gets spilled or if the breadcrumbs get clumpy, just follow the recipe ratios and add more as needed:
- Eggs/Milk – start with 1 egg and 1/6 cup of milk (just fill your 1/3 cup halfway)
- Breadcrumbs – start with 1/2 cup of each kind of breadcrumbs and 1 teaspoon of pizza seasoning.
- Keep the ravioli warm in the oven on a rack over a cookie sheet – the heat will keep the filling warm, it will finish crisping up the breading, and will bake off some of the excess grease – it is the finishing touch.
- Fry the ravioli in batches – if you put too many in the hot oil, it will decrease the temperature of the oil and it won’t cook.
- Optional, but helpful – take a baking sheet and put a cookie rack on top of it – use this to “rest” the ravioli before frying them. Placing the ravioli on a rack instead of directly on a tray will let any of the breadcrumbs that do not stick to the ravioli fall off so that 1) there will be a nice thin crust on the ravioli without any lumps, and 2) the excess breadcrumbs fall off before getting in the oil so you don’t end up with a pile of burnt breadcrumbs in the bottom of your oil!
Other Italian Recipes
- Instant Pot Pasta Fagioli
- Homemade Paleo Pasta – Fettucine
- One-Pot Pasta Fagioli
- 15 Minute Tortellini Carbonara
Have You Tried This Recipe?
Please rate it and leave a comment below. I would love to hear what you think!
Toasted/Fried Ravioli (with Pizza Seasoning)
Ingredients
- 25 cheese ravioli, fresh or frozen This is about ¾ of a 25oz bag (I got them at Aldi.) You can also use meat ravioli or spinach and cheese, use your imagination!
- 2 – 3 cups frying oil I used avocado, but you can use vegetable or canola if that is what you have.
Egg Mixture
- 2 eggs
- ⅓ cup milk I used whole but you can use whatever you have, including buttermilk.
Ravioli Breading
- 1 cup plain breadcrumbs
- 1 cup Italian Seasoned Breadcrumbs
- 2 teaspoons pizza seasoning
Dipping Sauce
- ½ cup tomato and basil pasta sauce Or marinara, pizza sauce – use your favorite sauce.
- 1 teaspoon pizza seasoning
Garnish
- 1 – 2 tablespoons grated parmesan
- 1 sprinkling pizza seasoning
Instructions
- Begin by removing frozen ravioli from the freezer and letting them sit at room temperature while you prepare the rest of the ingredients. (This way they will still be mostly frozen and easy to work with, but not so frozen that they won't cook.)
- Whisk together two eggs and the milk in a small bowl.
- In a separate and larger bowl or dish, toss together both kinds of breadcrumbs and the pizza seasoning.
- Dunk each ravioli in the egg/milk mixture, then the breading mixture – making sure they are fully coated. Place on a cookie rack and continue until all of the ravioli is coated. See note below if you run out of breading/the egg mixture.*
- When you are about halfway through, begin heating the oil on the stove and preheat the oven to 200/250°F. (The Warming setting will work as well.)
- When all the ravioli is coated, test the temperature of the oil. If you have a thermometer, you are aiming for 350°F – 375°F. The oil does not need to be a precise temperature, it just needs to be hot enough and not too hot. (See note below for how to test the oil without a thermometer.**)
- Now, fry the ravioli in batches based on the size of your pot. (Ideally, 4 – 5 at a time unless you have a giant pot or a deep fryer.) You don't want to crowd them or the oil temperature will decrease and they won't cook well. Fry until lightly browned.
- Transfer the fried ravioli to a baking sheet in the oven – this will finish crisping them up and will help them to be less greasy.
- While the last few ravioli are frying, heat up the sauce and mix in more pizza seasoning. (1 teaspoon to ½ cup of sauce. If you are using pizza sauce, you can leave the seasoning out.)
- Once all the ravioli have been fried, remove them from the oven and transfer them to a dish or large bowl to serve.
- Garnish with some freshly grated parmesan cheese on top and a sprinkling of pizza seasoning. Dunk in sauce and enjoy.
Video
Notes
- Eggs/Milk – start with 1 egg and ⅙ cup of milk (just fill your ⅓ cup halfway.)
- Breadcrumbs – start with ½ cup of each kind of breadcrumbs and 1 teaspoon of pizza seasoning.
Is toasted ravioli baked or fried?
Toasted ravioli is actually fried, but the original creators thought it wouldn’t appeal to people because “fried” has such a bad stigma associated with it. To me, Fried Ravioli sounds delicious! Is toasted ravioli make with meat or cheese ravioli?
You can use any flavor of ravioli that your heart desires. I like to use all cheese because it is like a bowl of pasta and a mozzarella stick had a baby – but meat ravioli is more traditional and is also delicious! Is toasted ravioli made with fresh or frozen ravioli?
You can use either kind. Fresh ravioli may cook a little bit faster, but by the time you go through the dredging and heating oil, the frozen ravioli will thaw enough that it won’t take very long for them to cook. 📋 Tips
- If you need more breadcrumbs or more of the egg/milk mixture — depending on how much gets spilled or if the breadcrumbs get clumpy, just follow the recipe ratios and add more as needed:
- Eggs/Milk – start with 1 egg and ⅙ cup of milk (just fill your ⅓ cup halfway)
- Breadcrumbs – start with ½ cup of each kind of breadcrumbs and 1 teaspoon of pizza seasoning.
- Keep the ravioli warm in the oven on a rack over a cookie sheet – the heat will keep the filling warm, it will finish crisping up the breading, and will bake off some of the excess grease – it is the finishing touch.
- Optional, but helpful – take a baking sheet and put a cookie rack on top of it – use this to “rest” your ravioli before frying them. Placing the ravioli on a rack instead of directly on a tray will let any of the breadcrumbs that do not stick to the ravioli fall off so that 1) you have a nice thin crust on the ravioli without any lumps, and 2) the excess breadcrumbs fall off before getting in the oil so you don’t end up with a pile of burnt breadcrumbs in the bottom of your oil!
- If you have a gas oven, be careful spooning the ravioli onto the rack with the exposed flames on the bottom of the oven – if the oil drips on the flame, you might have a small… “whoosh” of flames. I just slide the baking sheet out and drop them on, then slide it back in.
Serve toasted ravioli as an appetizer or snack with a bowl of warm marinara sauce for dipping. These are a great party appetizer or you can store them in the freezer to pop out and reheat for a light dinner or an afternoon snack! 🥫 Storage/Shelf Life/Reheating
Once cooled, store fried ravioli in the refrigerator for up to a week. (Meat ravioli I would say up to 5 days.) Reheat by spreading the ravioli on a cookie rack over a baking sheet in the oven at 325°F for about 8 minutes, then flip them for another 5 – 8 minutes. These can also be reheated and re-crisped back up in an air fryer.
If they cannot all be eaten in one sitting or if you want to save them for a quick snack for another day, the fried ravioli can be frozen and reheated in the oven or air fryer. To best freeze ravioli, spread them out on a small cookie sheet or on a dish – whatever can fit in your freezer – then transfer them to an air-tight container once frozen. I like to use Stasher bags for freezing things – they don’t get damaged by the temperature changes as plastic Tupperware does and I don’t have to lose my prized Pyrex containers into the abyss of the freezer. Freezing them this way will prevent them from getting stuck together in a huge clump. This method also works really well for freezing fruits, vegetables, and baked goods.
Special Equipment Needeed
- a 5 quart dutch oven or a large pot
- cooling rack
- baking sheet
- a slotted spoon
- a cheese grater
Nutrition
Nutrition information is approximate and is automatically calculated, so should only be used as a guide.




I LOVE toasted ravioli. I’ve tried to make it myself before and it didn’t quite turn out how I wanted it to. Your recipe looks amazing and I will definitely give it a try!
I perked up when I saw pizza raviolis
! Yum! I will definitely be making these.